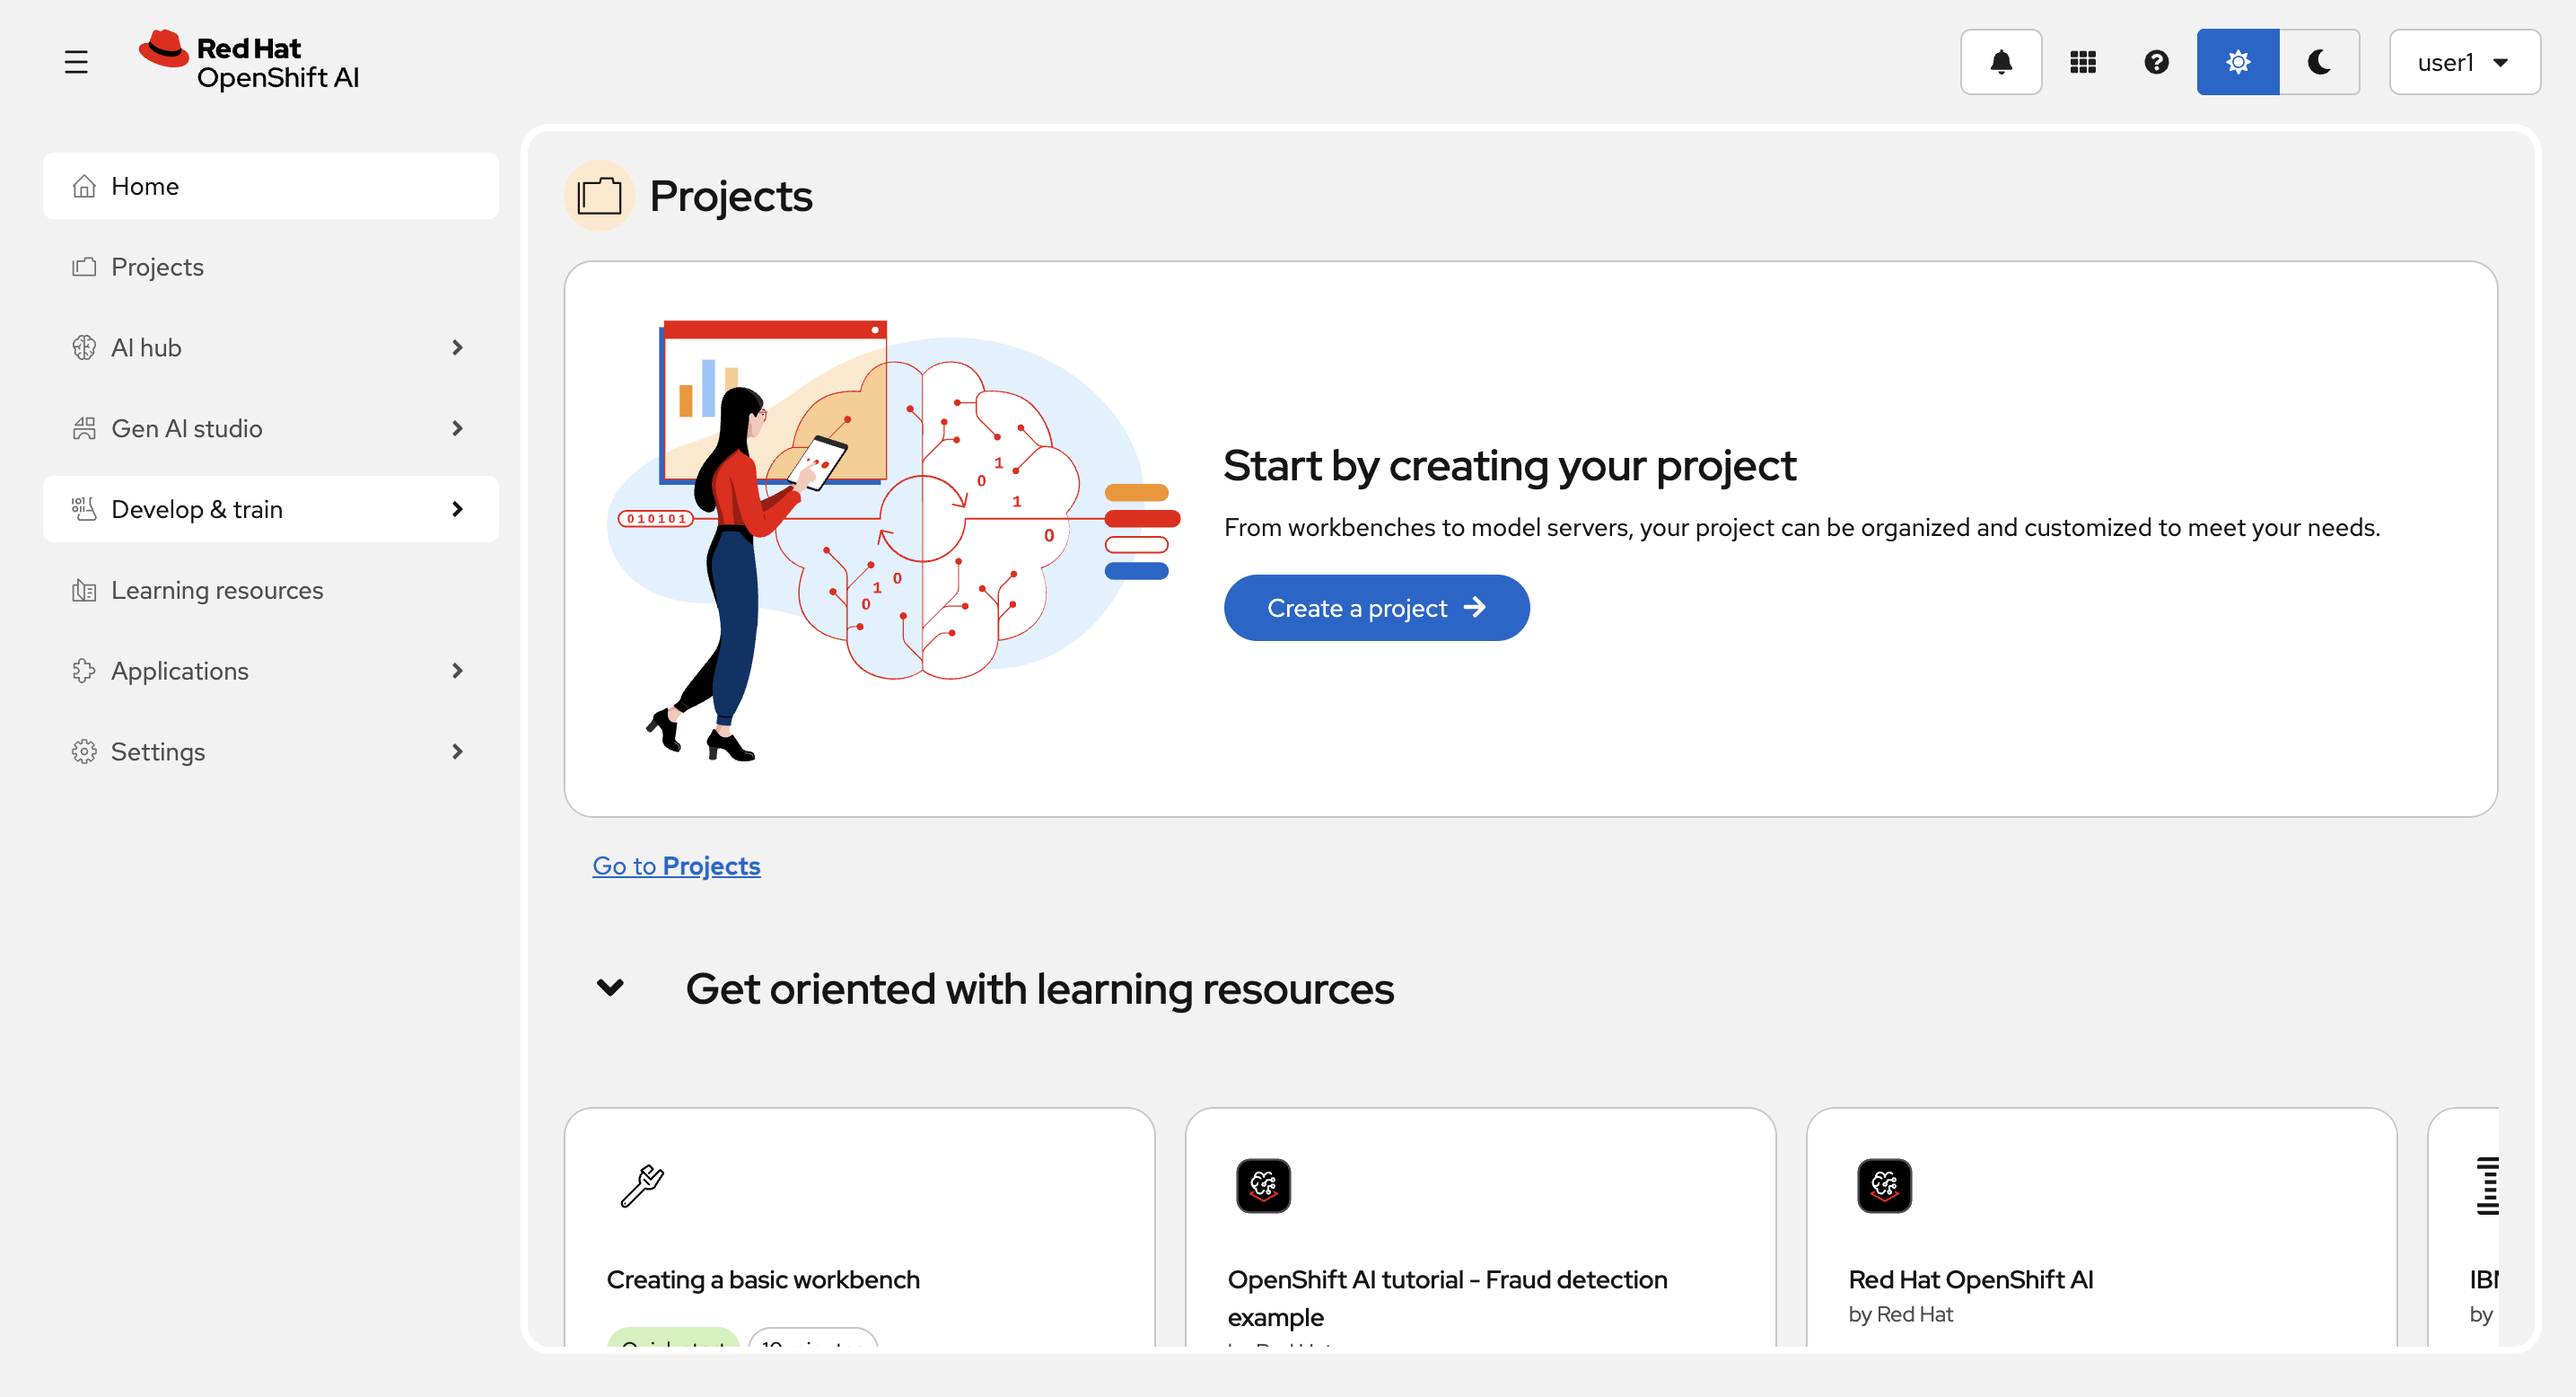
DataScience Project の作成と探検
ここでは、DataScience Project を作成し、その中を確認していきます。
DataScience Project の作成
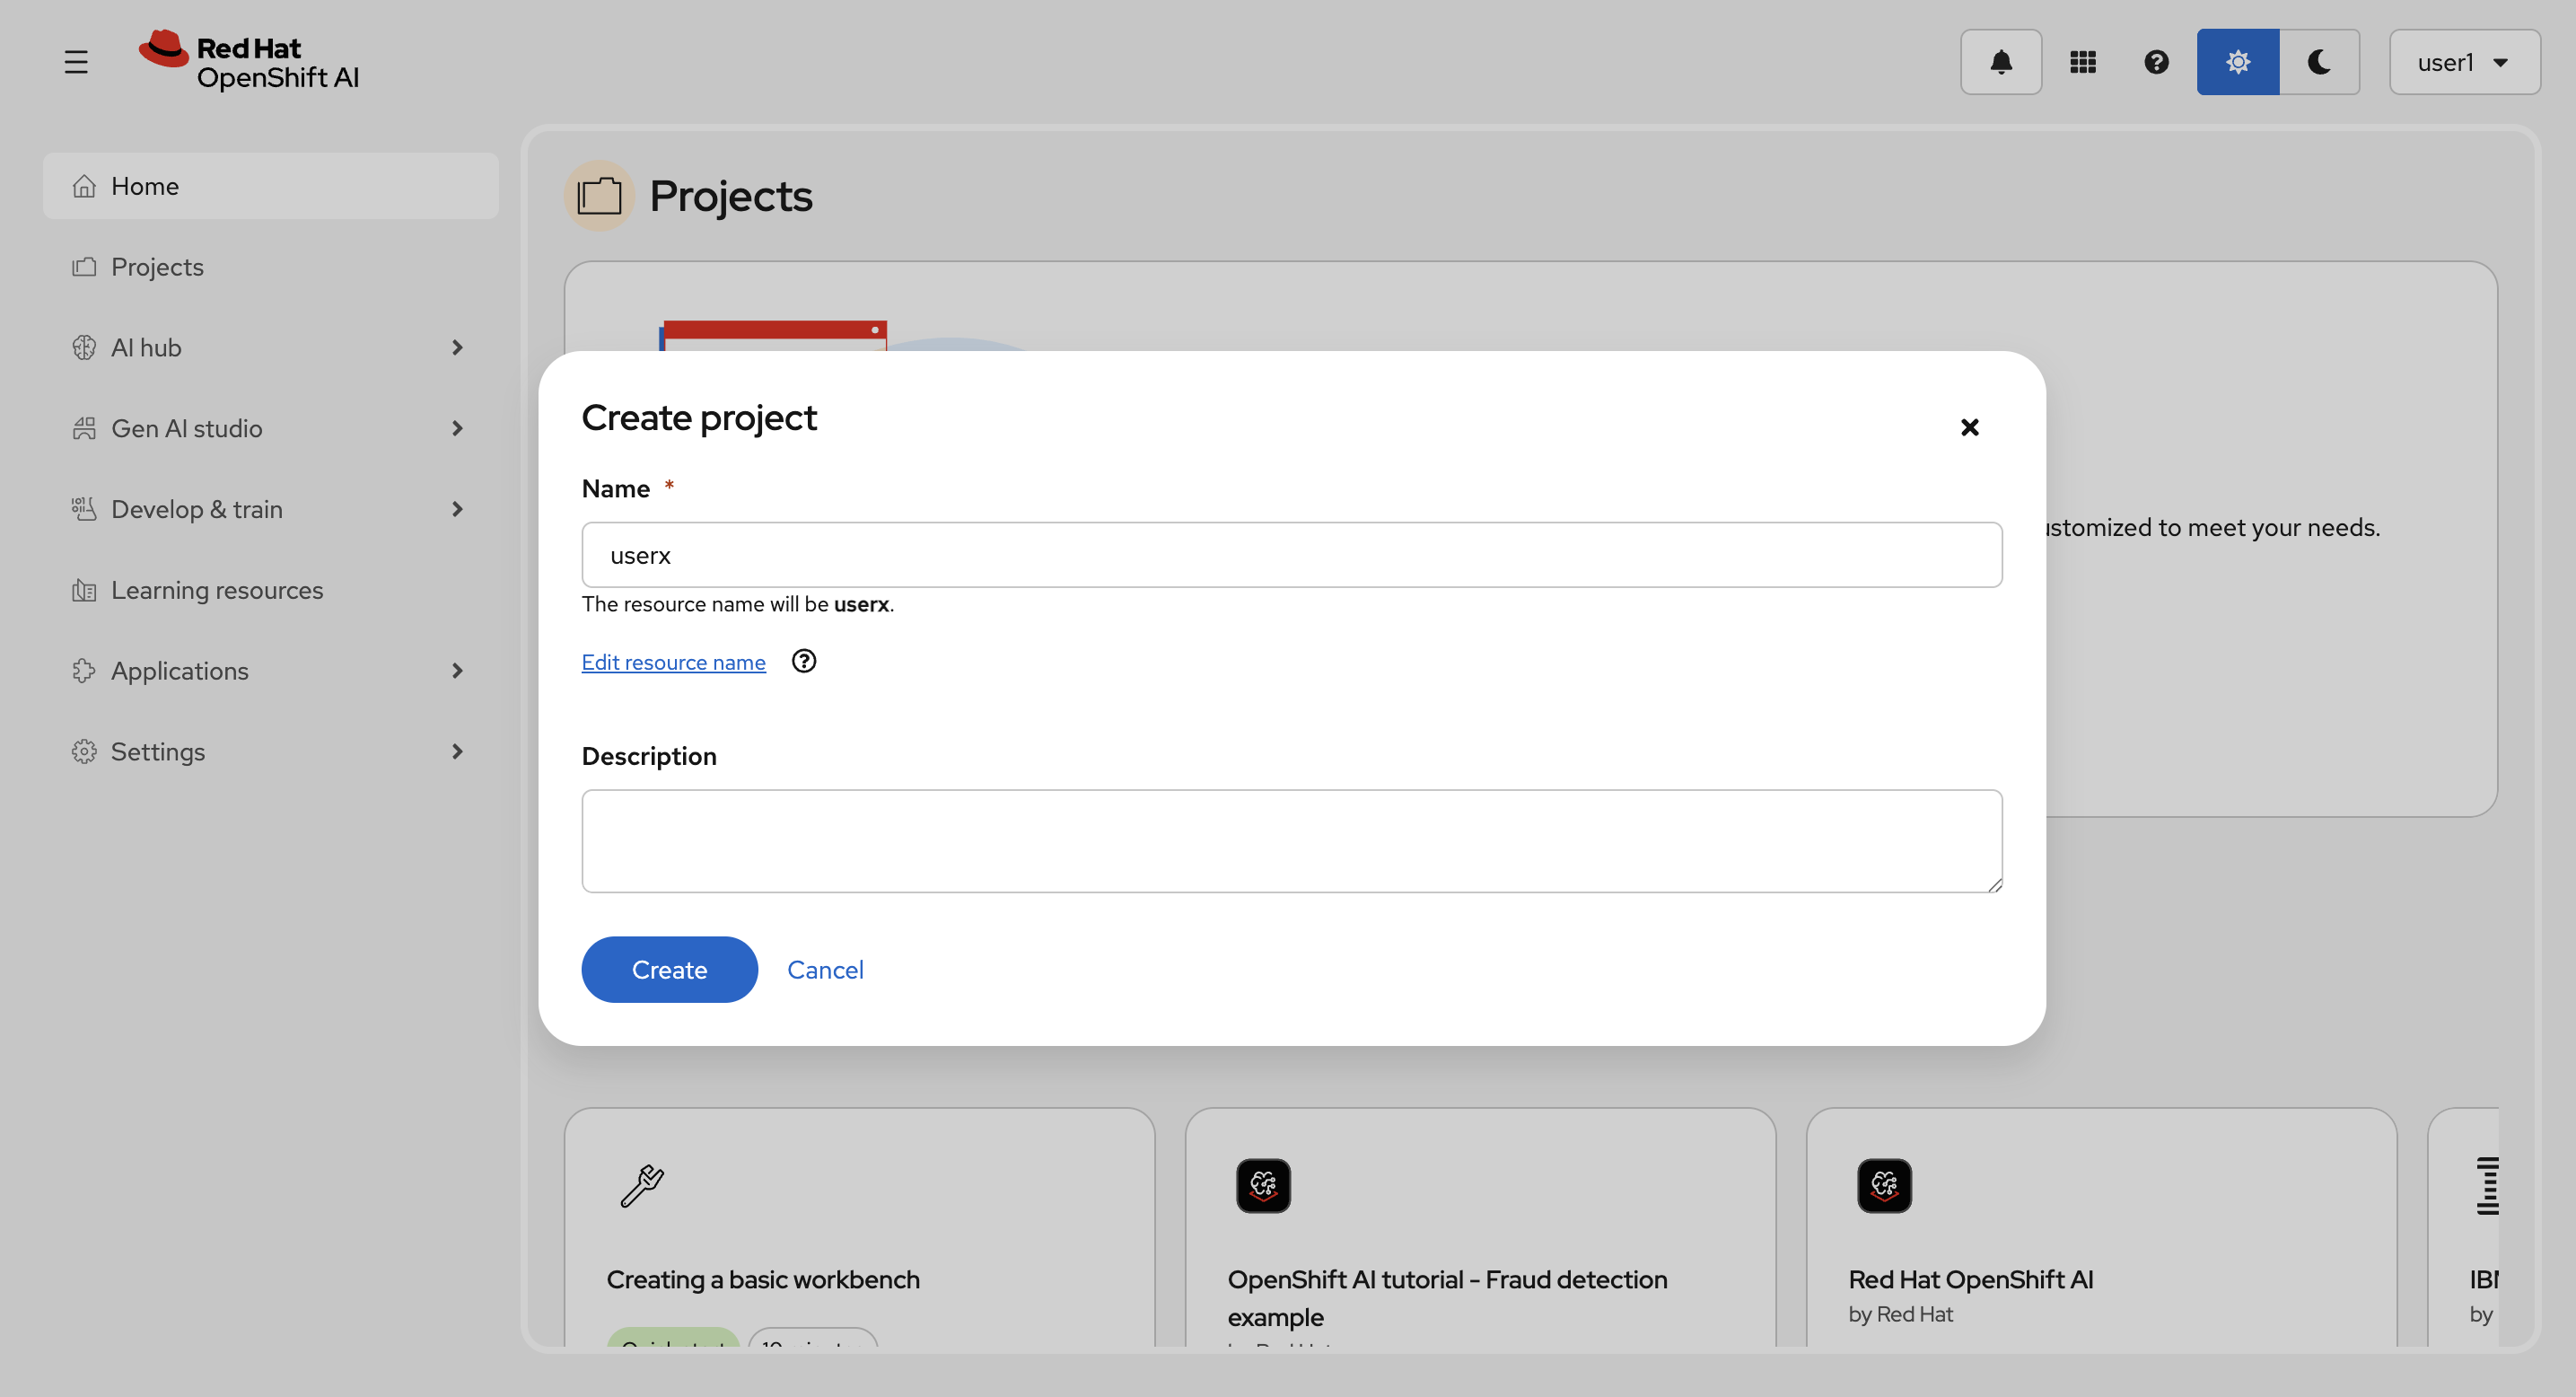
Create project を選択します。
プロジェクト名はユーザー名と同じ(user<xx>)にします。Create を選択してプロジェクトを作成します。
作成後:
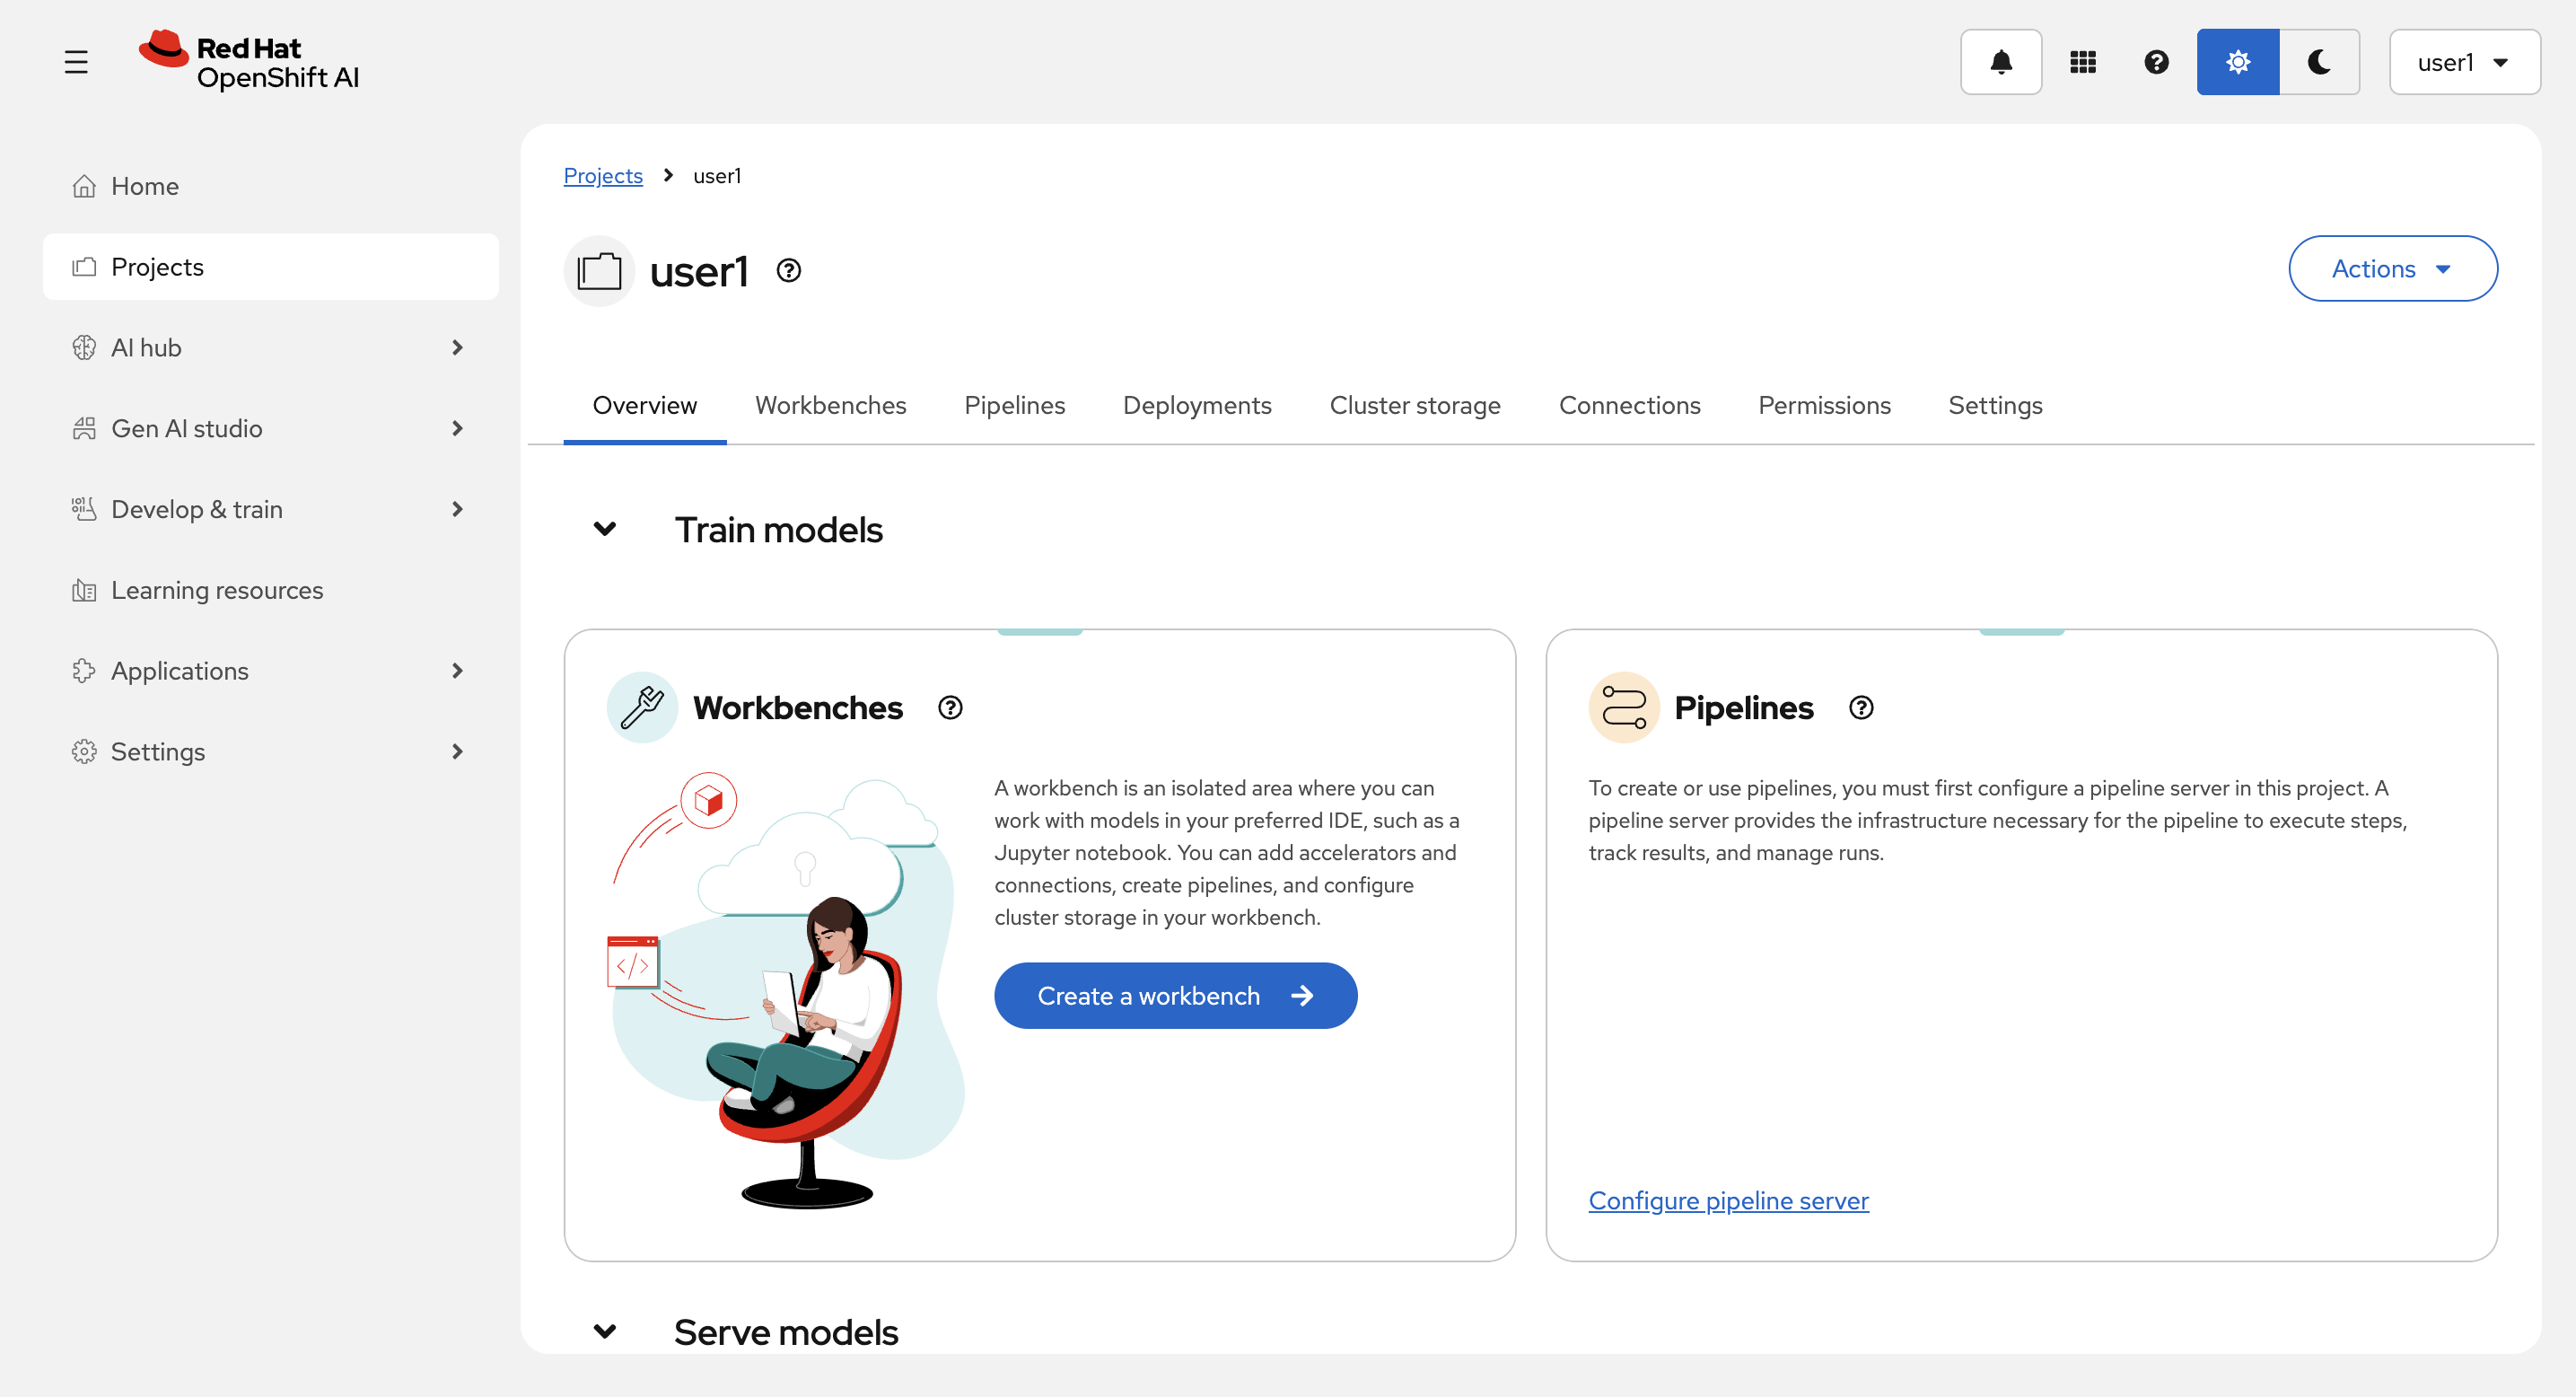
DataScience Project
DataScience Projectには以下が含まれます。
-
Workbenches: マシーンラーニング、データサイエンスのための開発環境
-
Pipelines: マシーンラーニング、データサイエンスのためのパイプラインを設定
-
Deployments: モデルランタイムとモデルのデプロイの設定
-
Cluster storage: Workbenchで中間ファイルなどの共有情報を保持するために使用する、永続ボリュームの設定
-
Connections: モデルなどを保存じたりするためのオブジェクトストレージへのアクセス情報(実態は OpenShift の Secret)
-
Permissions: アクセス件を設定
-
Settings: プロジェクトの設定
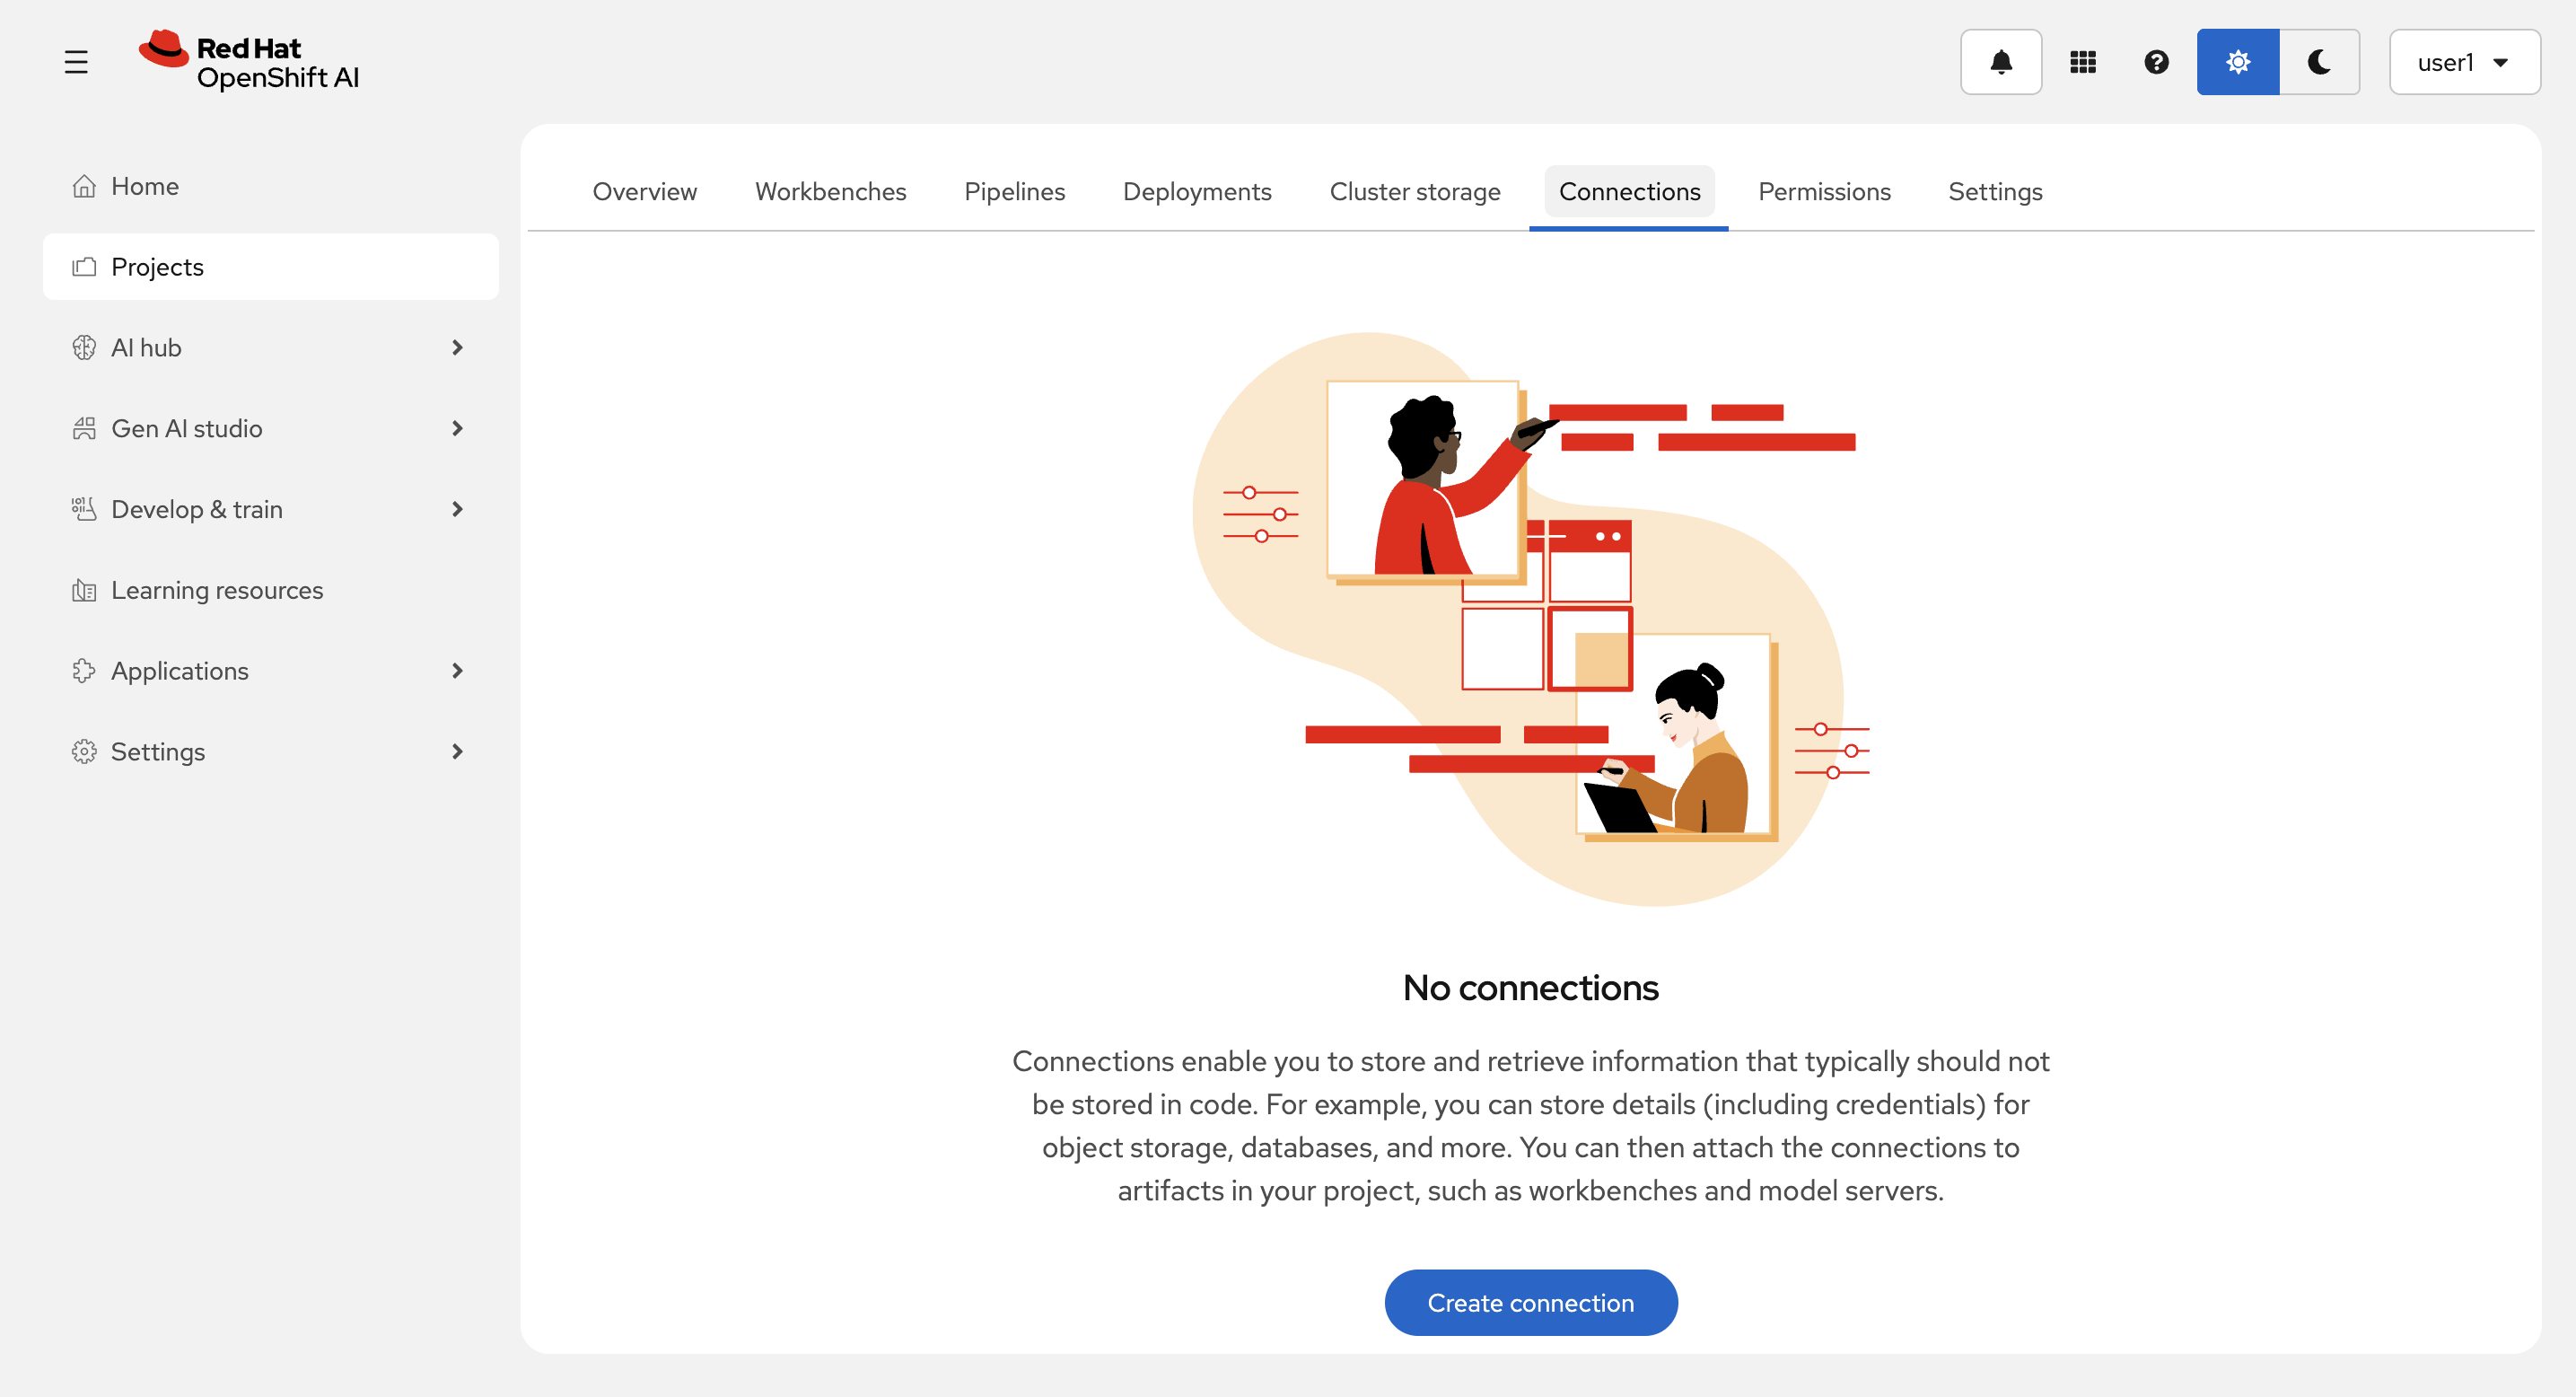
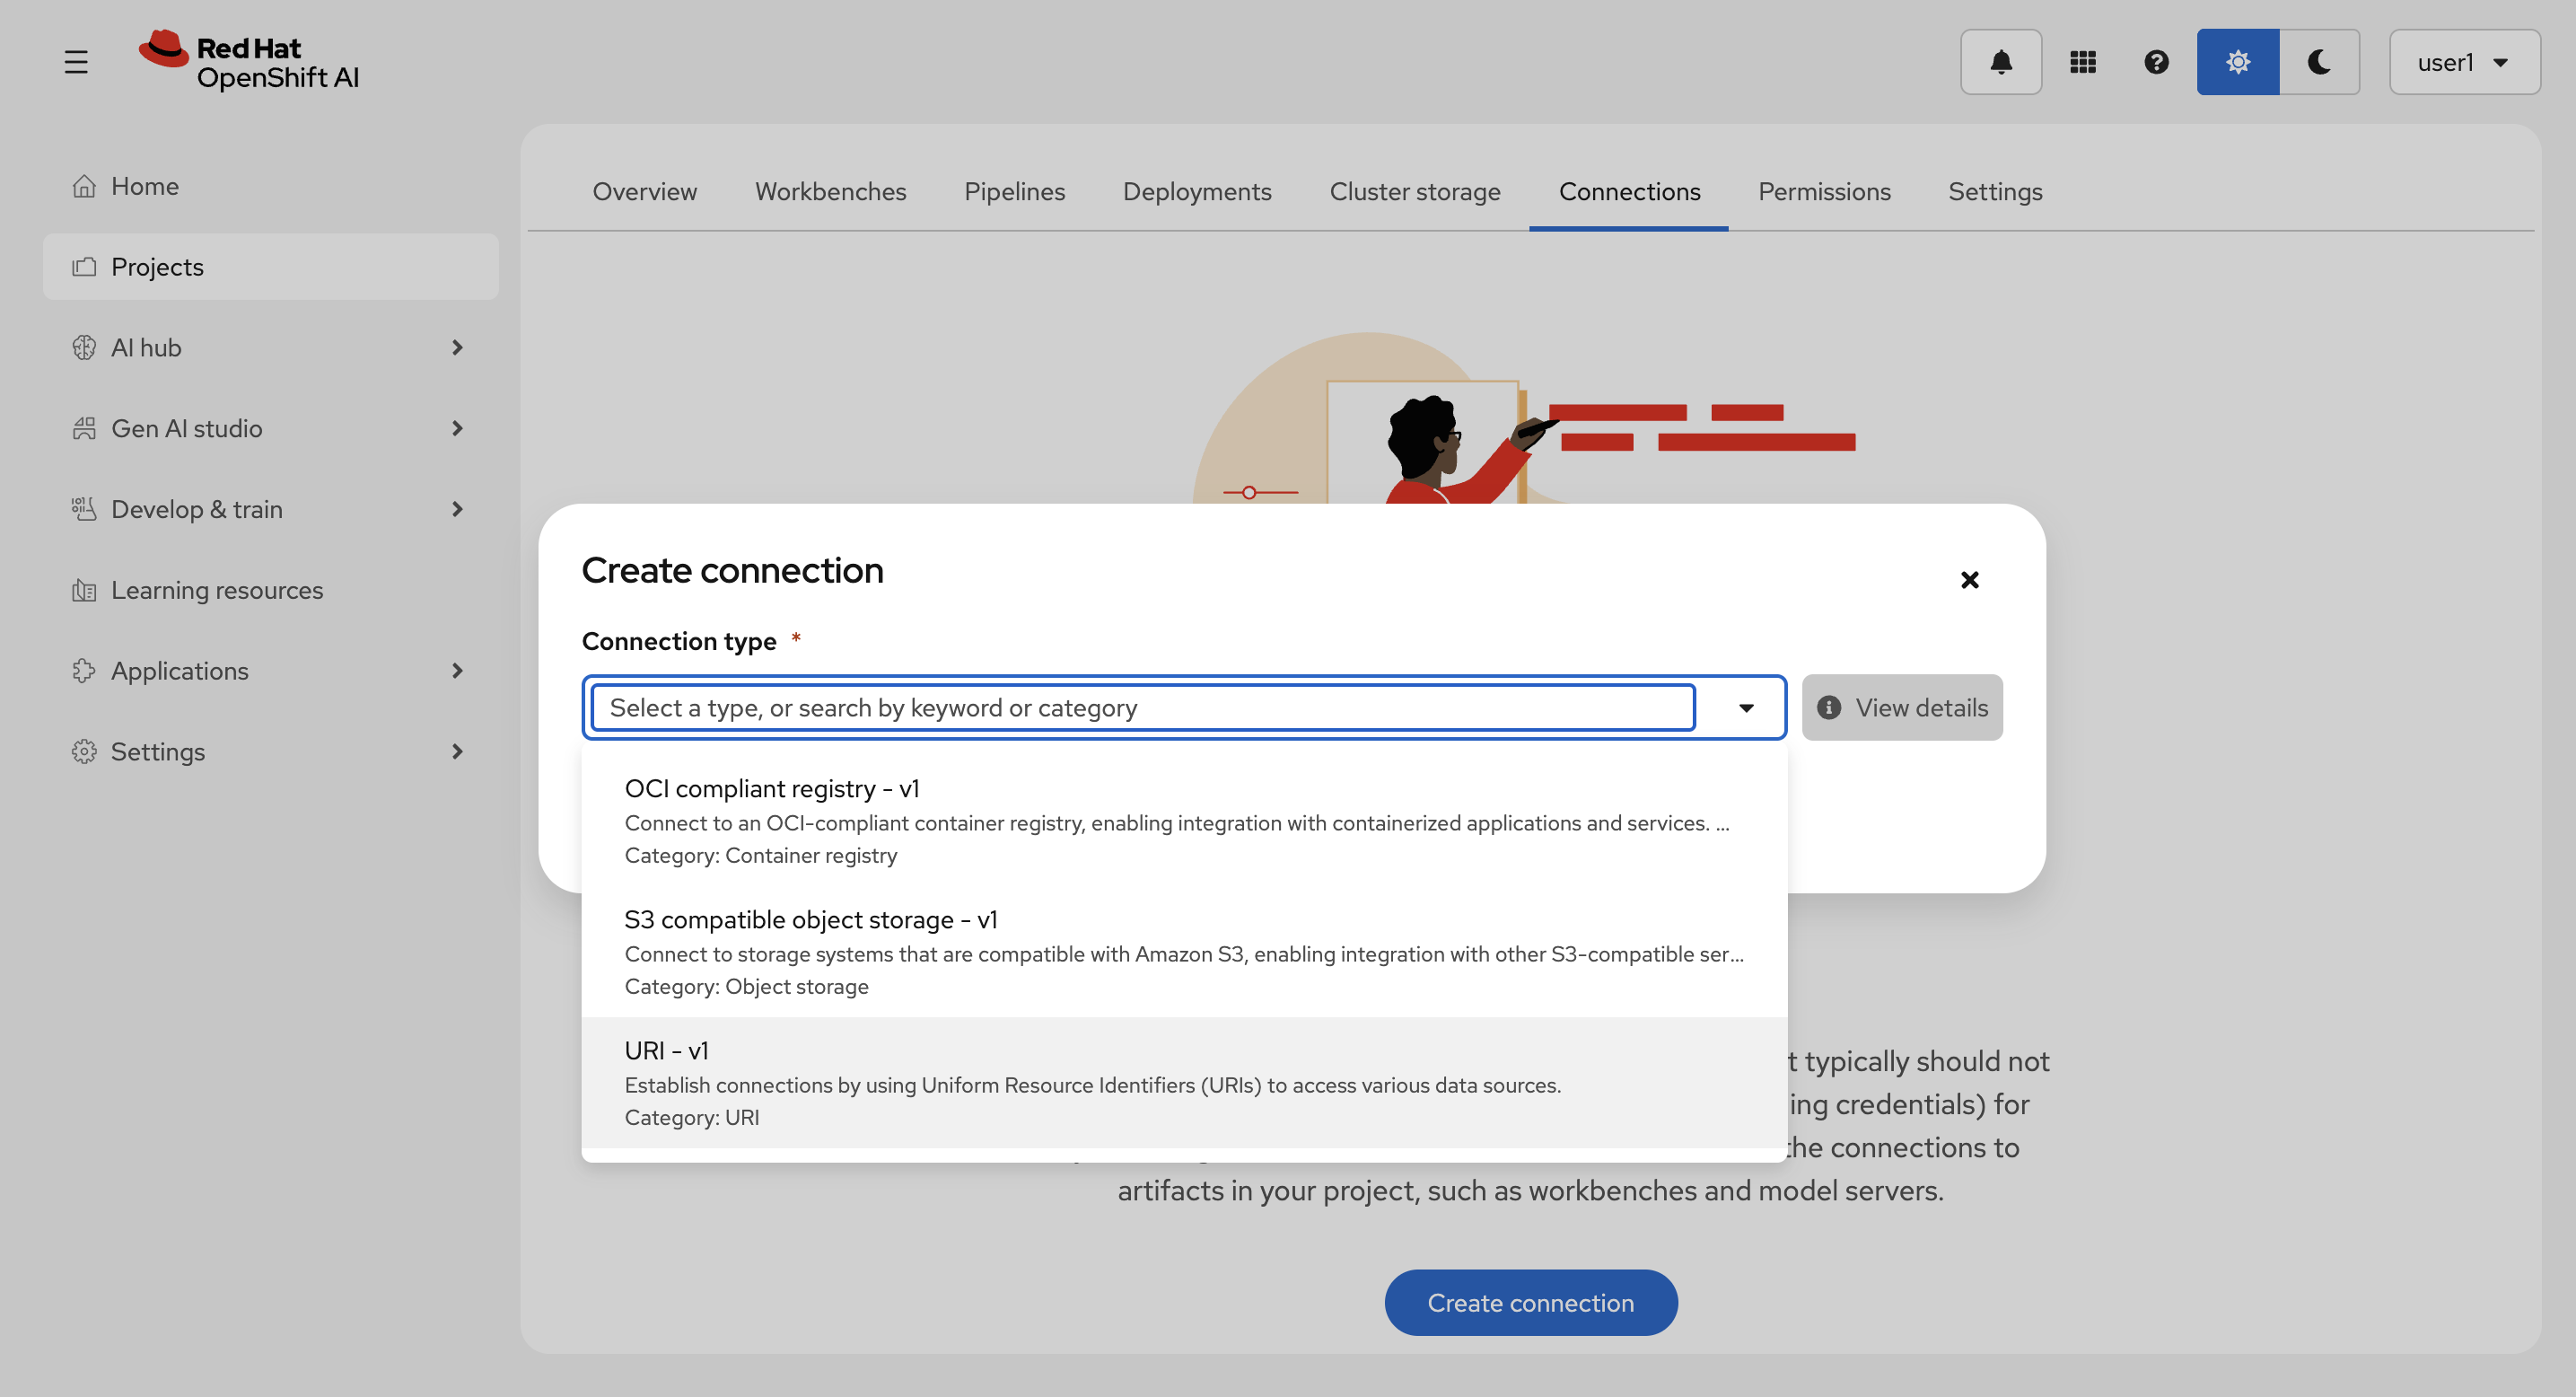
Connection の作成
Connections タブから、Create connection を選択します。
Connection type に URI - v1 を選択します。
以下を入力して、Create を選択します。
-
Connection details :
llama-32-3b-instruct-
URI :
oci://quay.io/redhat-ai-services/modelcar-catalog:llama-3.2-3b-instruct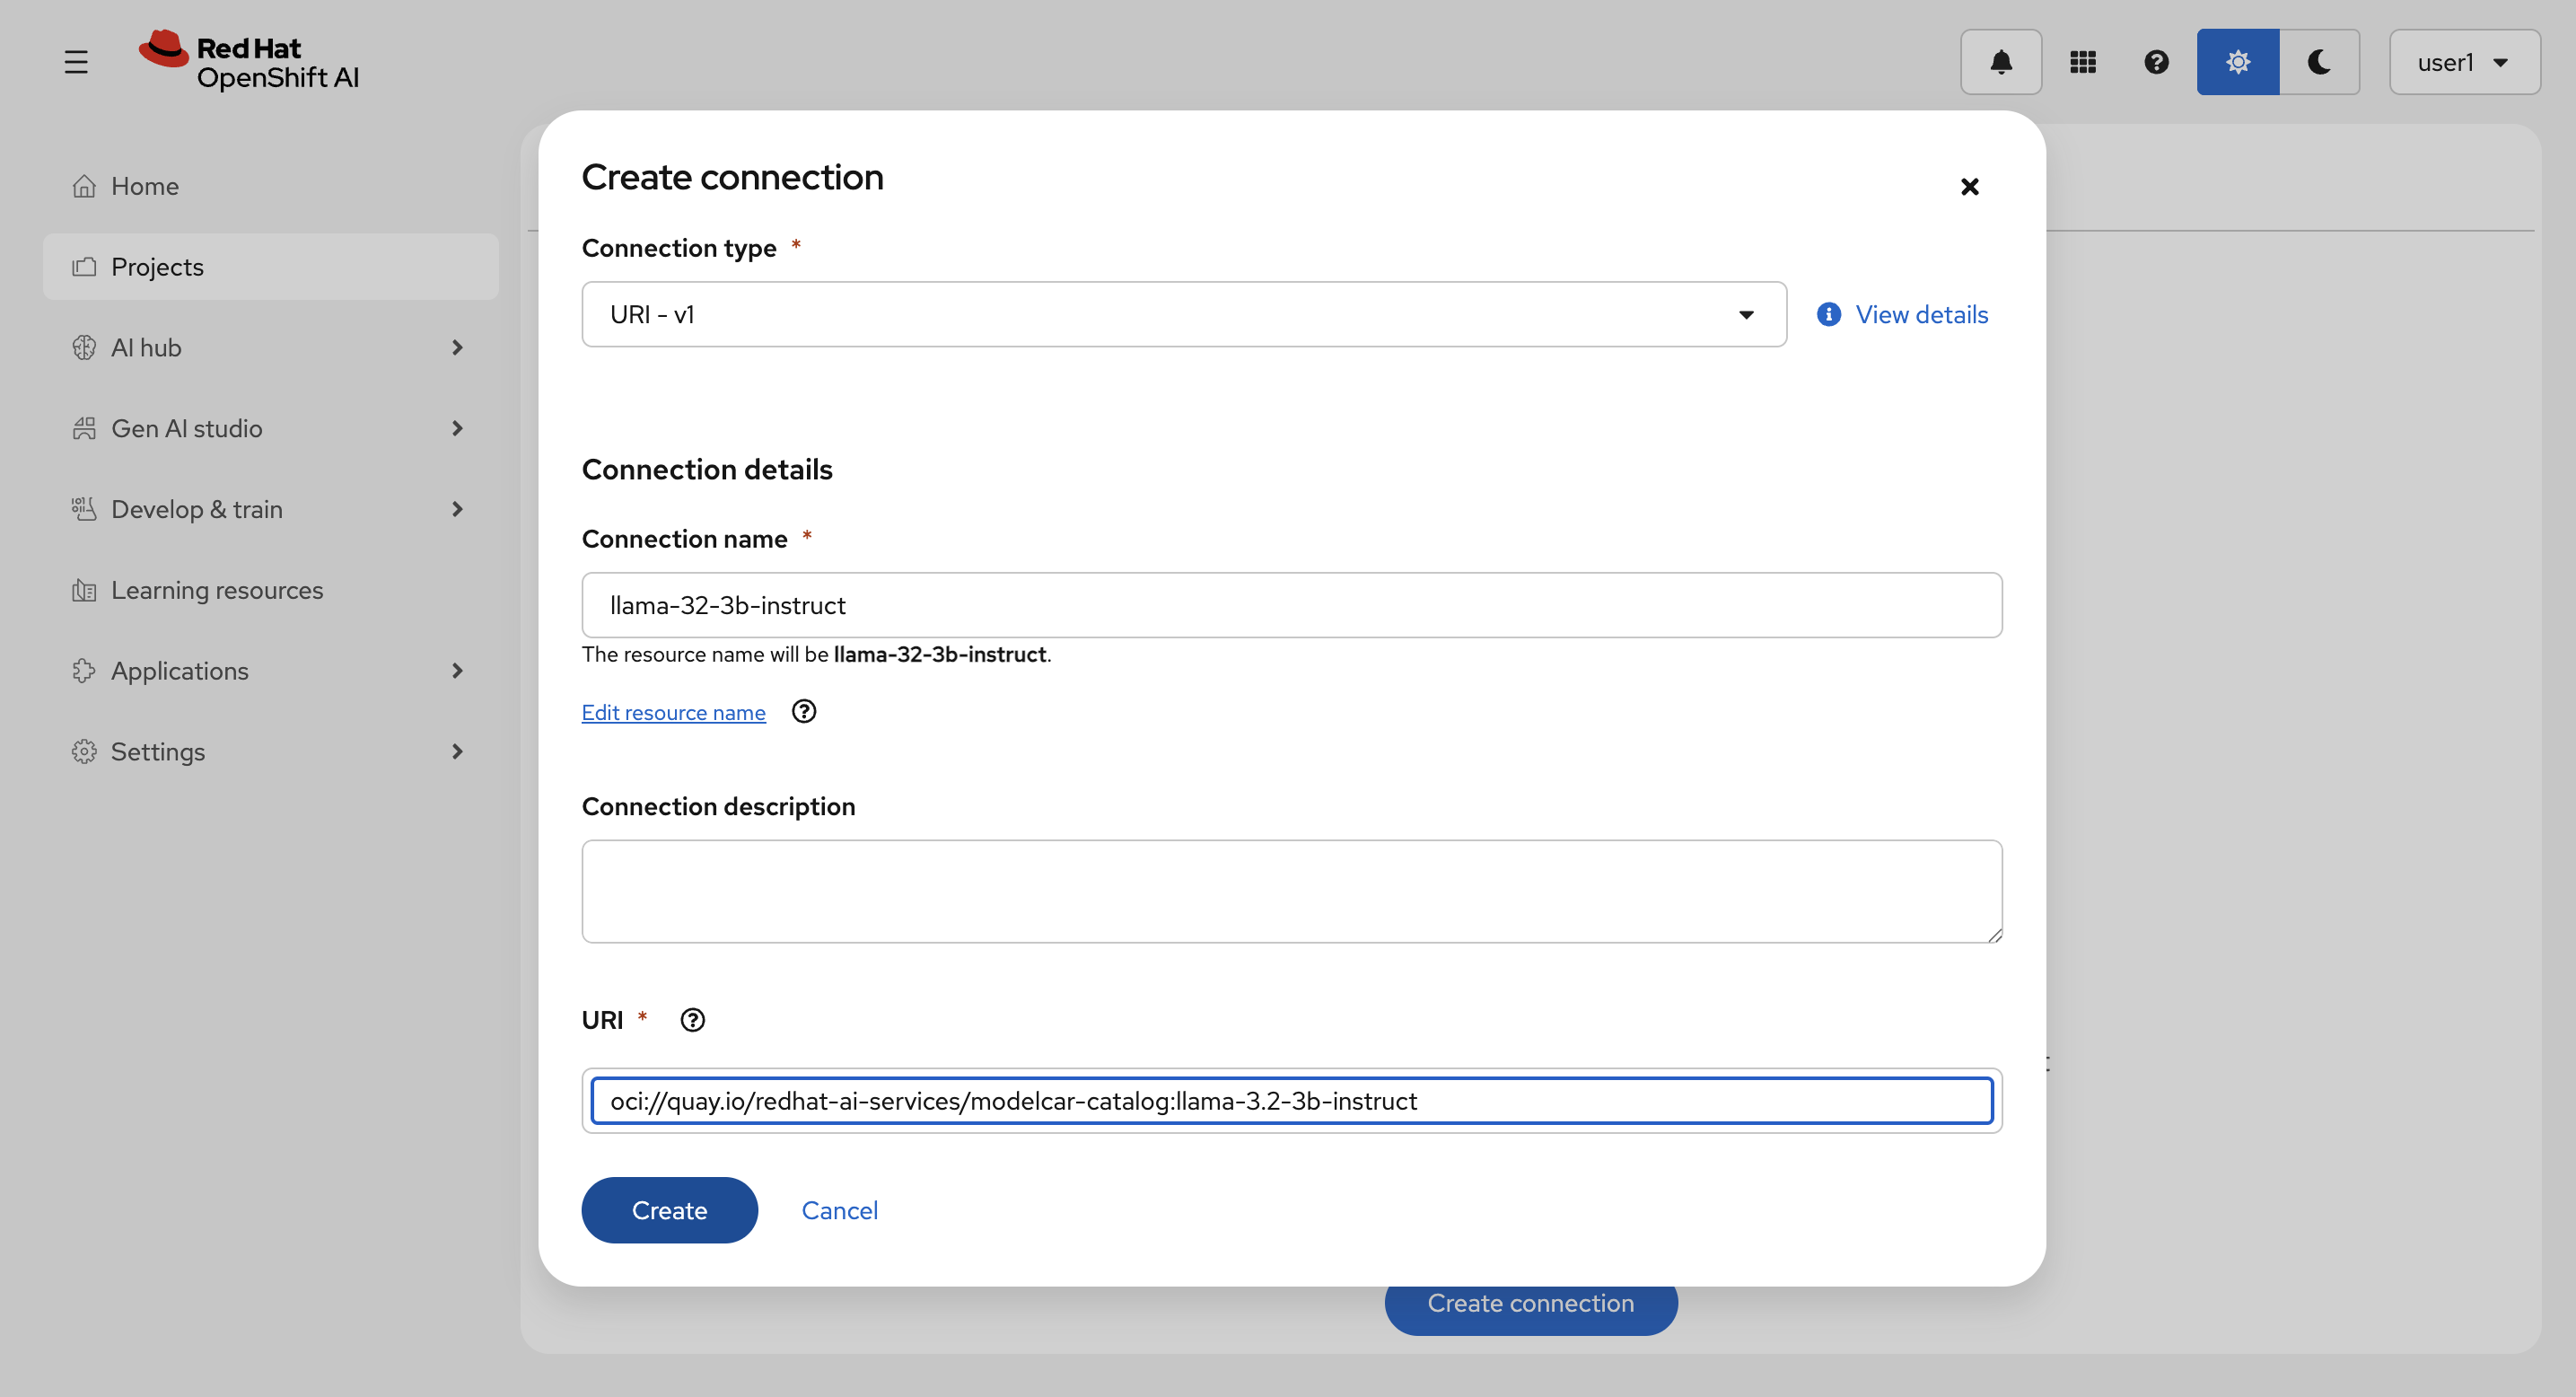
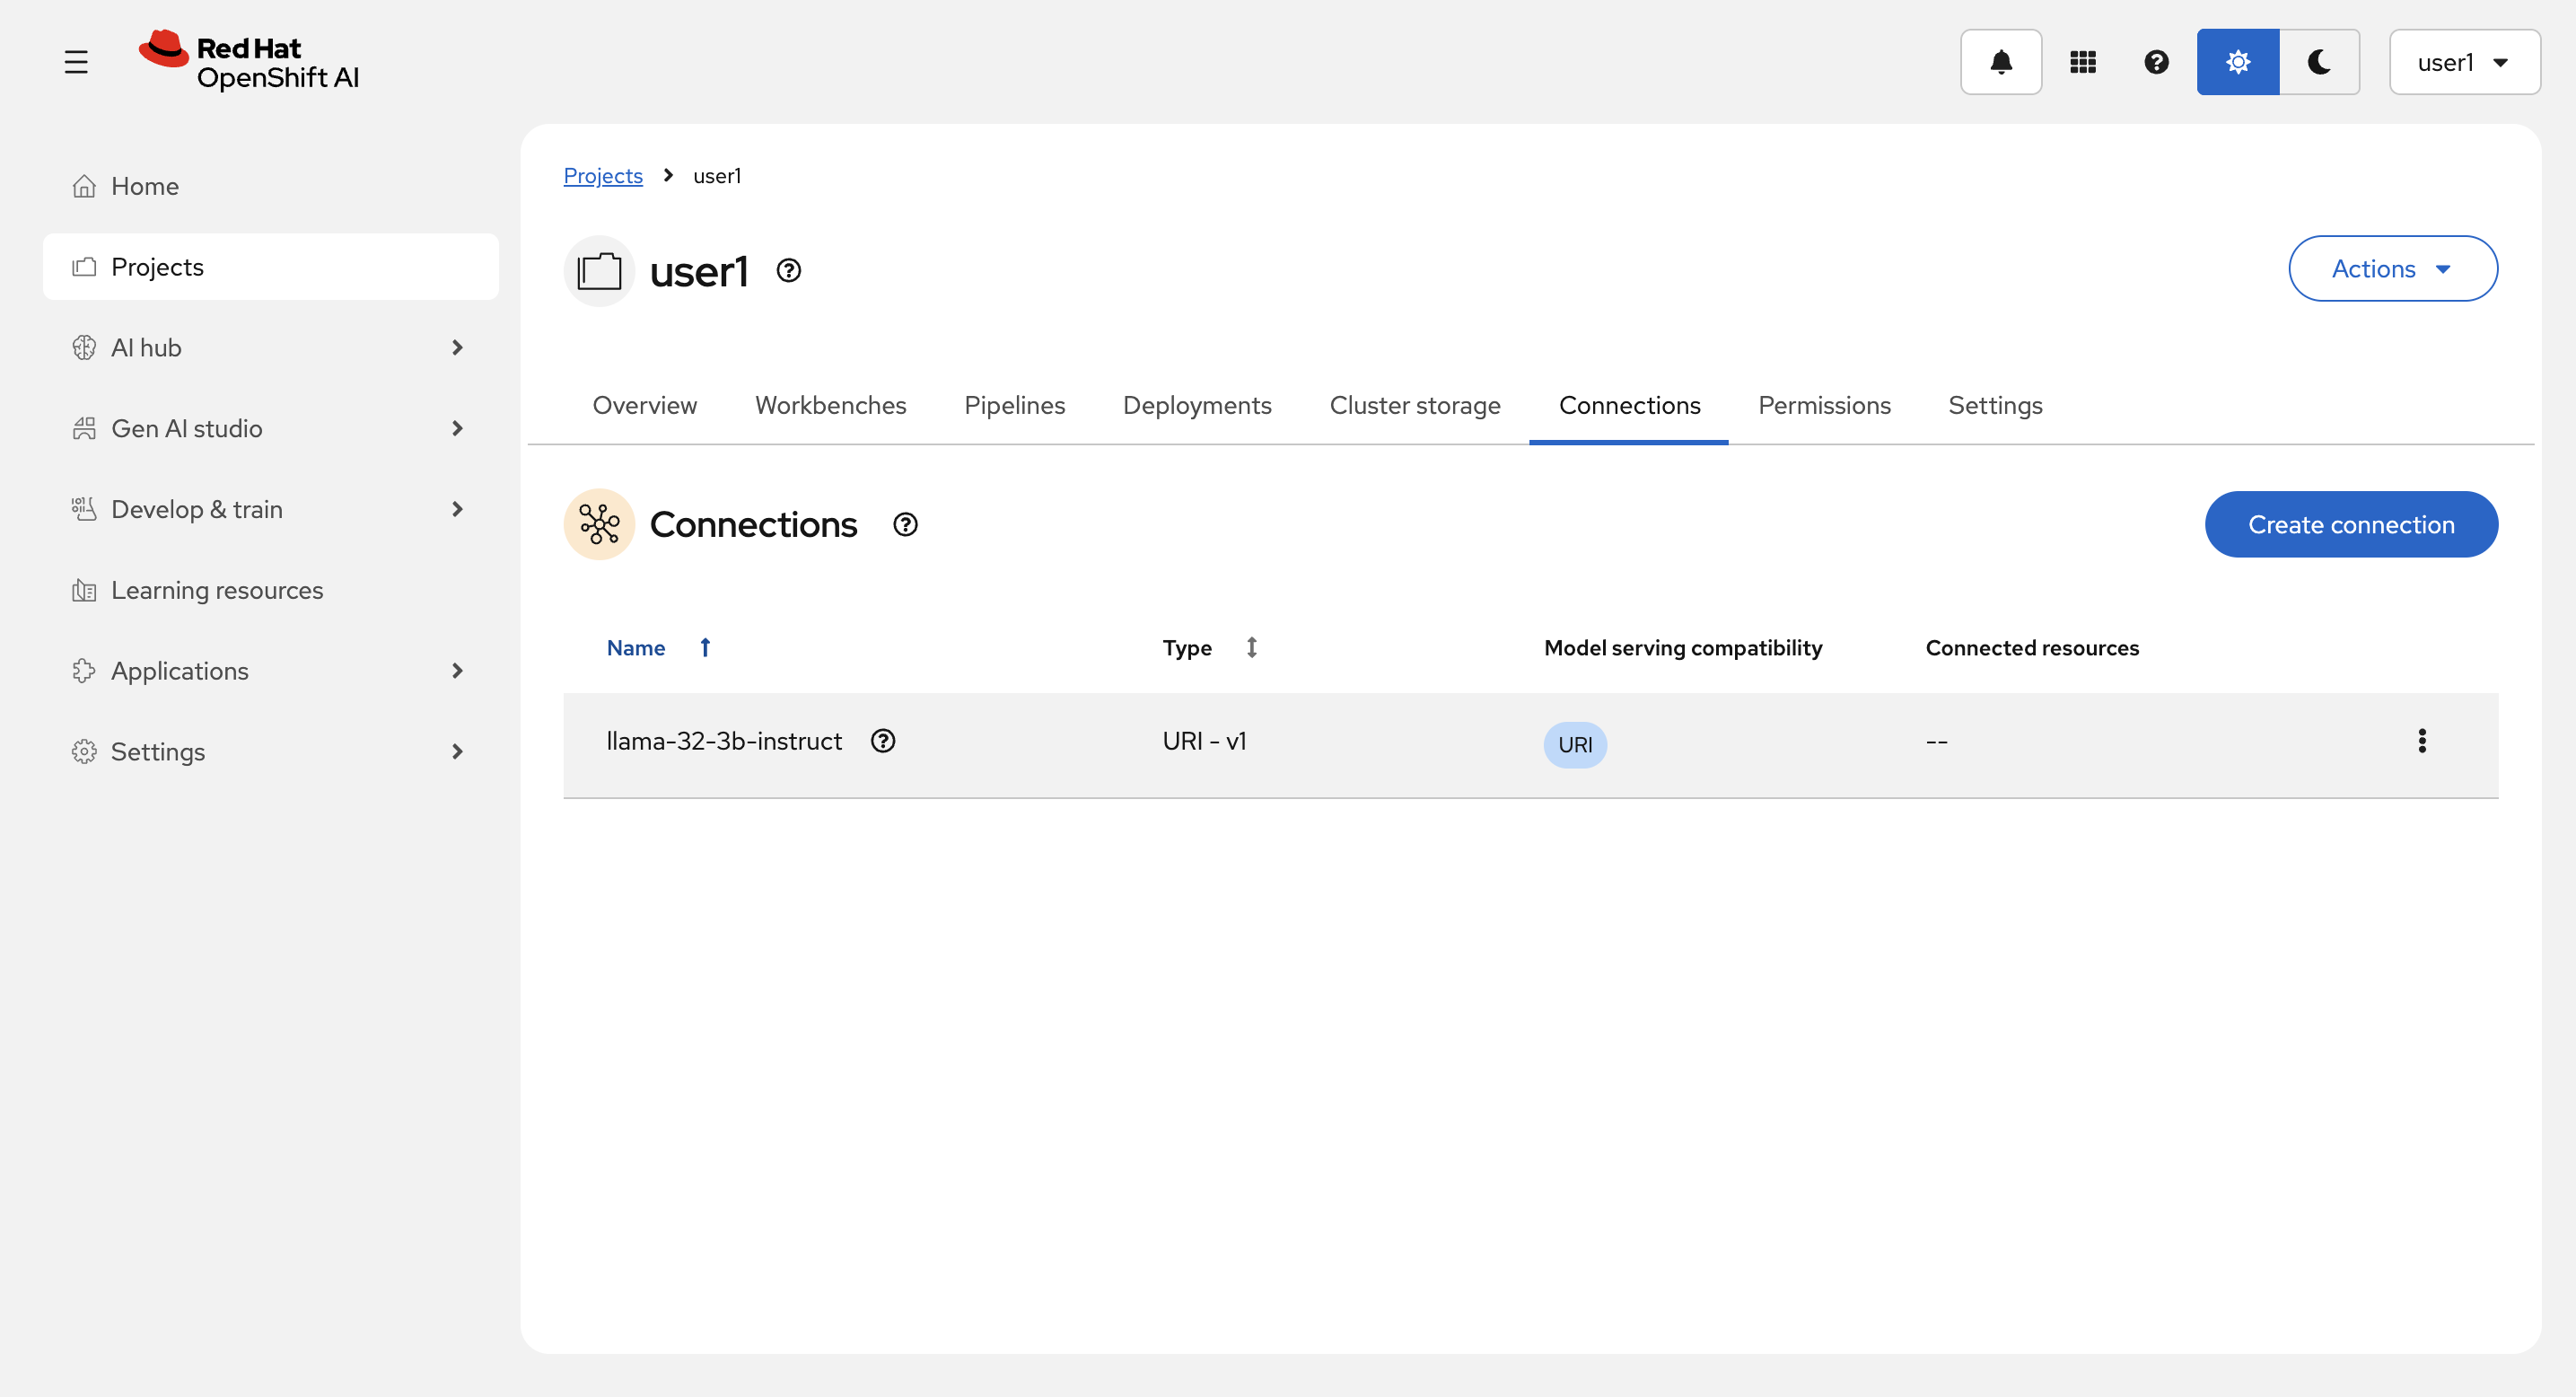
作成後:
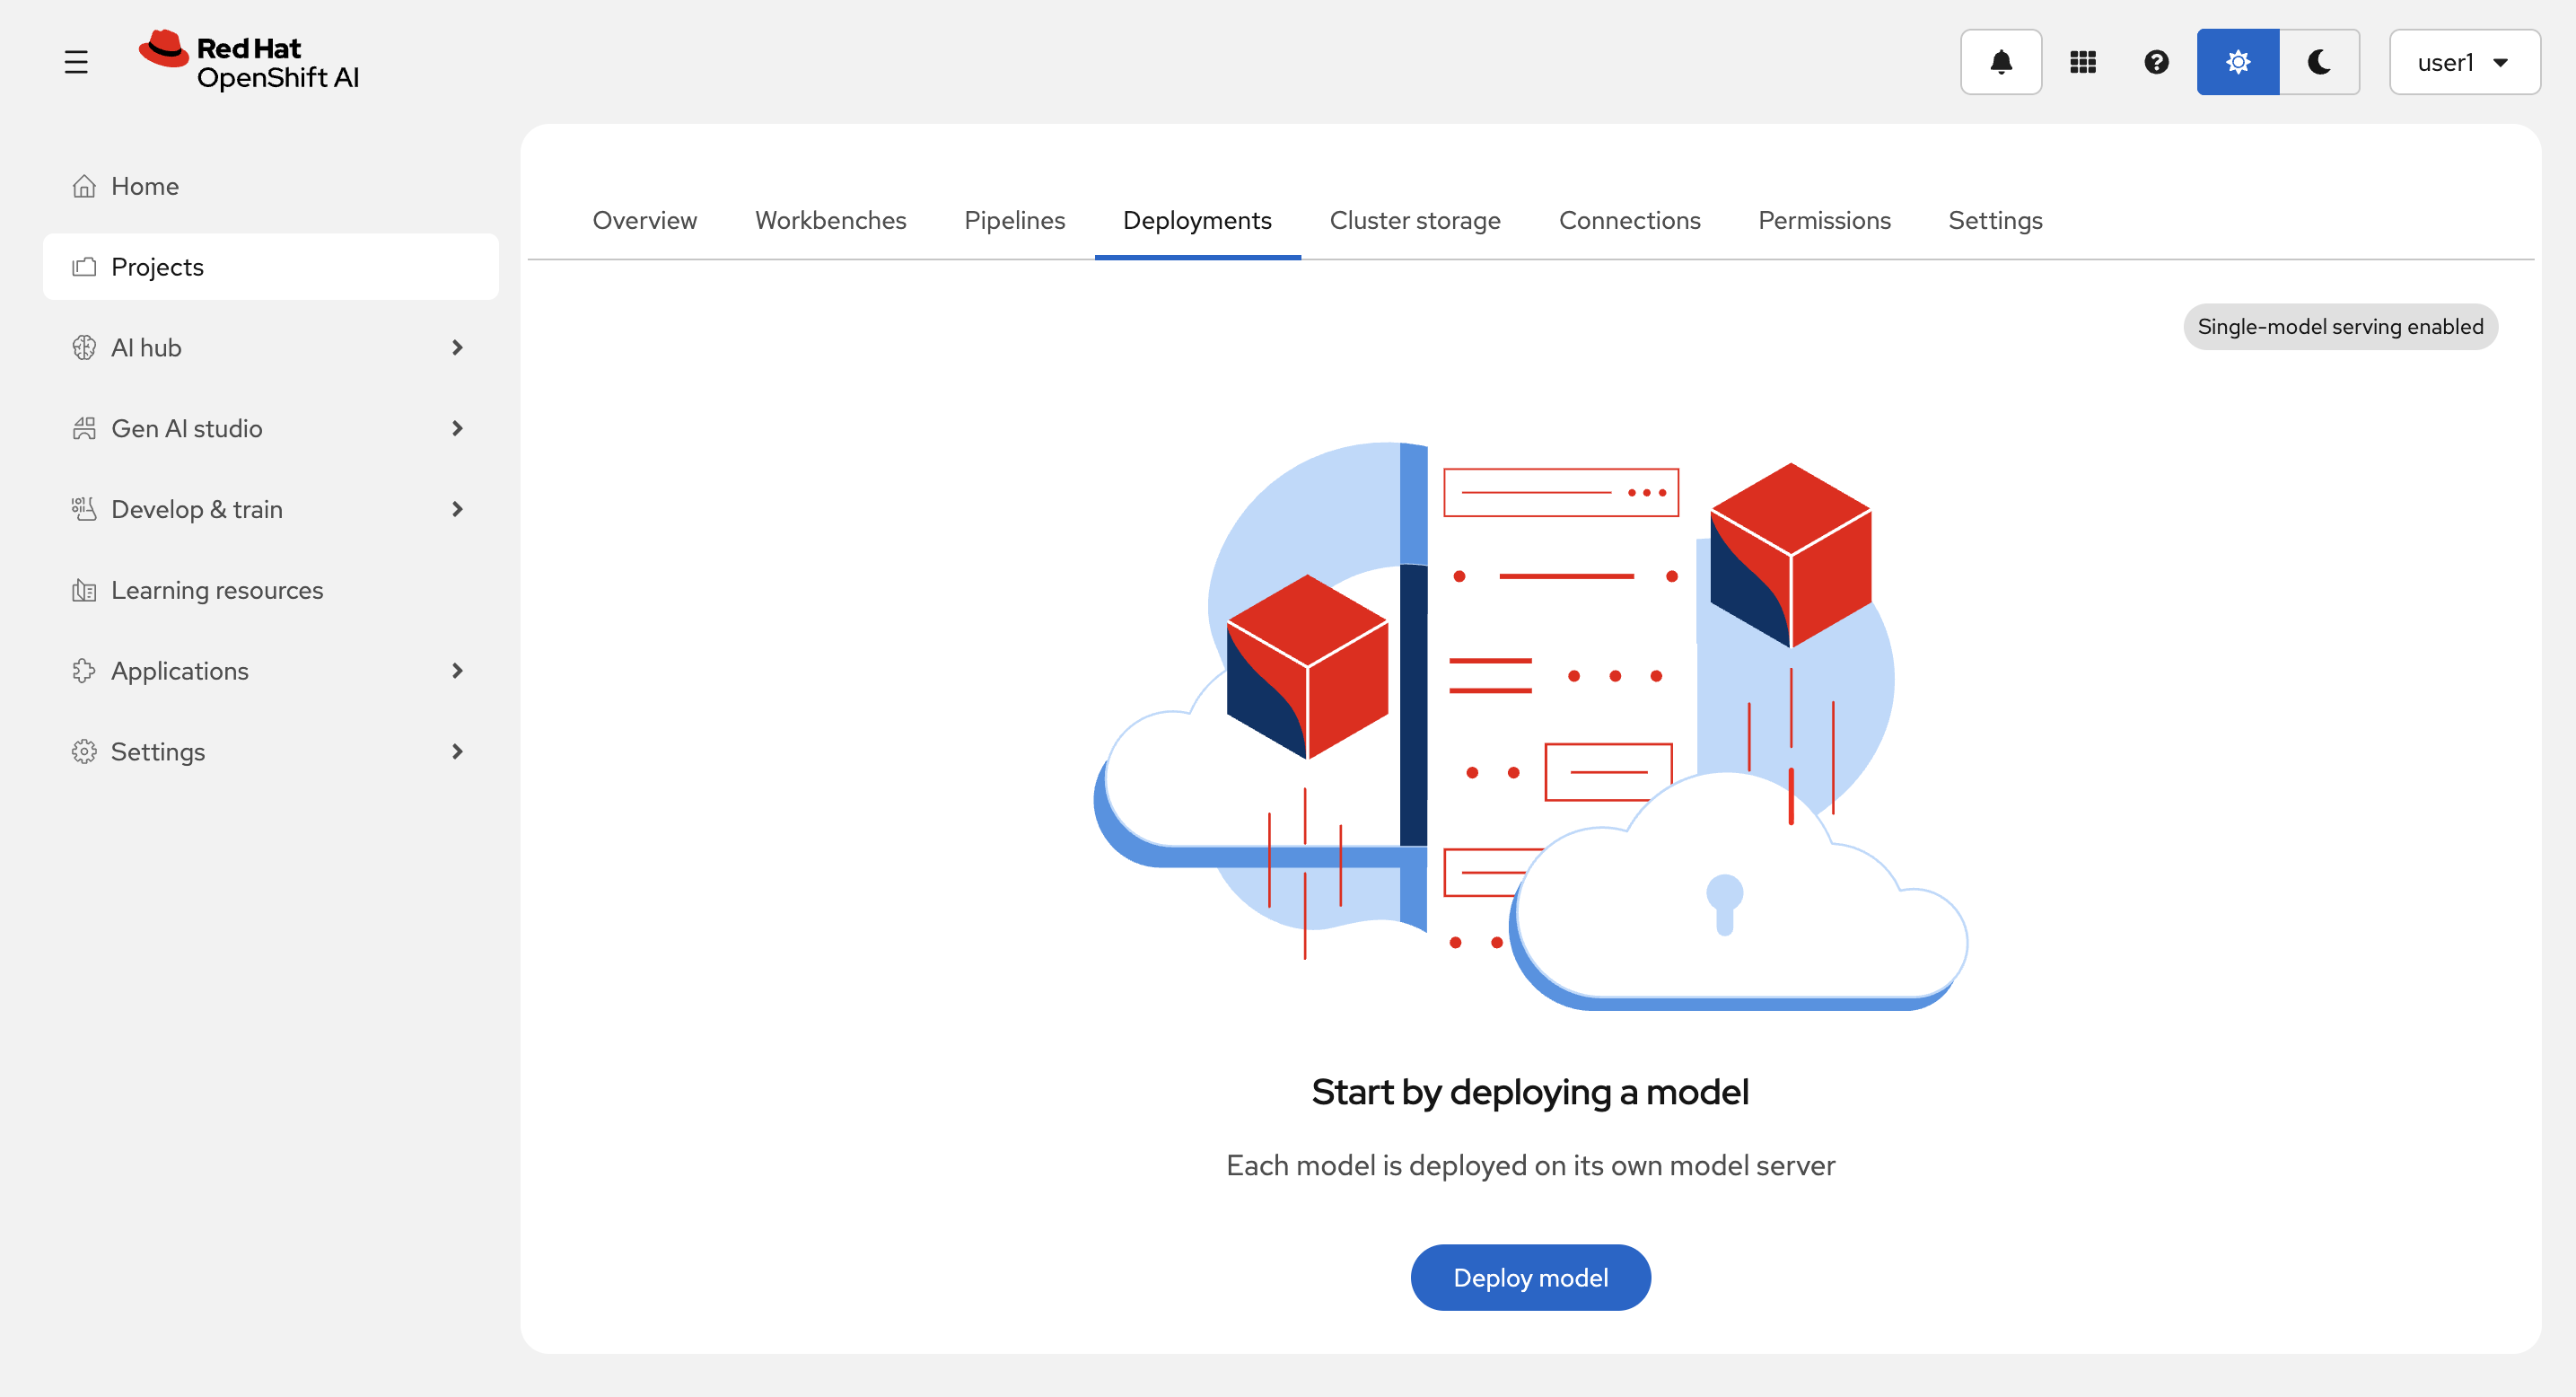
モデルのランタイムの作成とモデルのデプロイ
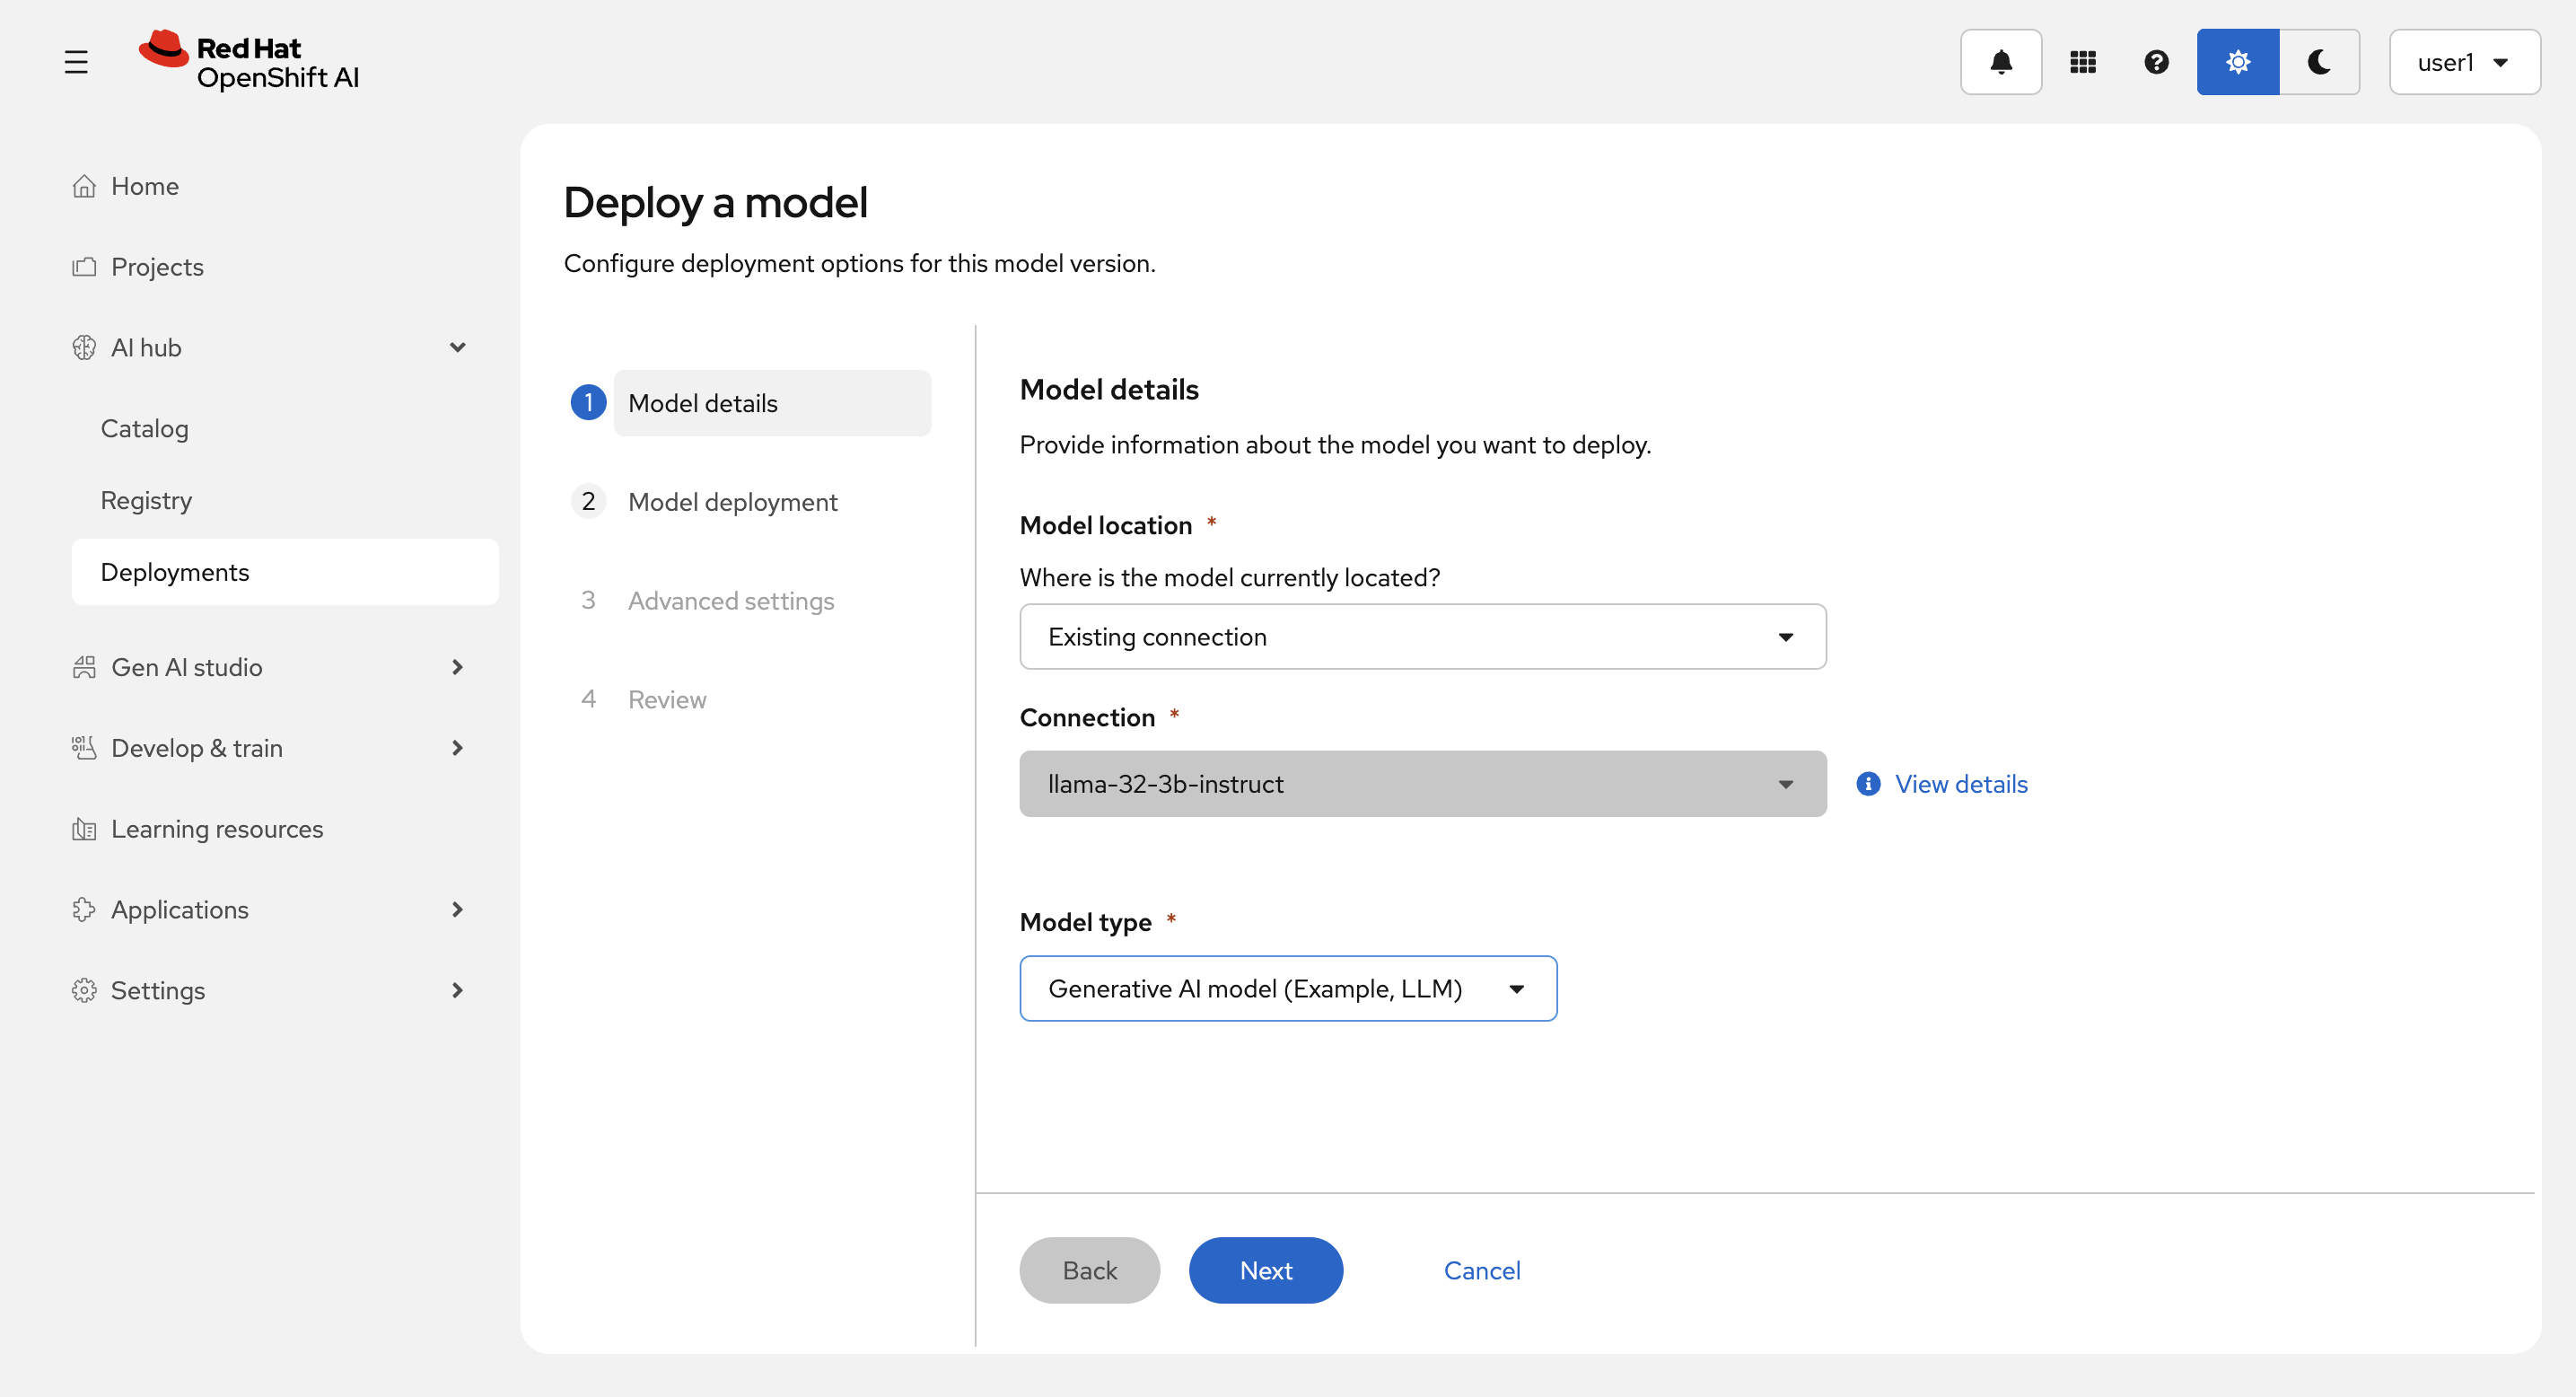
Deployments タブから、Deploy model を選択します。
Model location に Existing connection を Model type に Generative AI model (Example, LLM) を選択(Connection は1つしか存在しないので自動で選択されます。)し、Next を選択します。
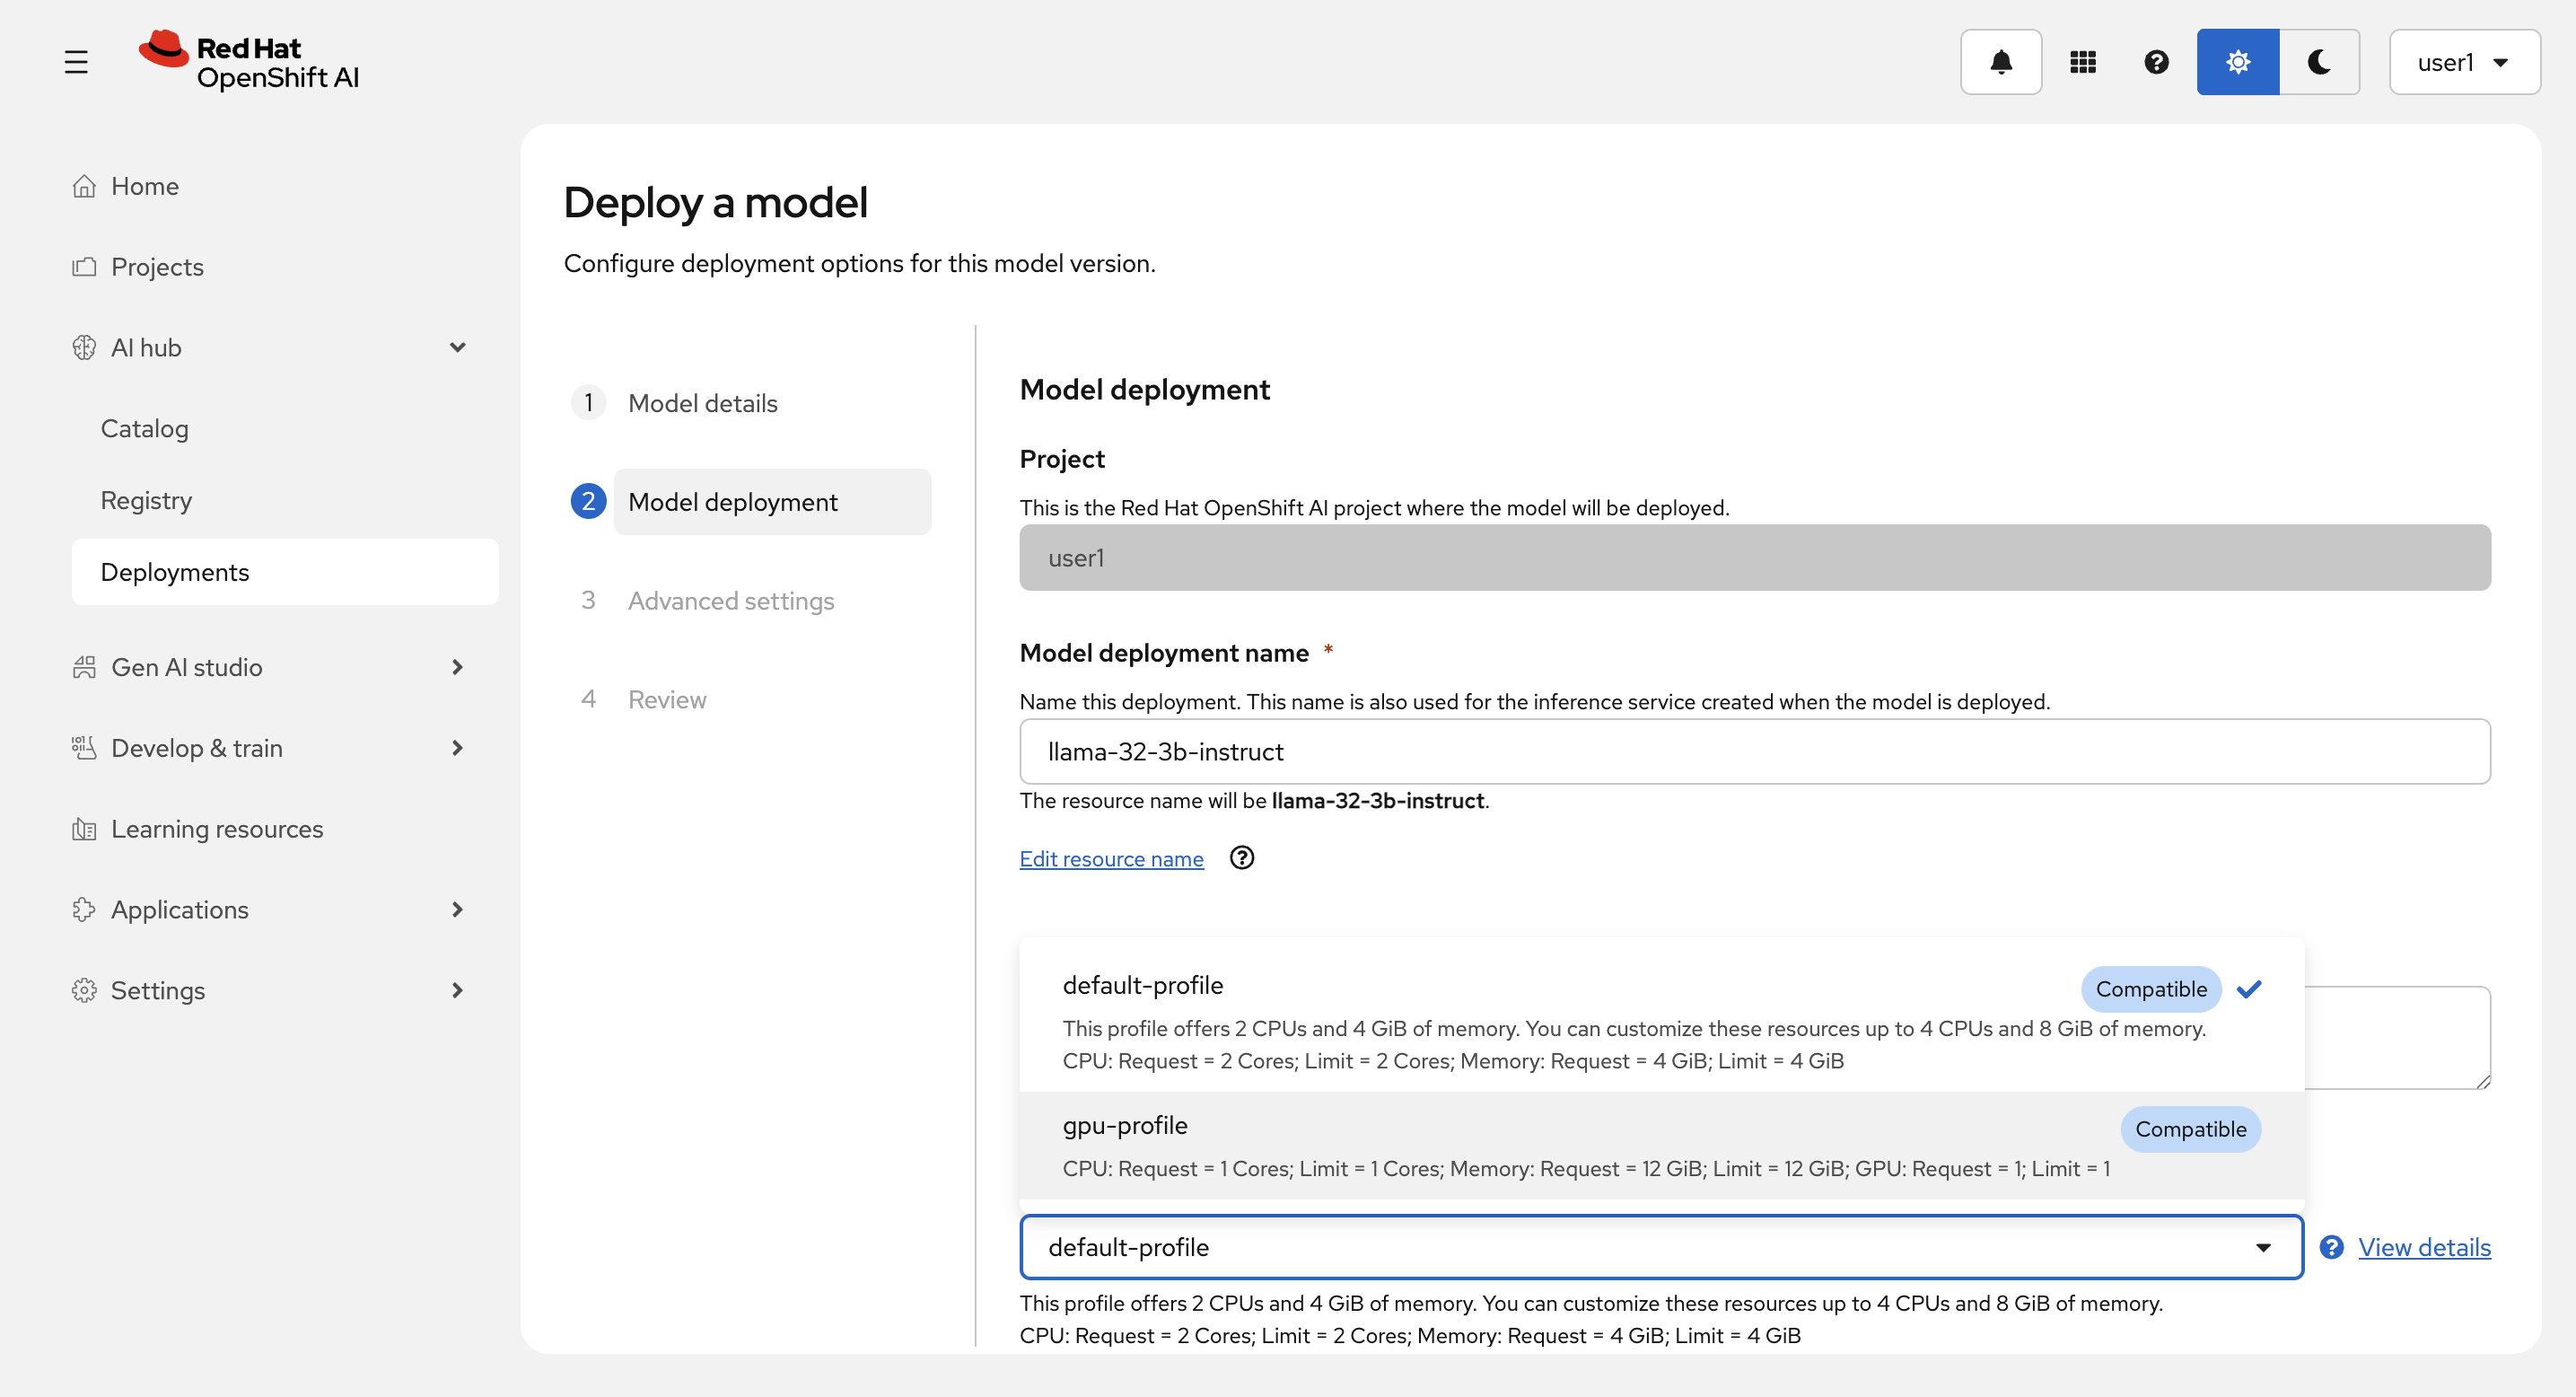
Model deployment name を llama-32-3b-instruct
とし、Hardware profie に gpu-profile を選択します。
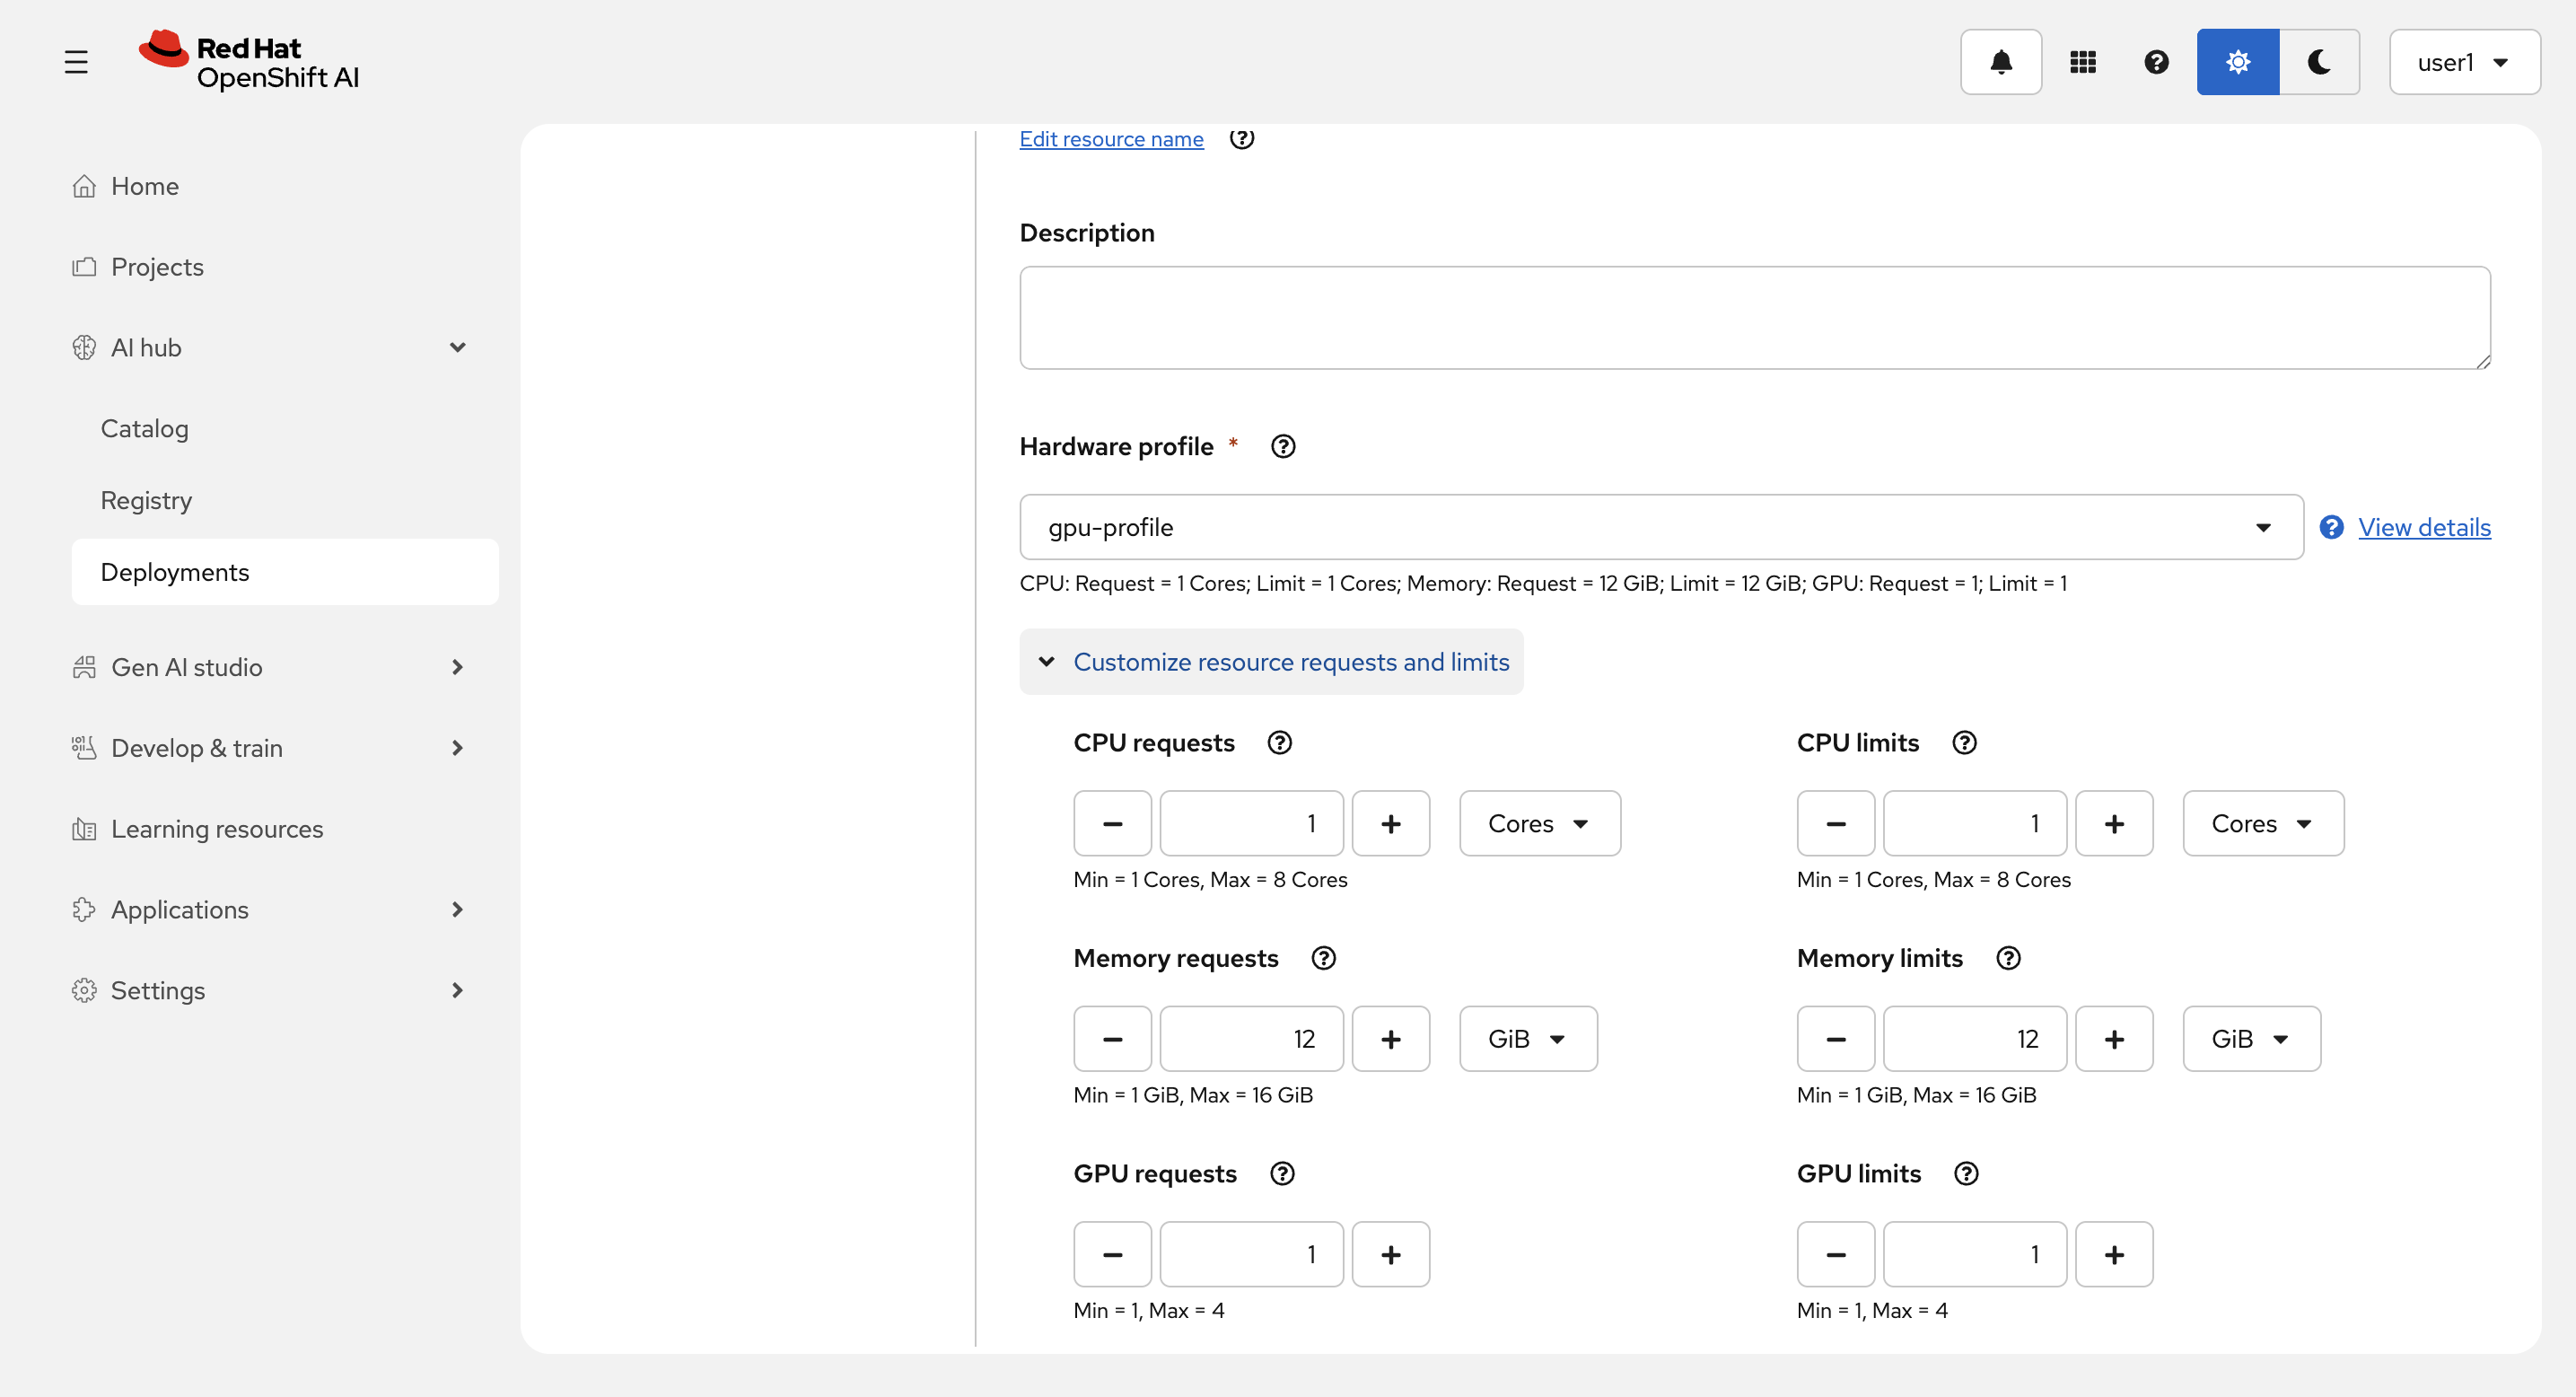
Customize resource request and limits を開いて以下を設定します。
-
CPU requests : 1 Cores
-
CPU limits : 4 Cores
-
Memory requests : 6 GiB
-
Memory limits : 16 GiB
-
GPU requests : 1
-
GPU limits : 1
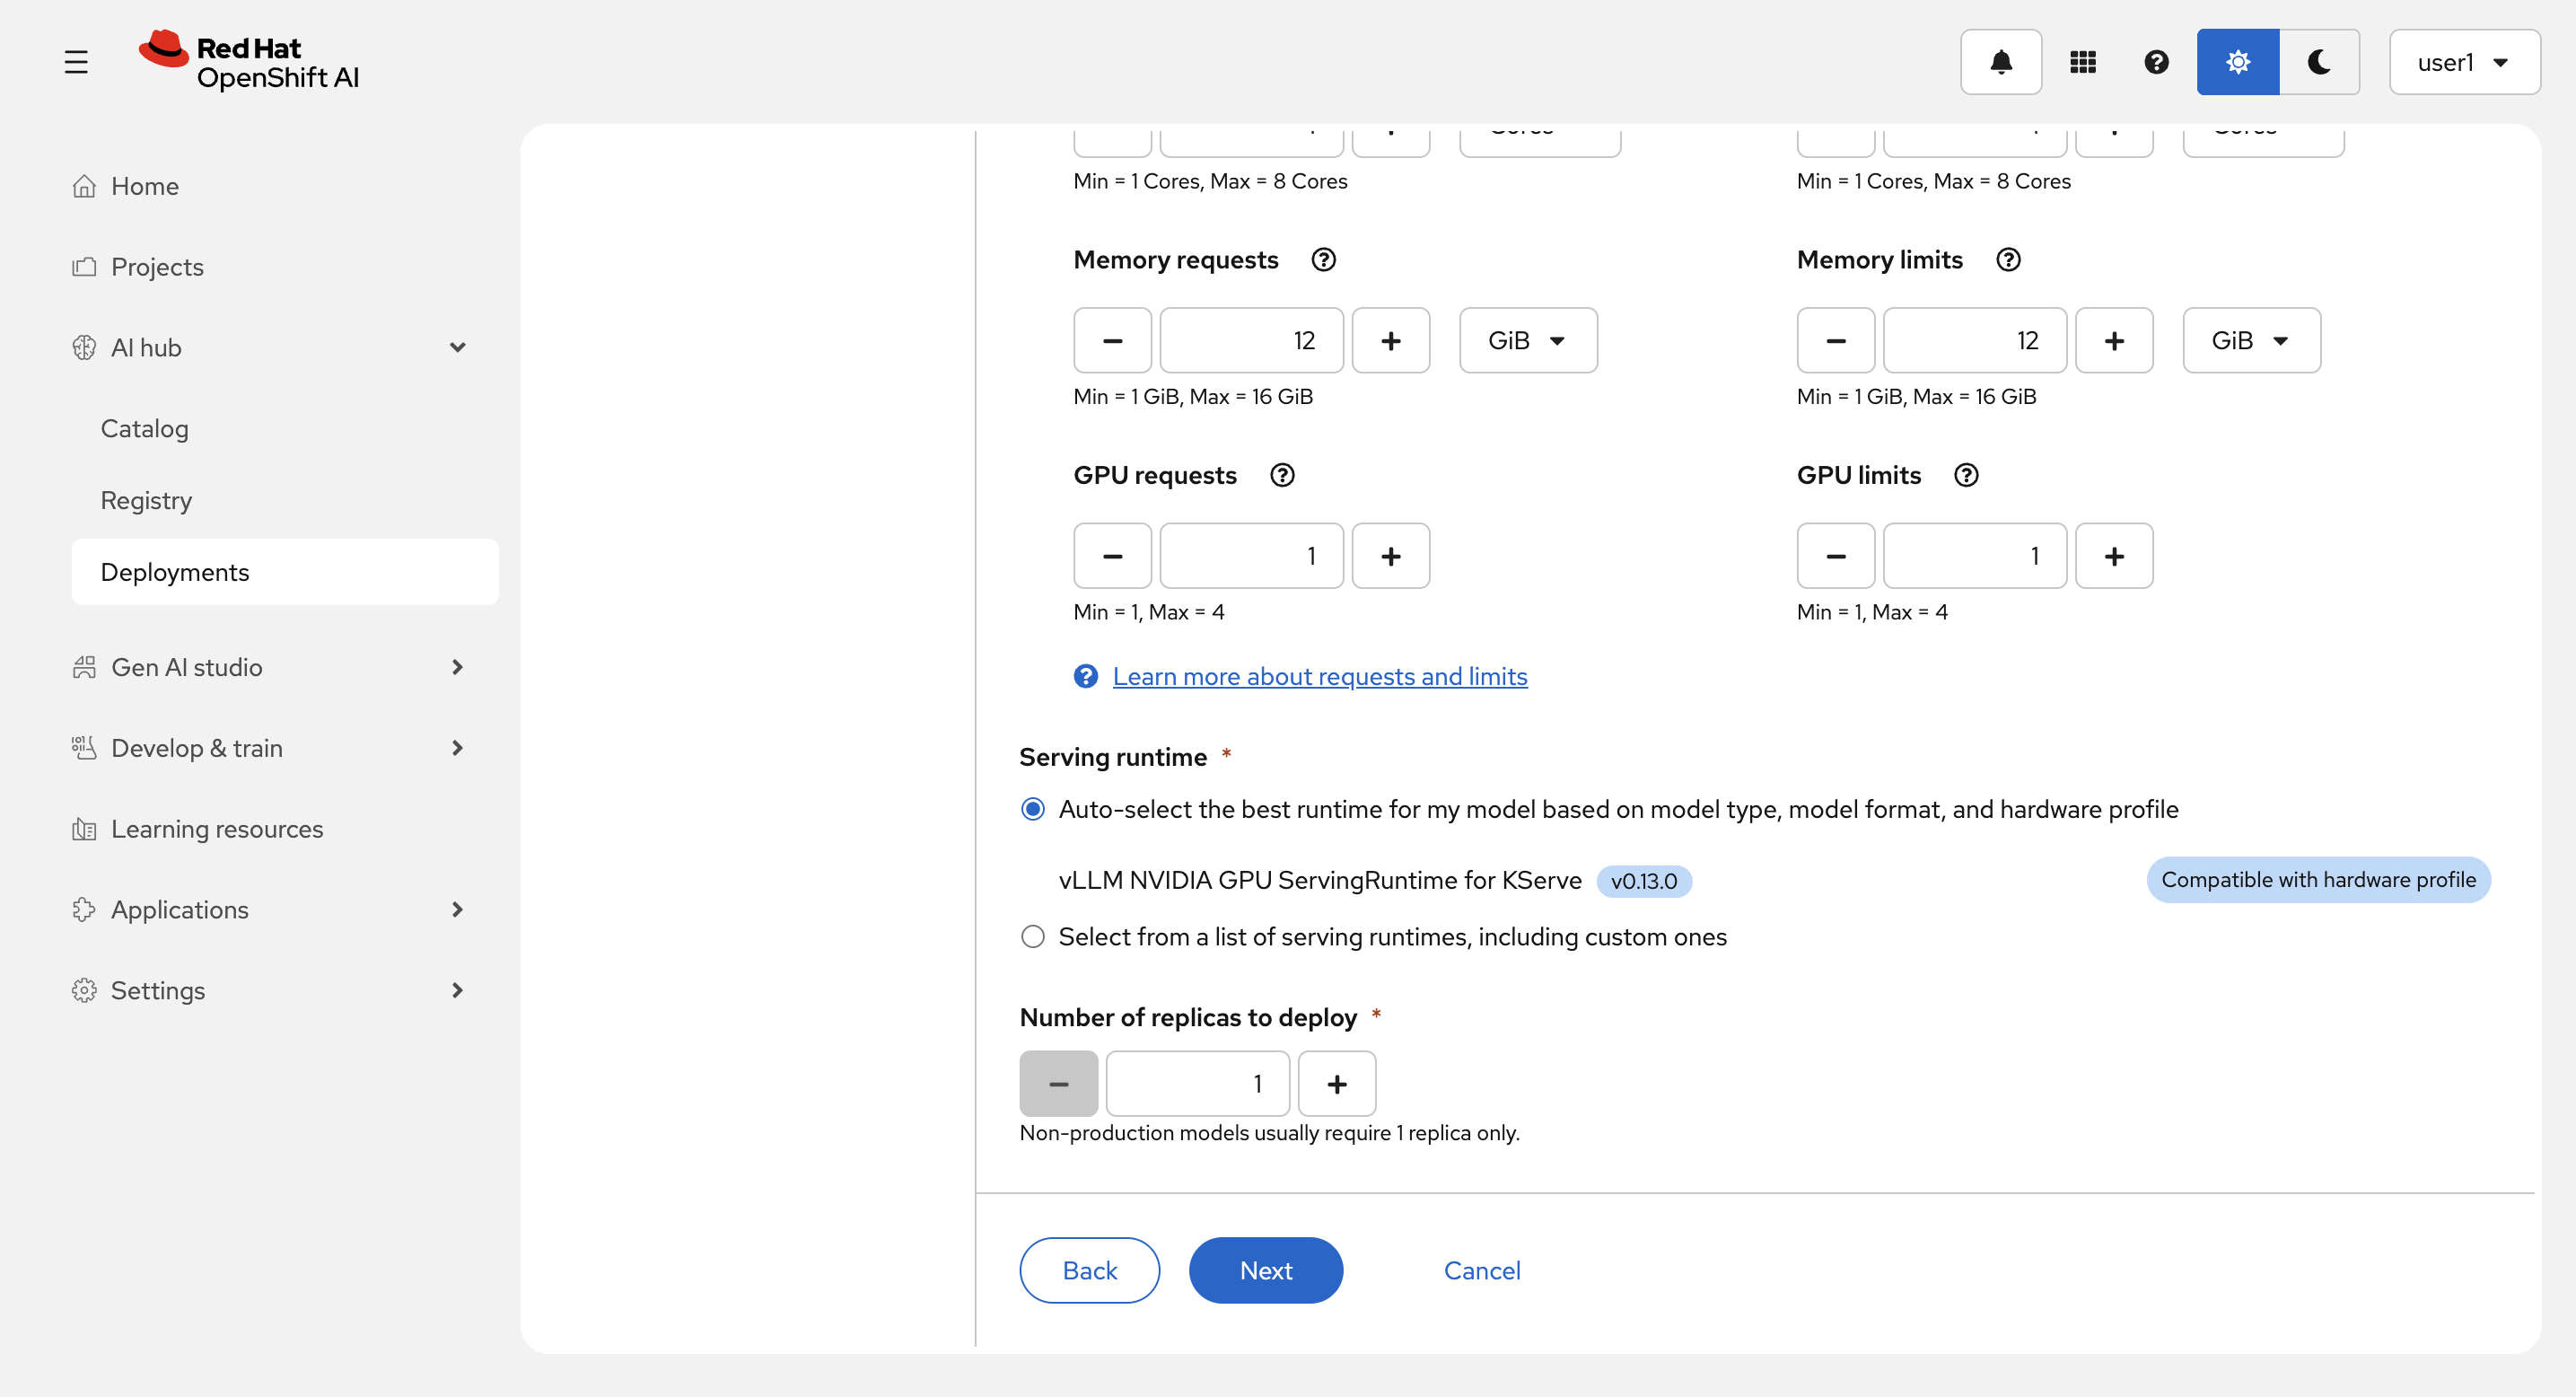
Service runtime は Auto-select the best runtime for my model based on model type, model format, and hardware profile にして、Next を選択します。
Model playground availability の Add as AI asset endopoint と Configure parameters の Add custom runtime arguments をチェックします。
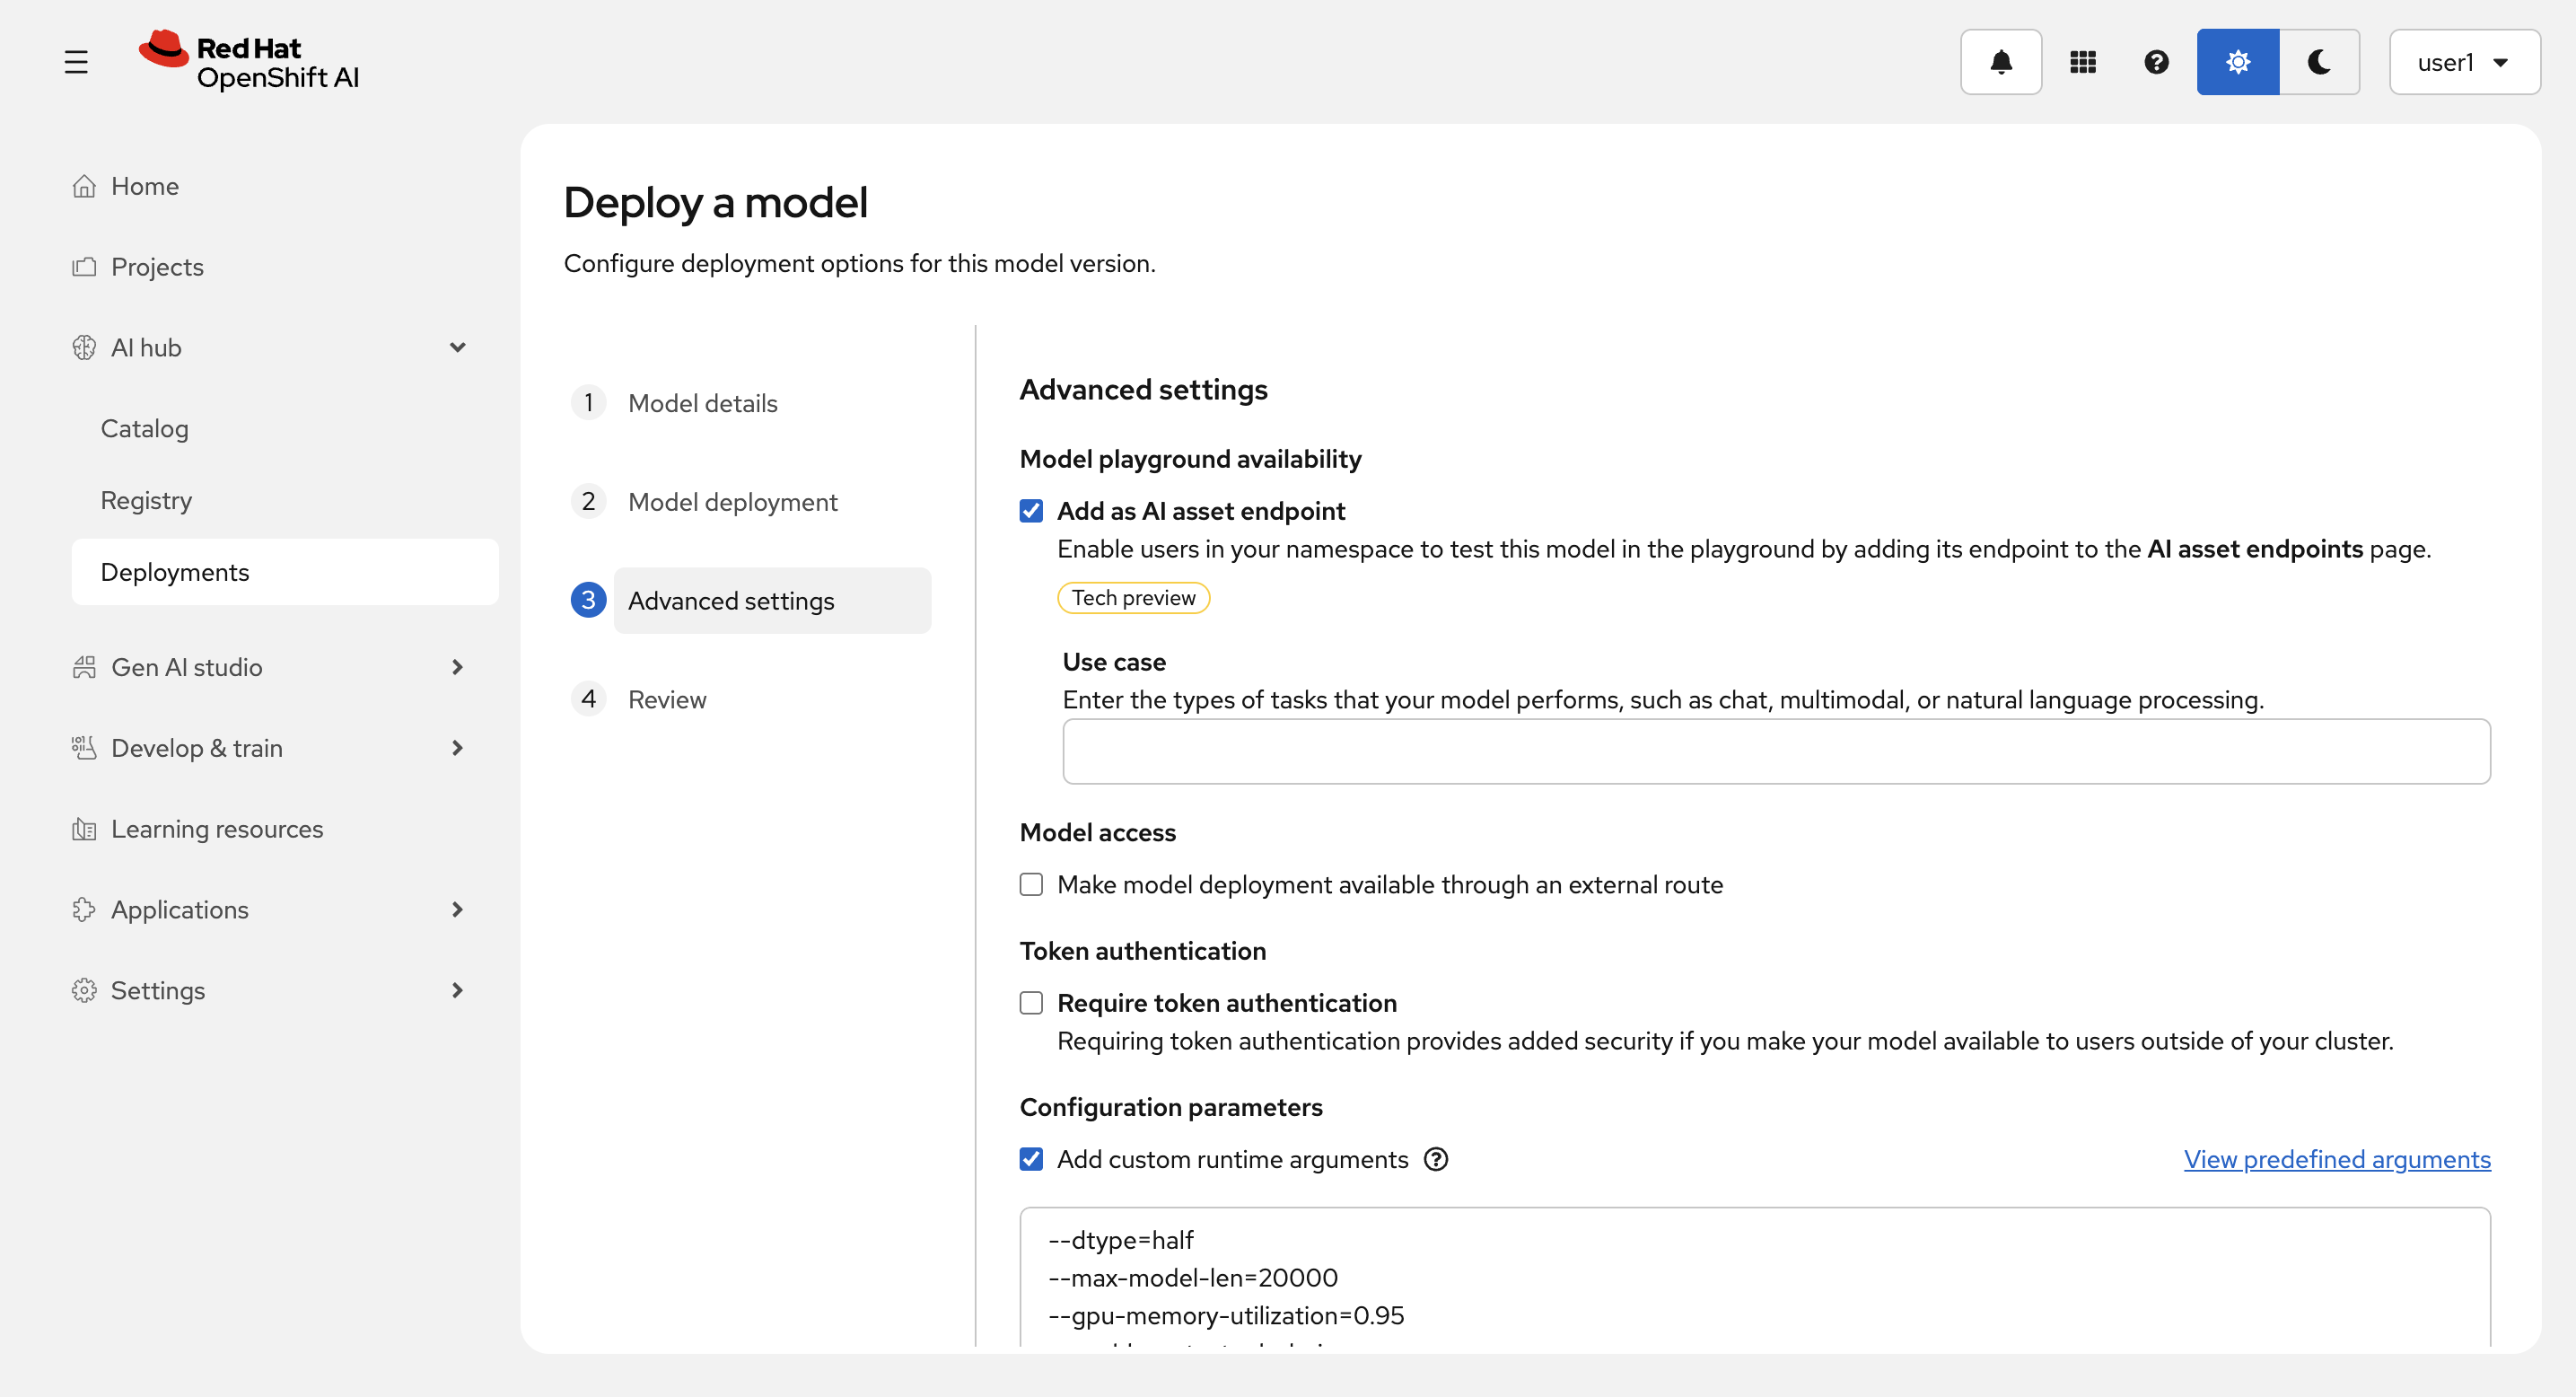
パラメーターに以下を入力して、Next を選択します。
--dtype=half
--max-model-len=20000
--gpu-memory-utilization=0.95
--enable-auto-tool-choice
--tool-call-parser=llama3_json
--chat-template=/opt/app-root/template/tool_chat_template_llama3.2_json.jinja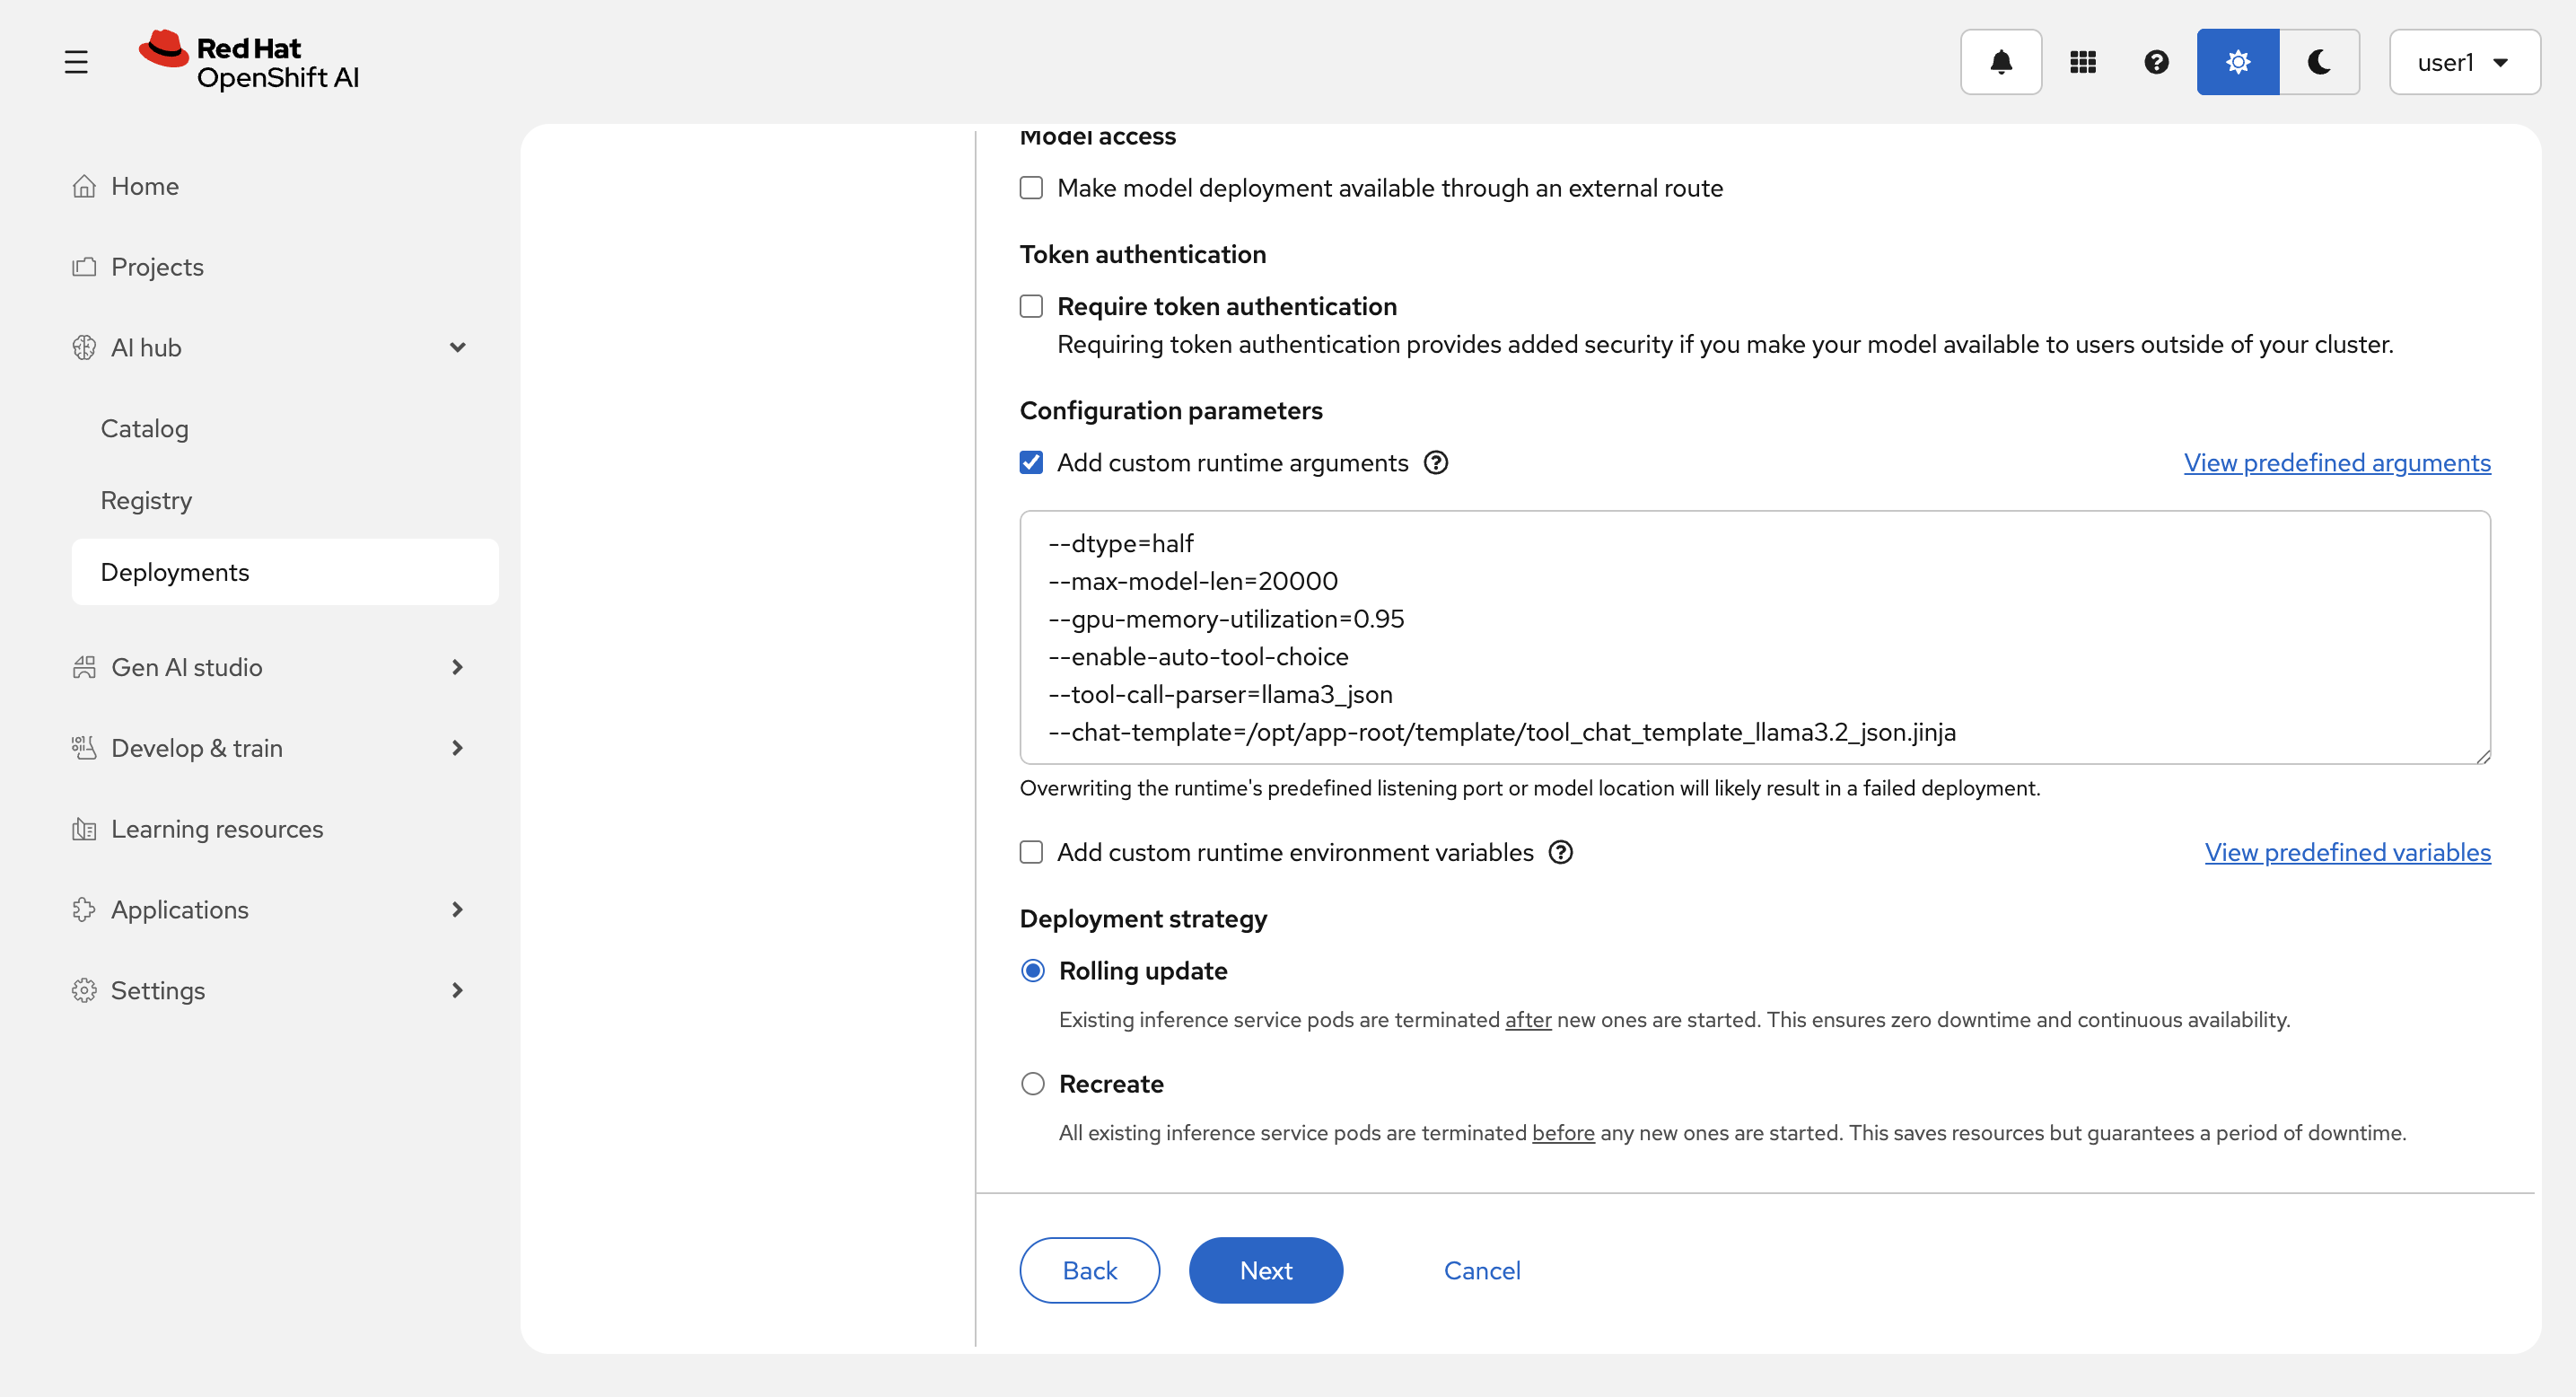
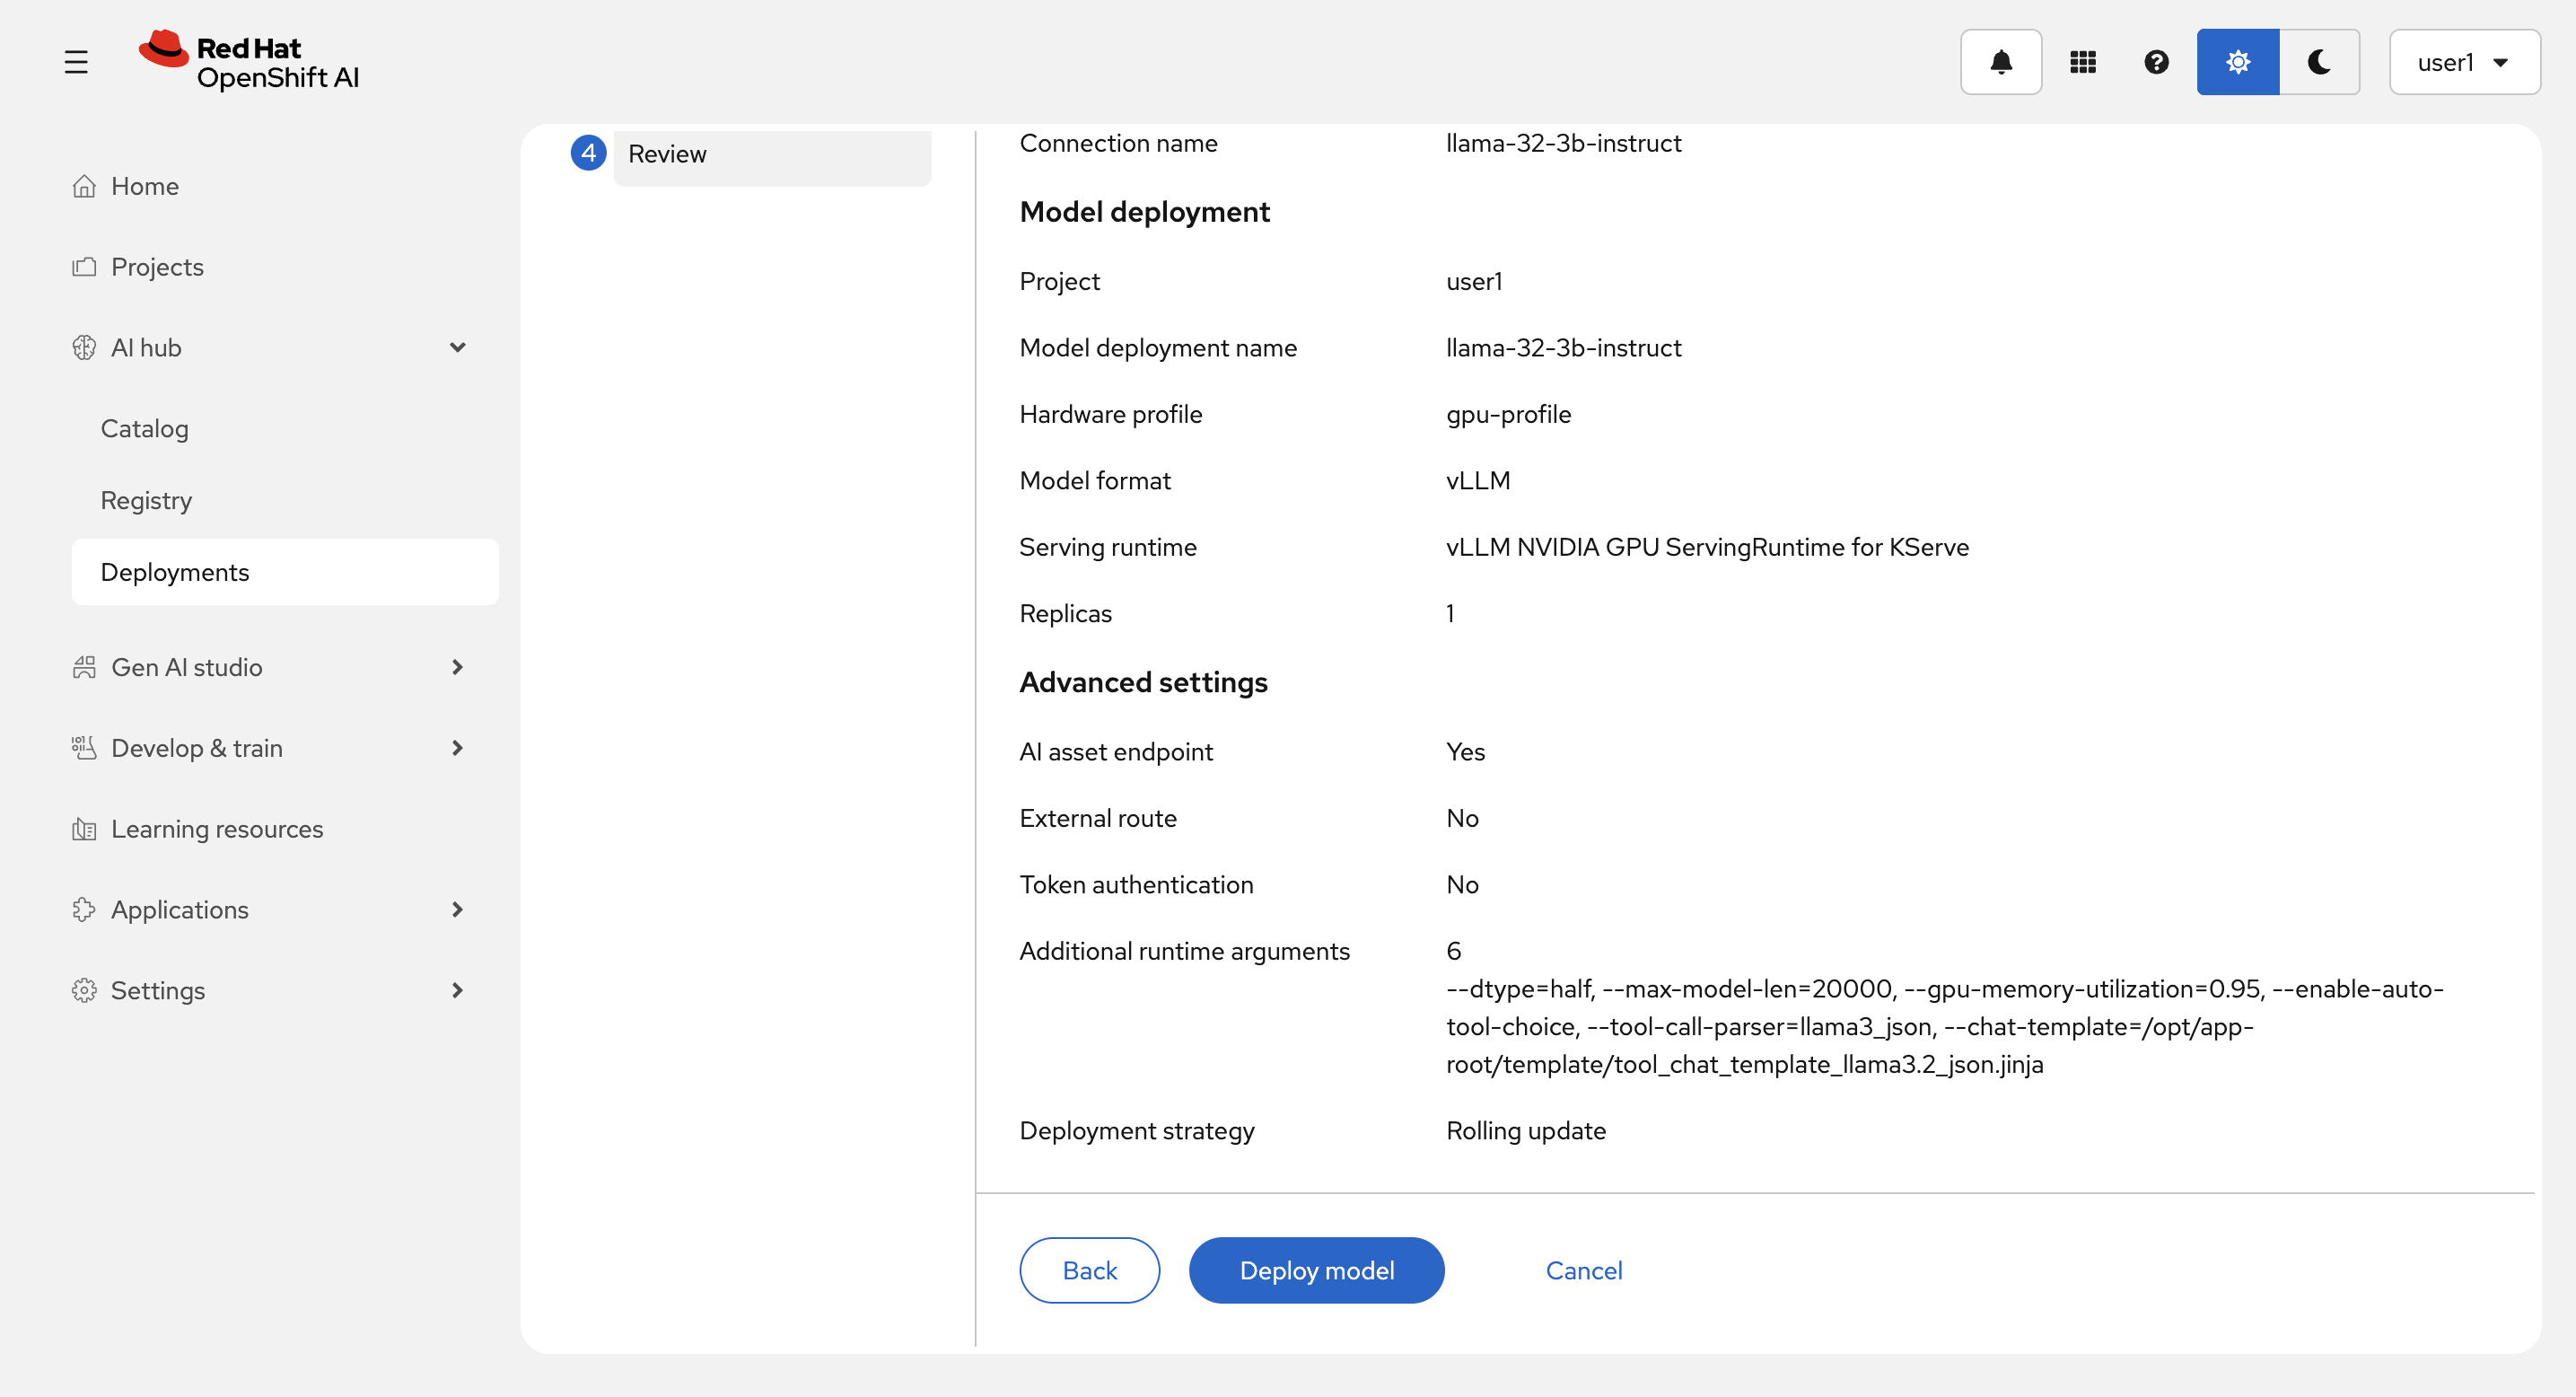
Review 画面で入力を確認して、Deploy model を選択します。
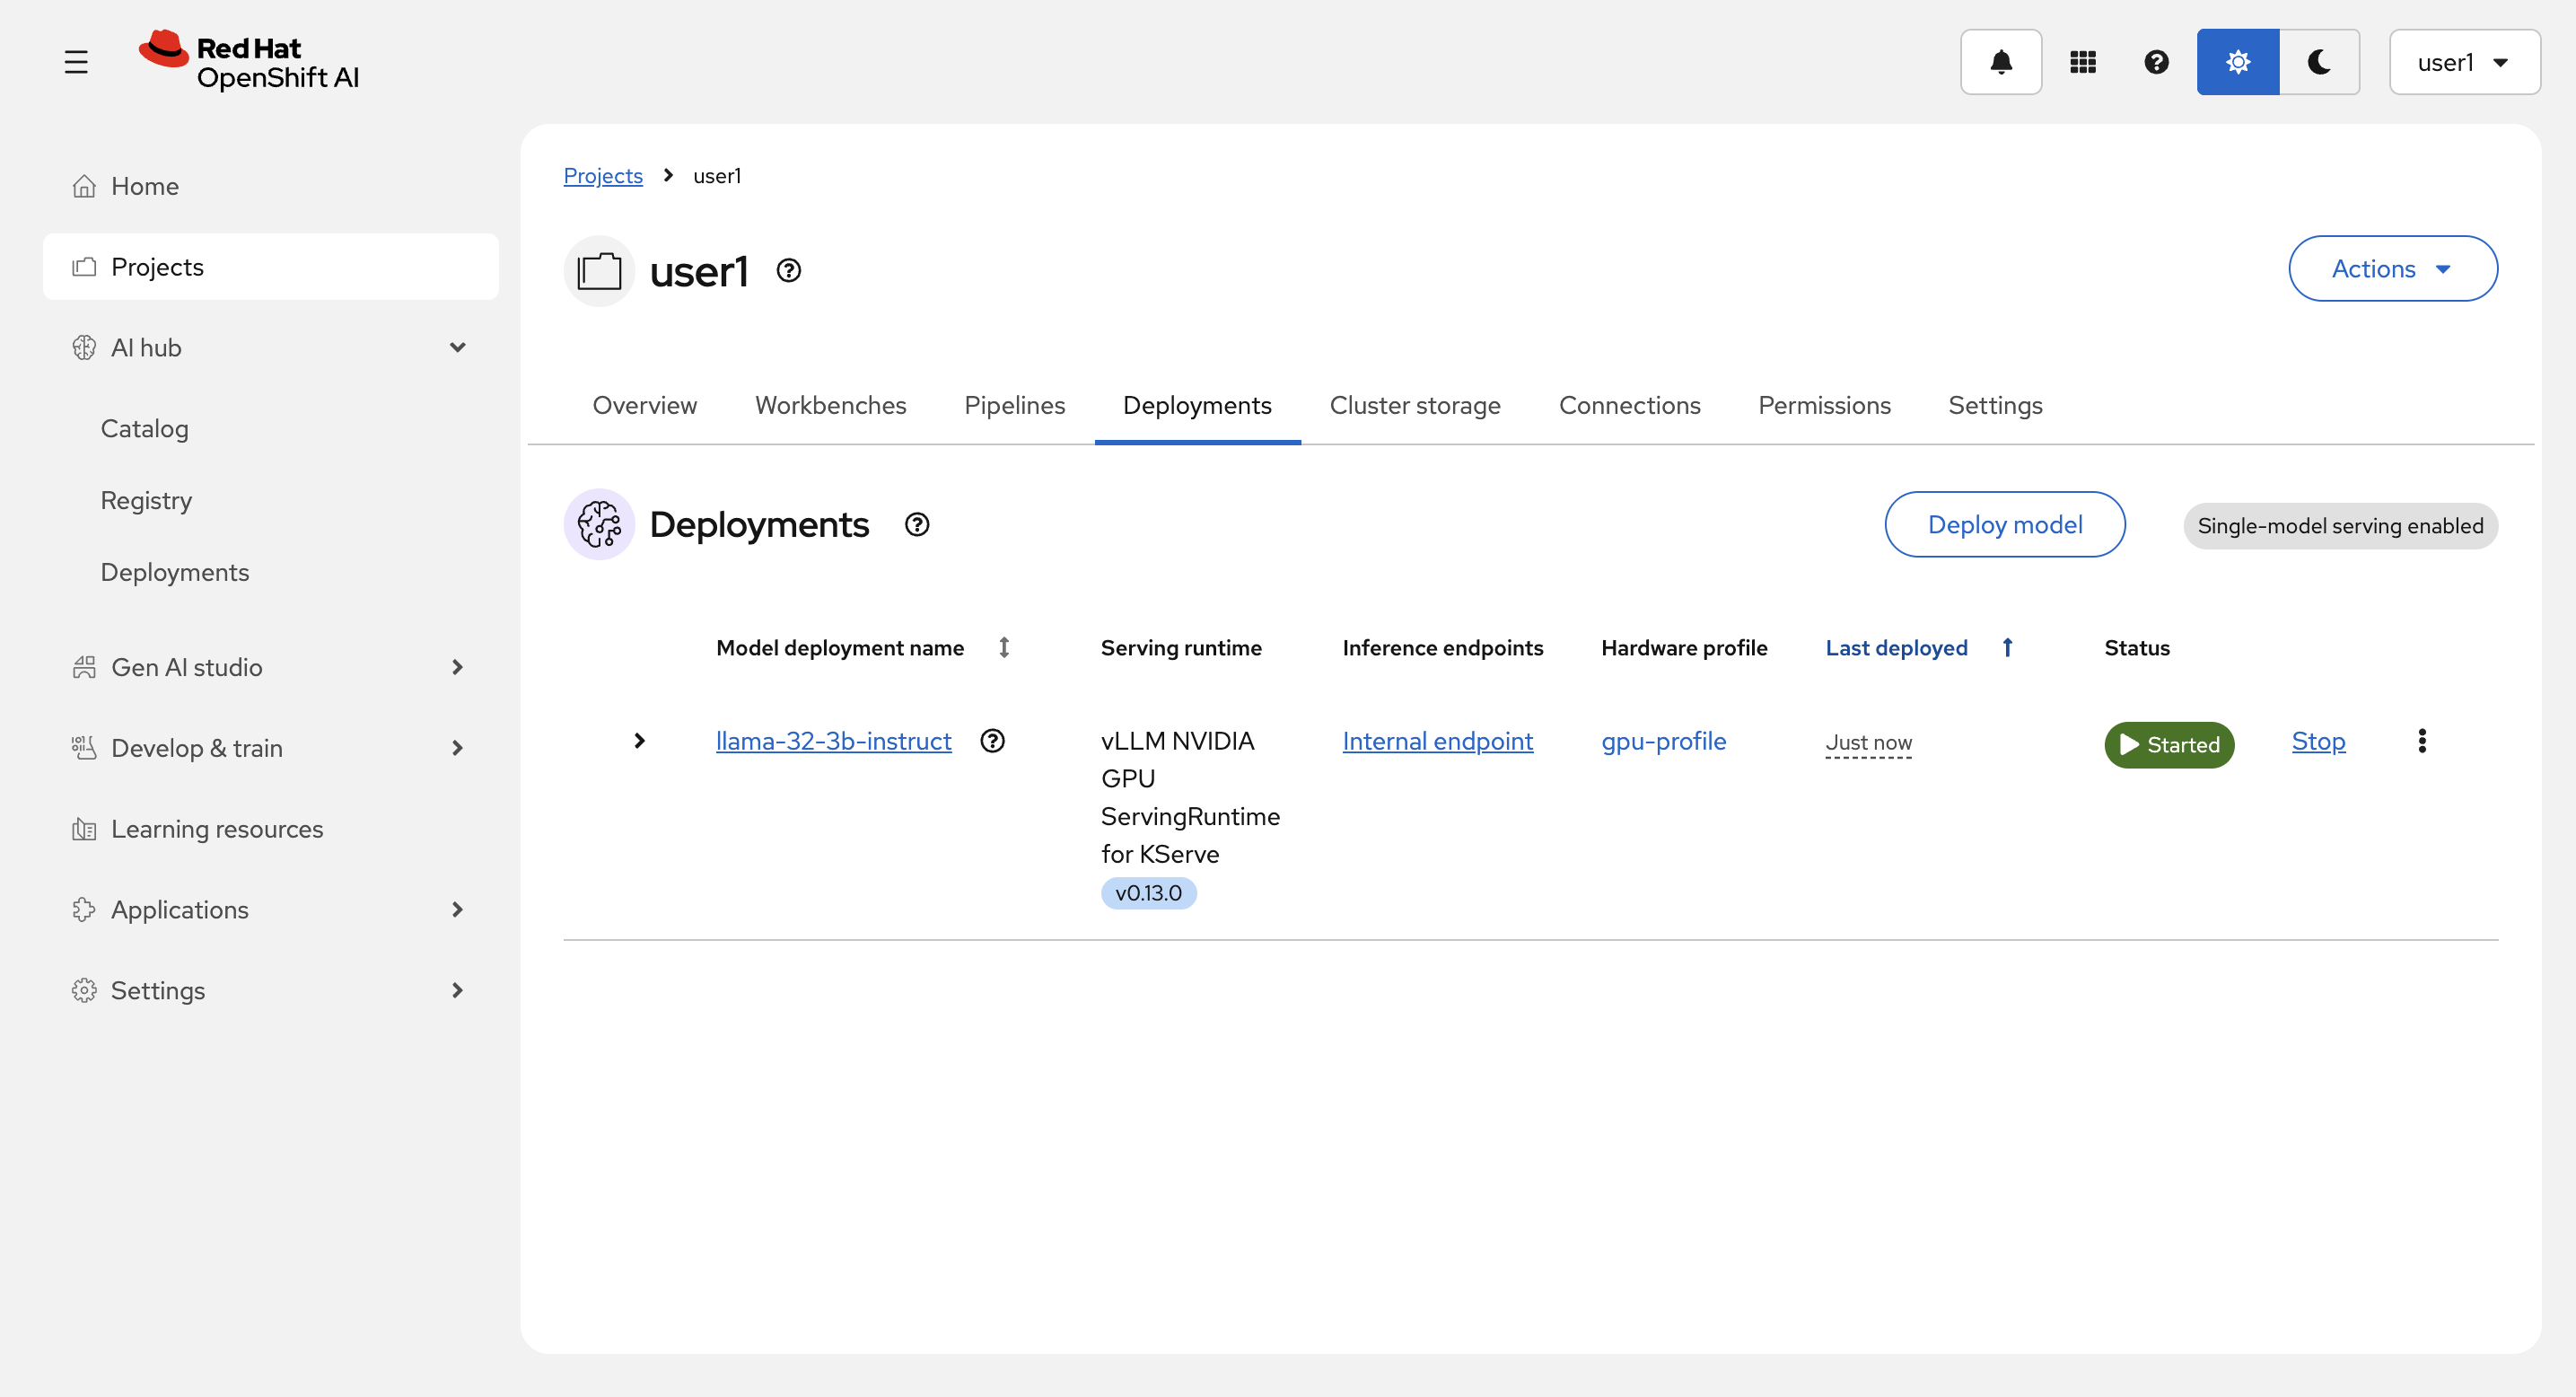
Deploy中:
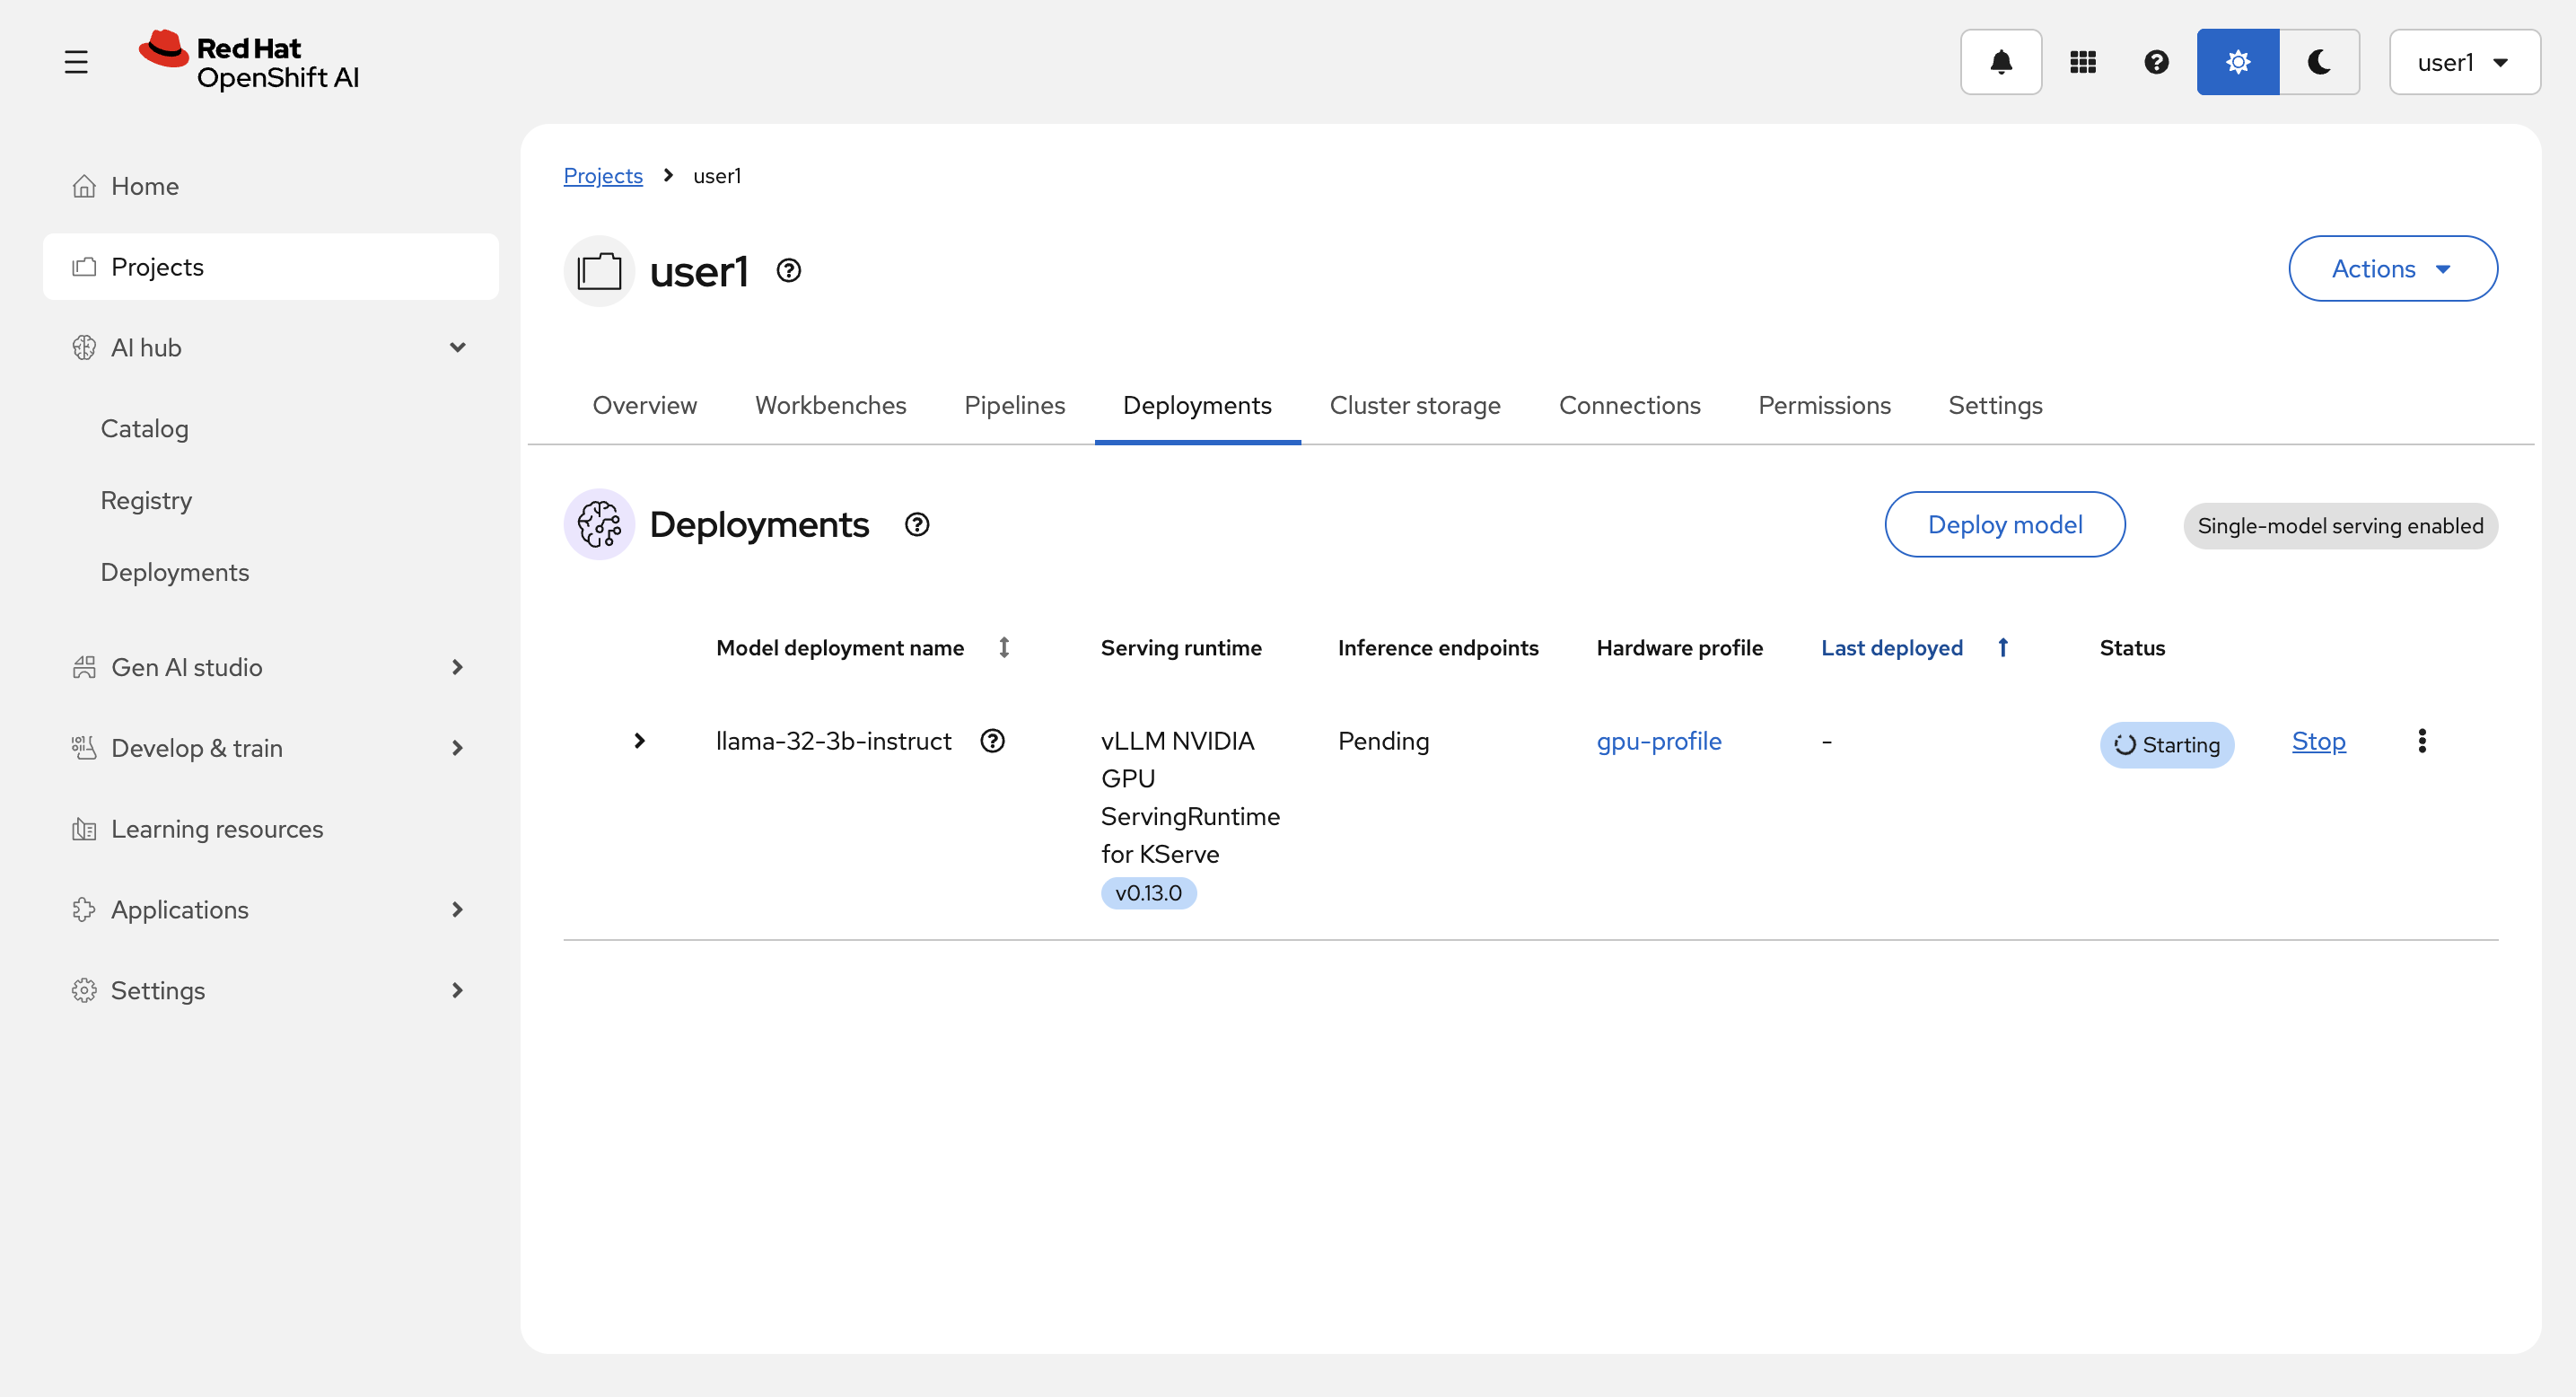
Deploy 完了後:
| 共有環境のため、モデルを1つ以上デプロイしないでください。GPUを確保してしまい、他の方がリソース不足になってしまいます。 |
その他のタブの中も見てみてください。 (補足)Workbenchについては後のパートで触れます。