GenAI Studio Playground で遊ぶ
OpenShift 3 の新規機能の Generative AI Playground を試してみましょう。
Playground の作成と実行
左の Gen AI studio の Playground メニューから、Create playground を選択してください。

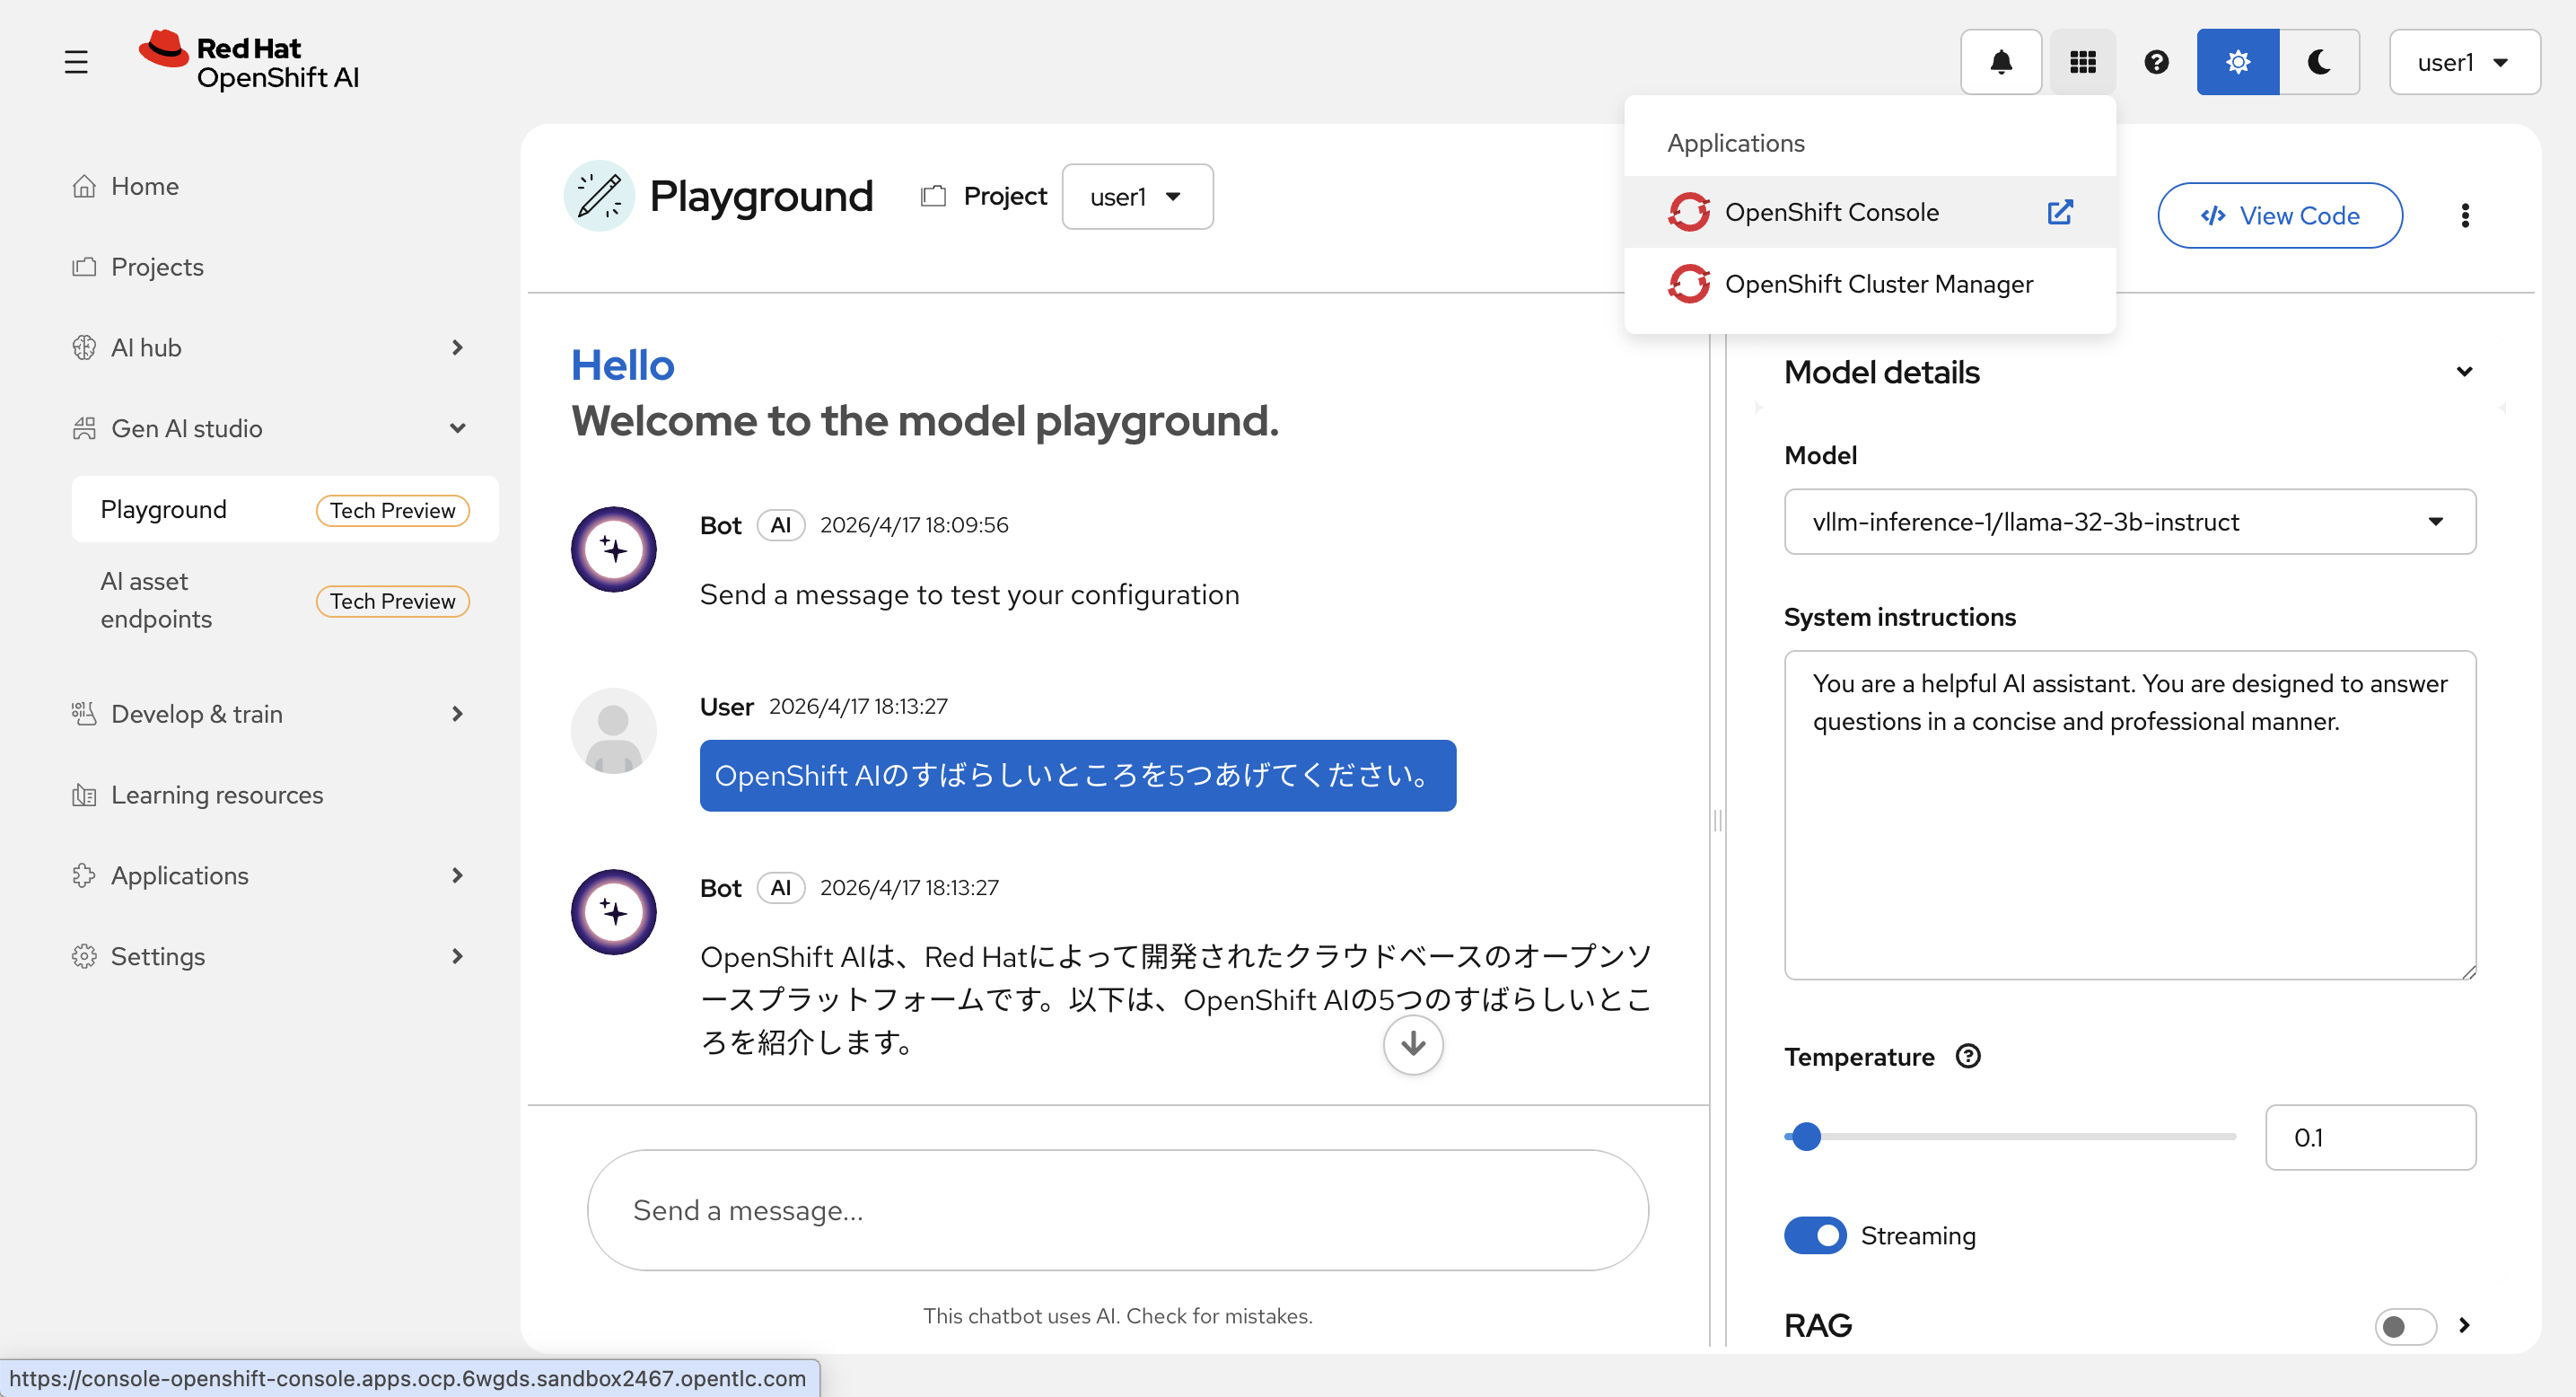
Available models に先ほどDeployした llama-32-3b-instruct が表示、チェックされていることを確認して、Create を選択します。

作成中:
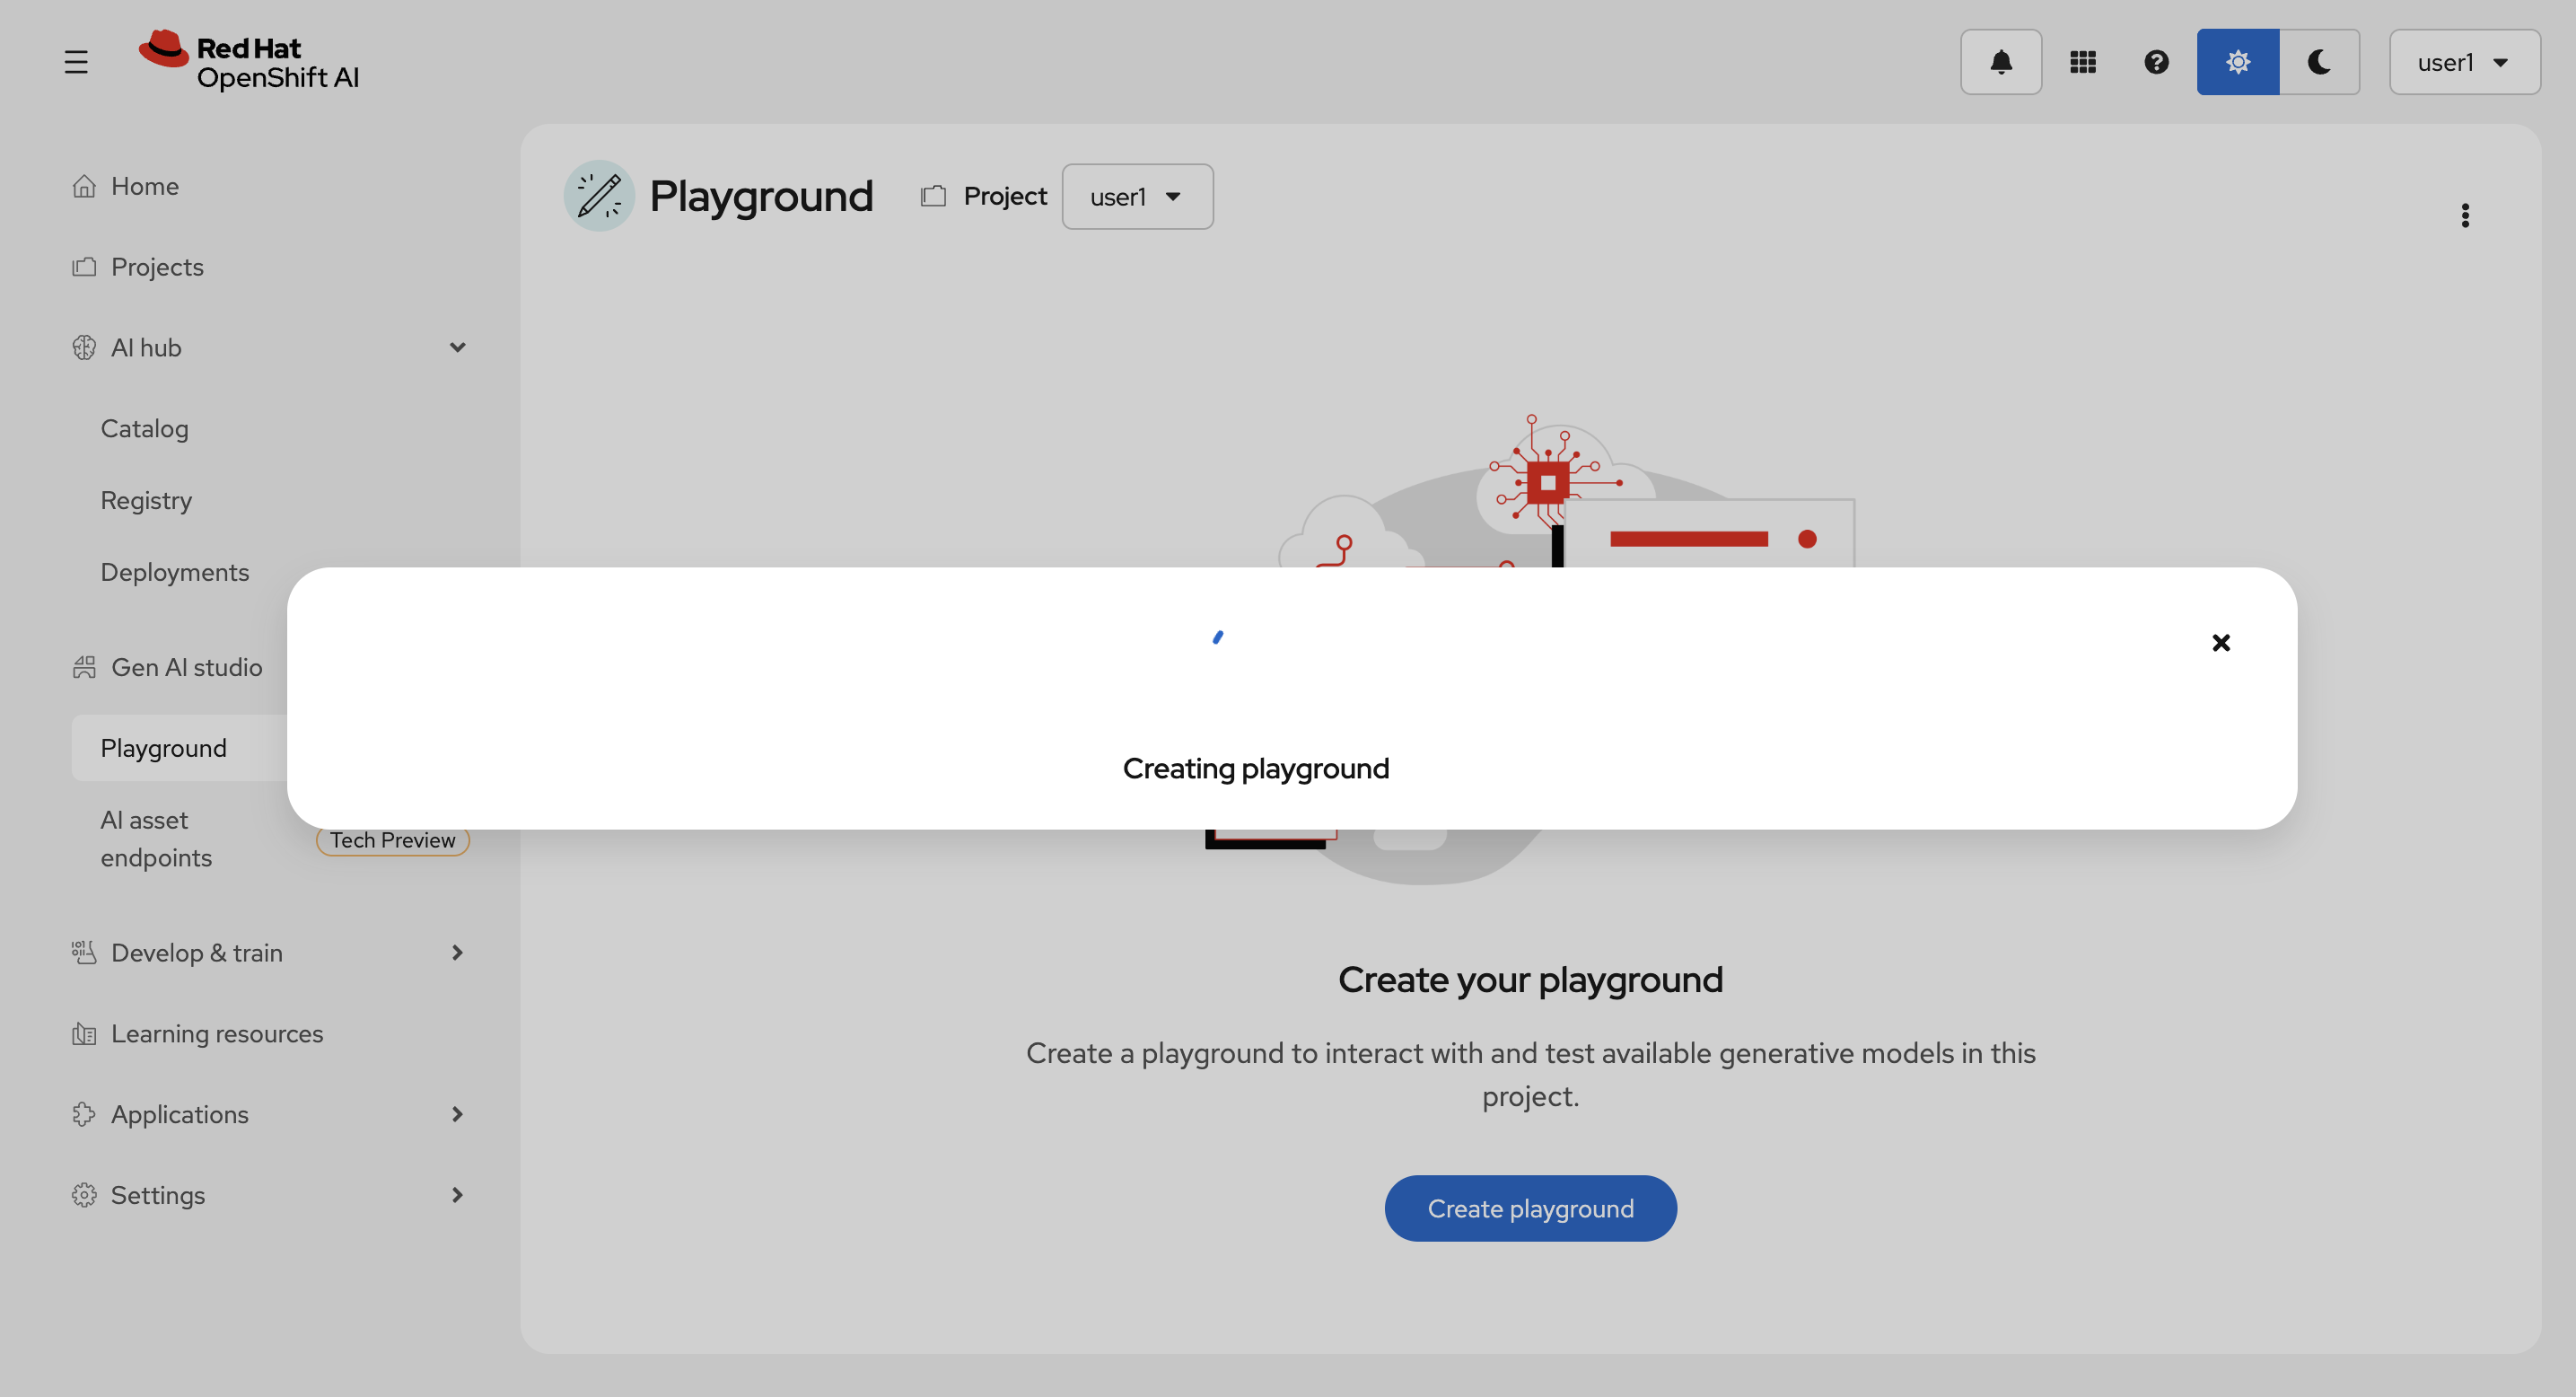
作成には数分かかることがあります。
| 5分たっても画面が切り替わらない場合は、ブラウザの画面をリロードしてください。 |
作成後:
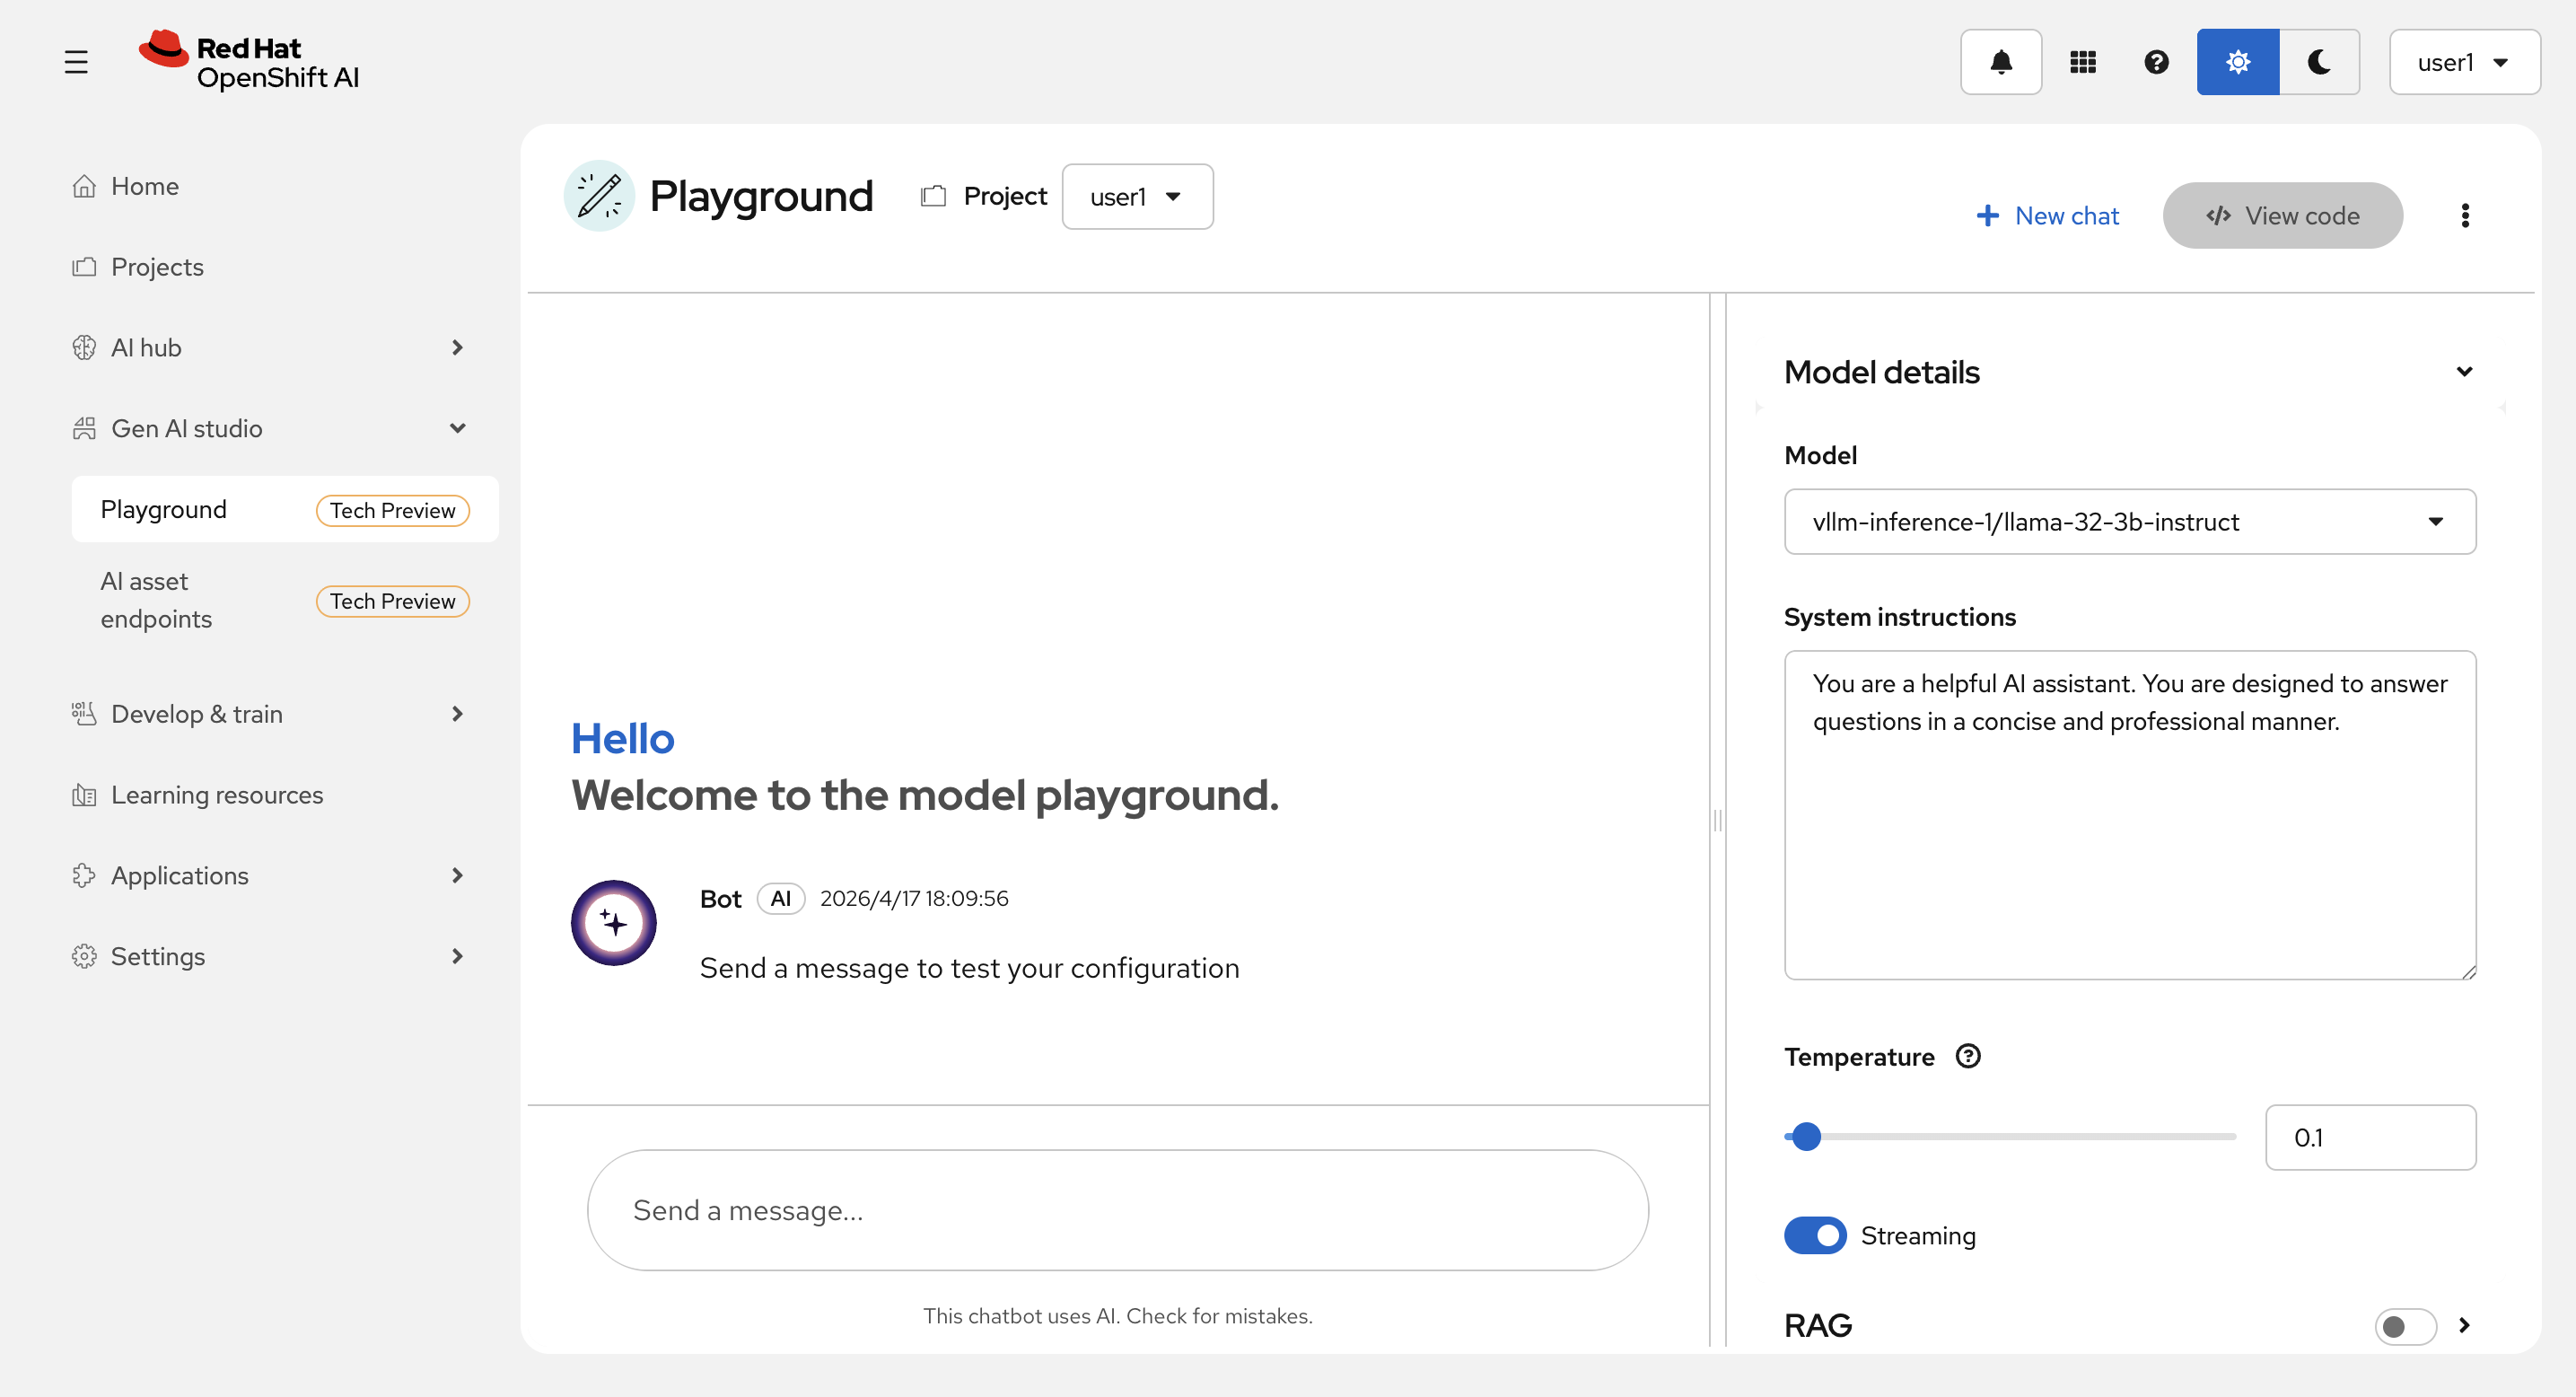
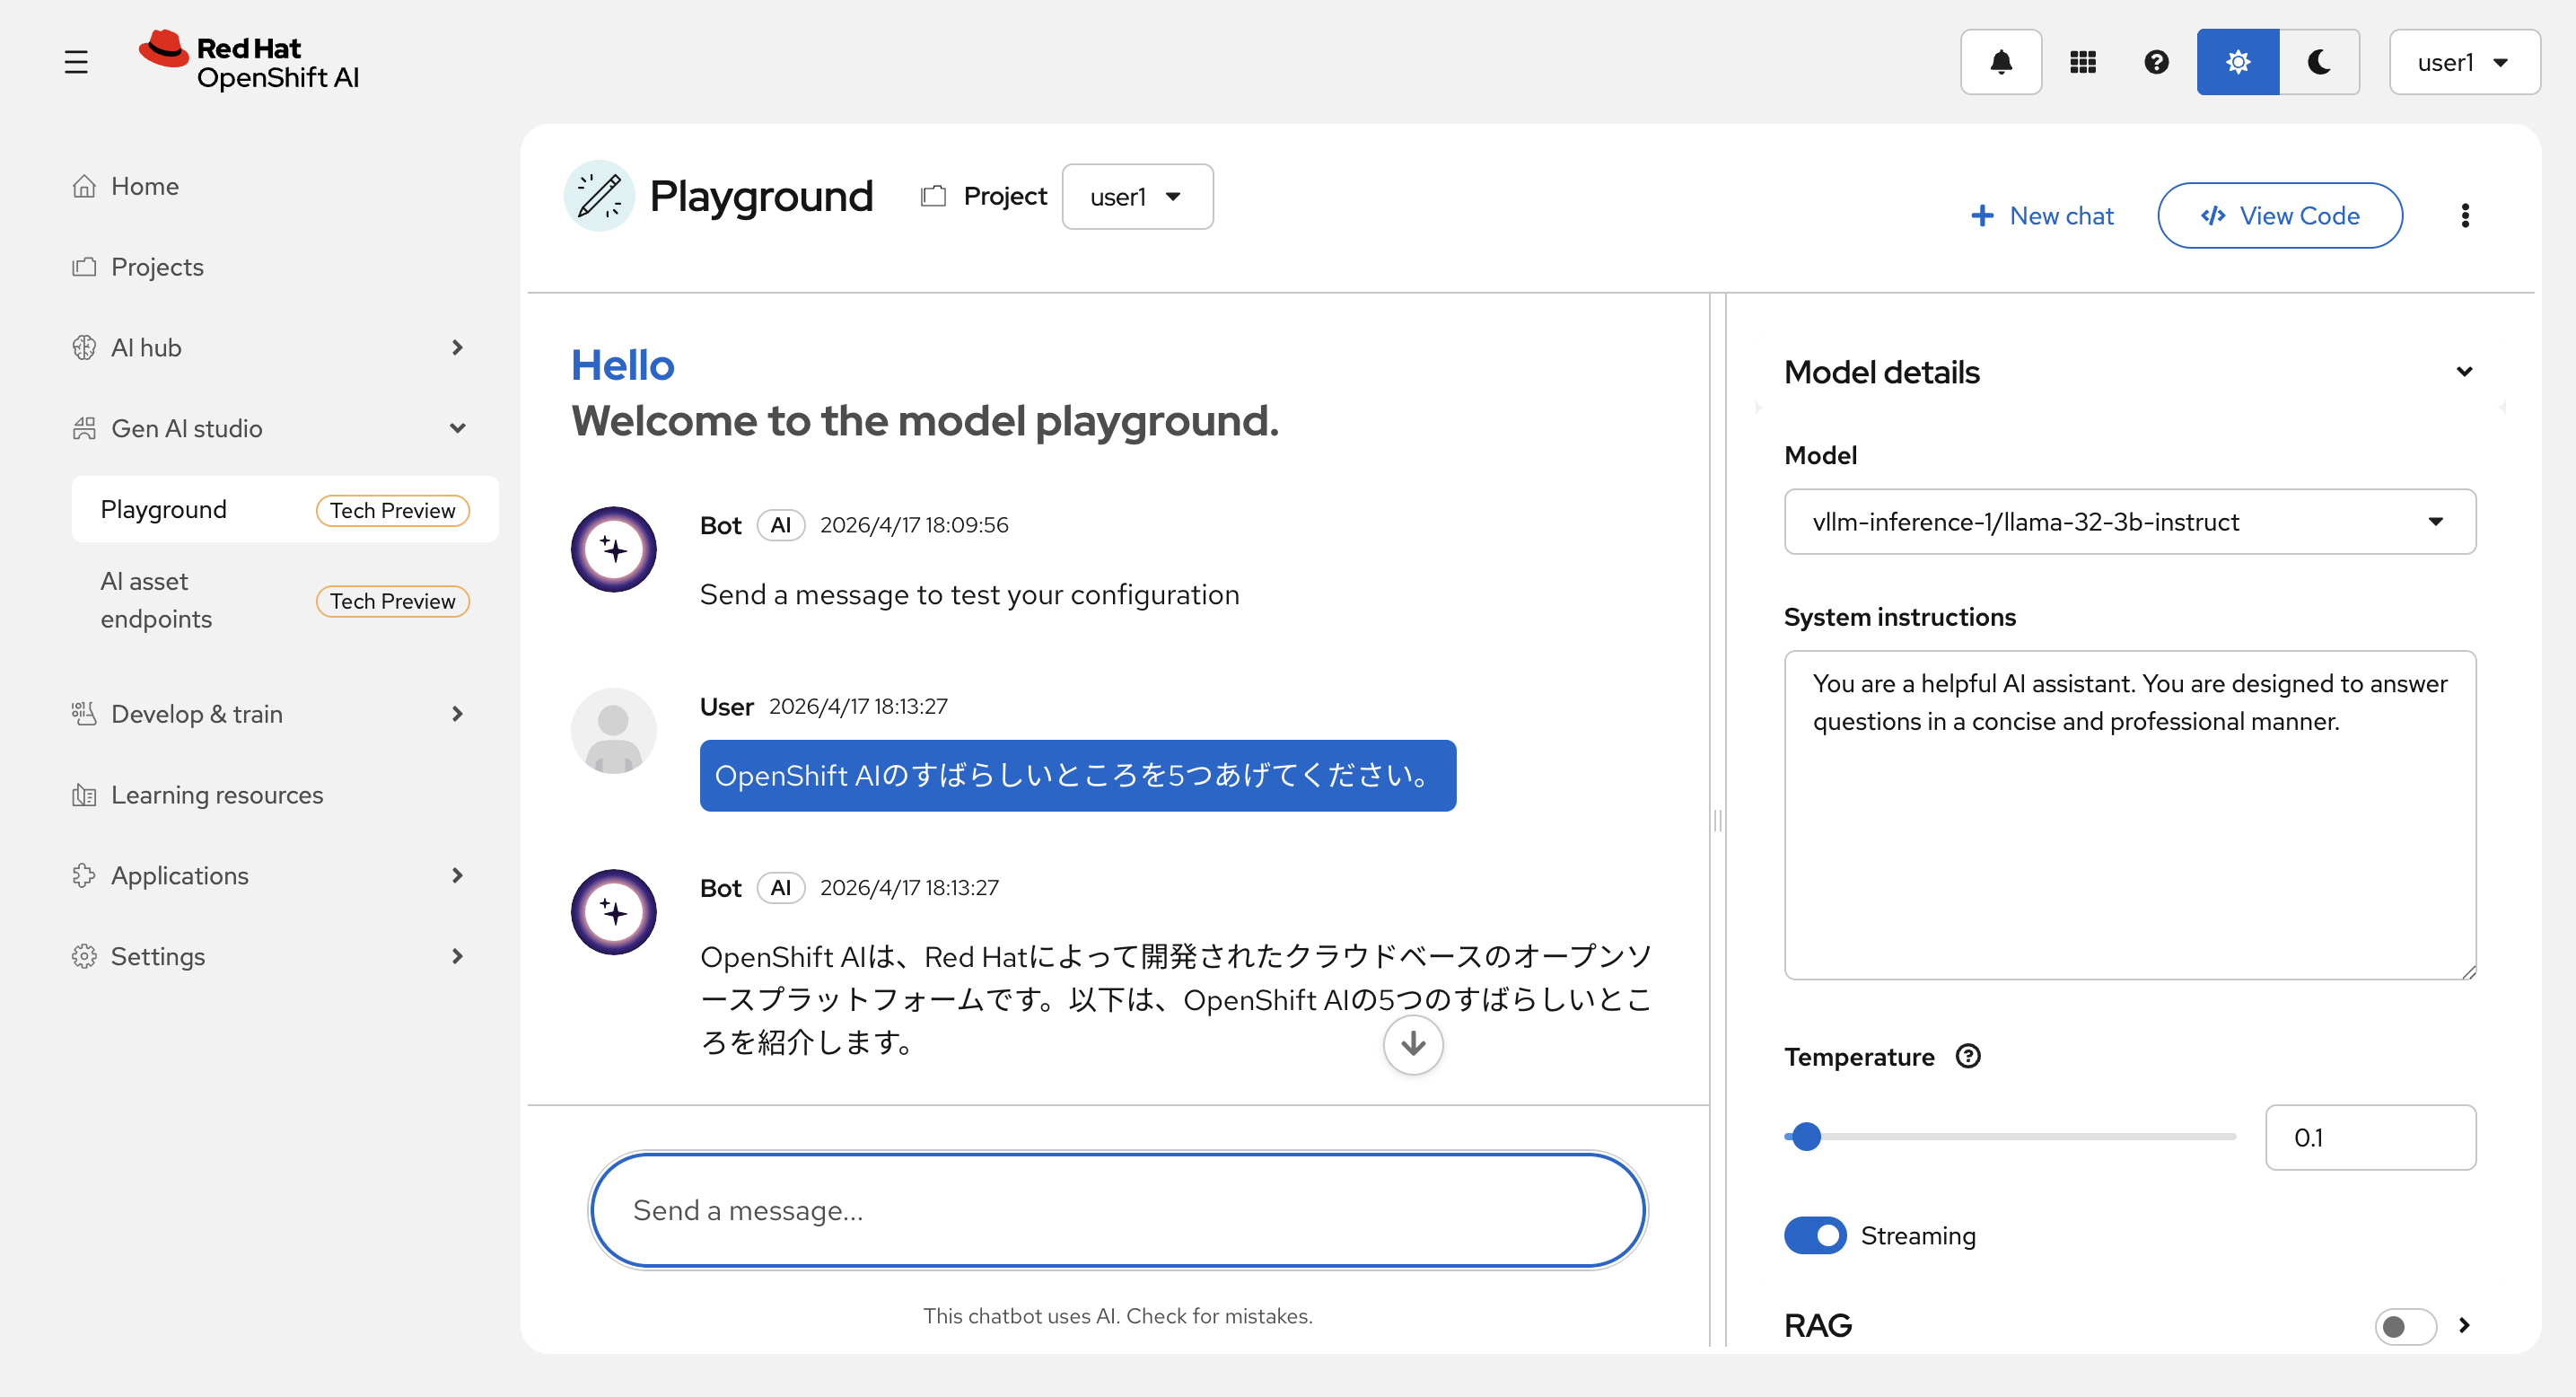
これで llama stack 経由でモデルにつながっているので、プロンプトやSystem instructionsやTemperatureを変更して、結果を試してみてください。
次のハンズオンの準備
-
次のハンズオンで使うため、右上の
View Codeを選択してコードを出力します。
例:
# Llama Stack Quickstart Script
#
# README:
# This example shows how to configure an assistant using the Llama Stack client.
# Before using this code, make sure of the following:
#
# 1. Required Packages:
#    - Install the required dependencies using pip:
#      pip install llama-stack-client
#    - NOTE: Verify the correct llama-stack-client version for your Llama Stack server instance,
#      then install that version as needed.
#
# 2. Llama Stack Server:
#    - Your Llama Stack instance must be running and accessible
#    - Set the LLAMA_STACK_URL variable to the base URL of your Llama Stack server
#
# 3. Model Configuration:
#    - The selected model (e.g., "llama3.2:3b") must be available in your Llama Stack deployment.
#
# 4. Tools (MCP Integration):
#    - Any tools used must be properly pre-configured in your Llama Stack setup.

# Configuration adjust as needed:
LLAMA_STACK_URL = ""
FILES_BASE_PATH = ""
input_text = "OpenShift AIのすばらしいところを5つあげてください。"
model_name = "vllm-inference-1/llama-32-3b-instruct"
vector_store_name = "0a041b9462caa4a31bac3567e0b6e6fd"
system_instructions = """You are a helpful AI assistant. You are designed to answer questions in a concise and professional manner.
"""

import os

from llama_stack_client import LlamaStackClient

client = LlamaStackClient(base_url=LLAMA_STACK_URL)

# Create vector store
vector_store = client.vector_stores.create(
    name=vector_store_name,
    extra_body={
        "provider_id": "milvus"
    }
)

config = {
    "input": input_text,
    "model": model_name,
    "instructions": system_instructions
}

response = client.responses.create(**config)

print("agent>", response.output_text)
これをどこかに保存しておいてください。
-
次にllama stack server の URL を確認します。 右上の
?の左のアプリケーションメニューから OpenShift のコンソールを起動します。
左のメニューの ネットワーク > Service からプロジェクトをハンズオンの最初で作成した自分のプロジェクト user<xx> に設定します。
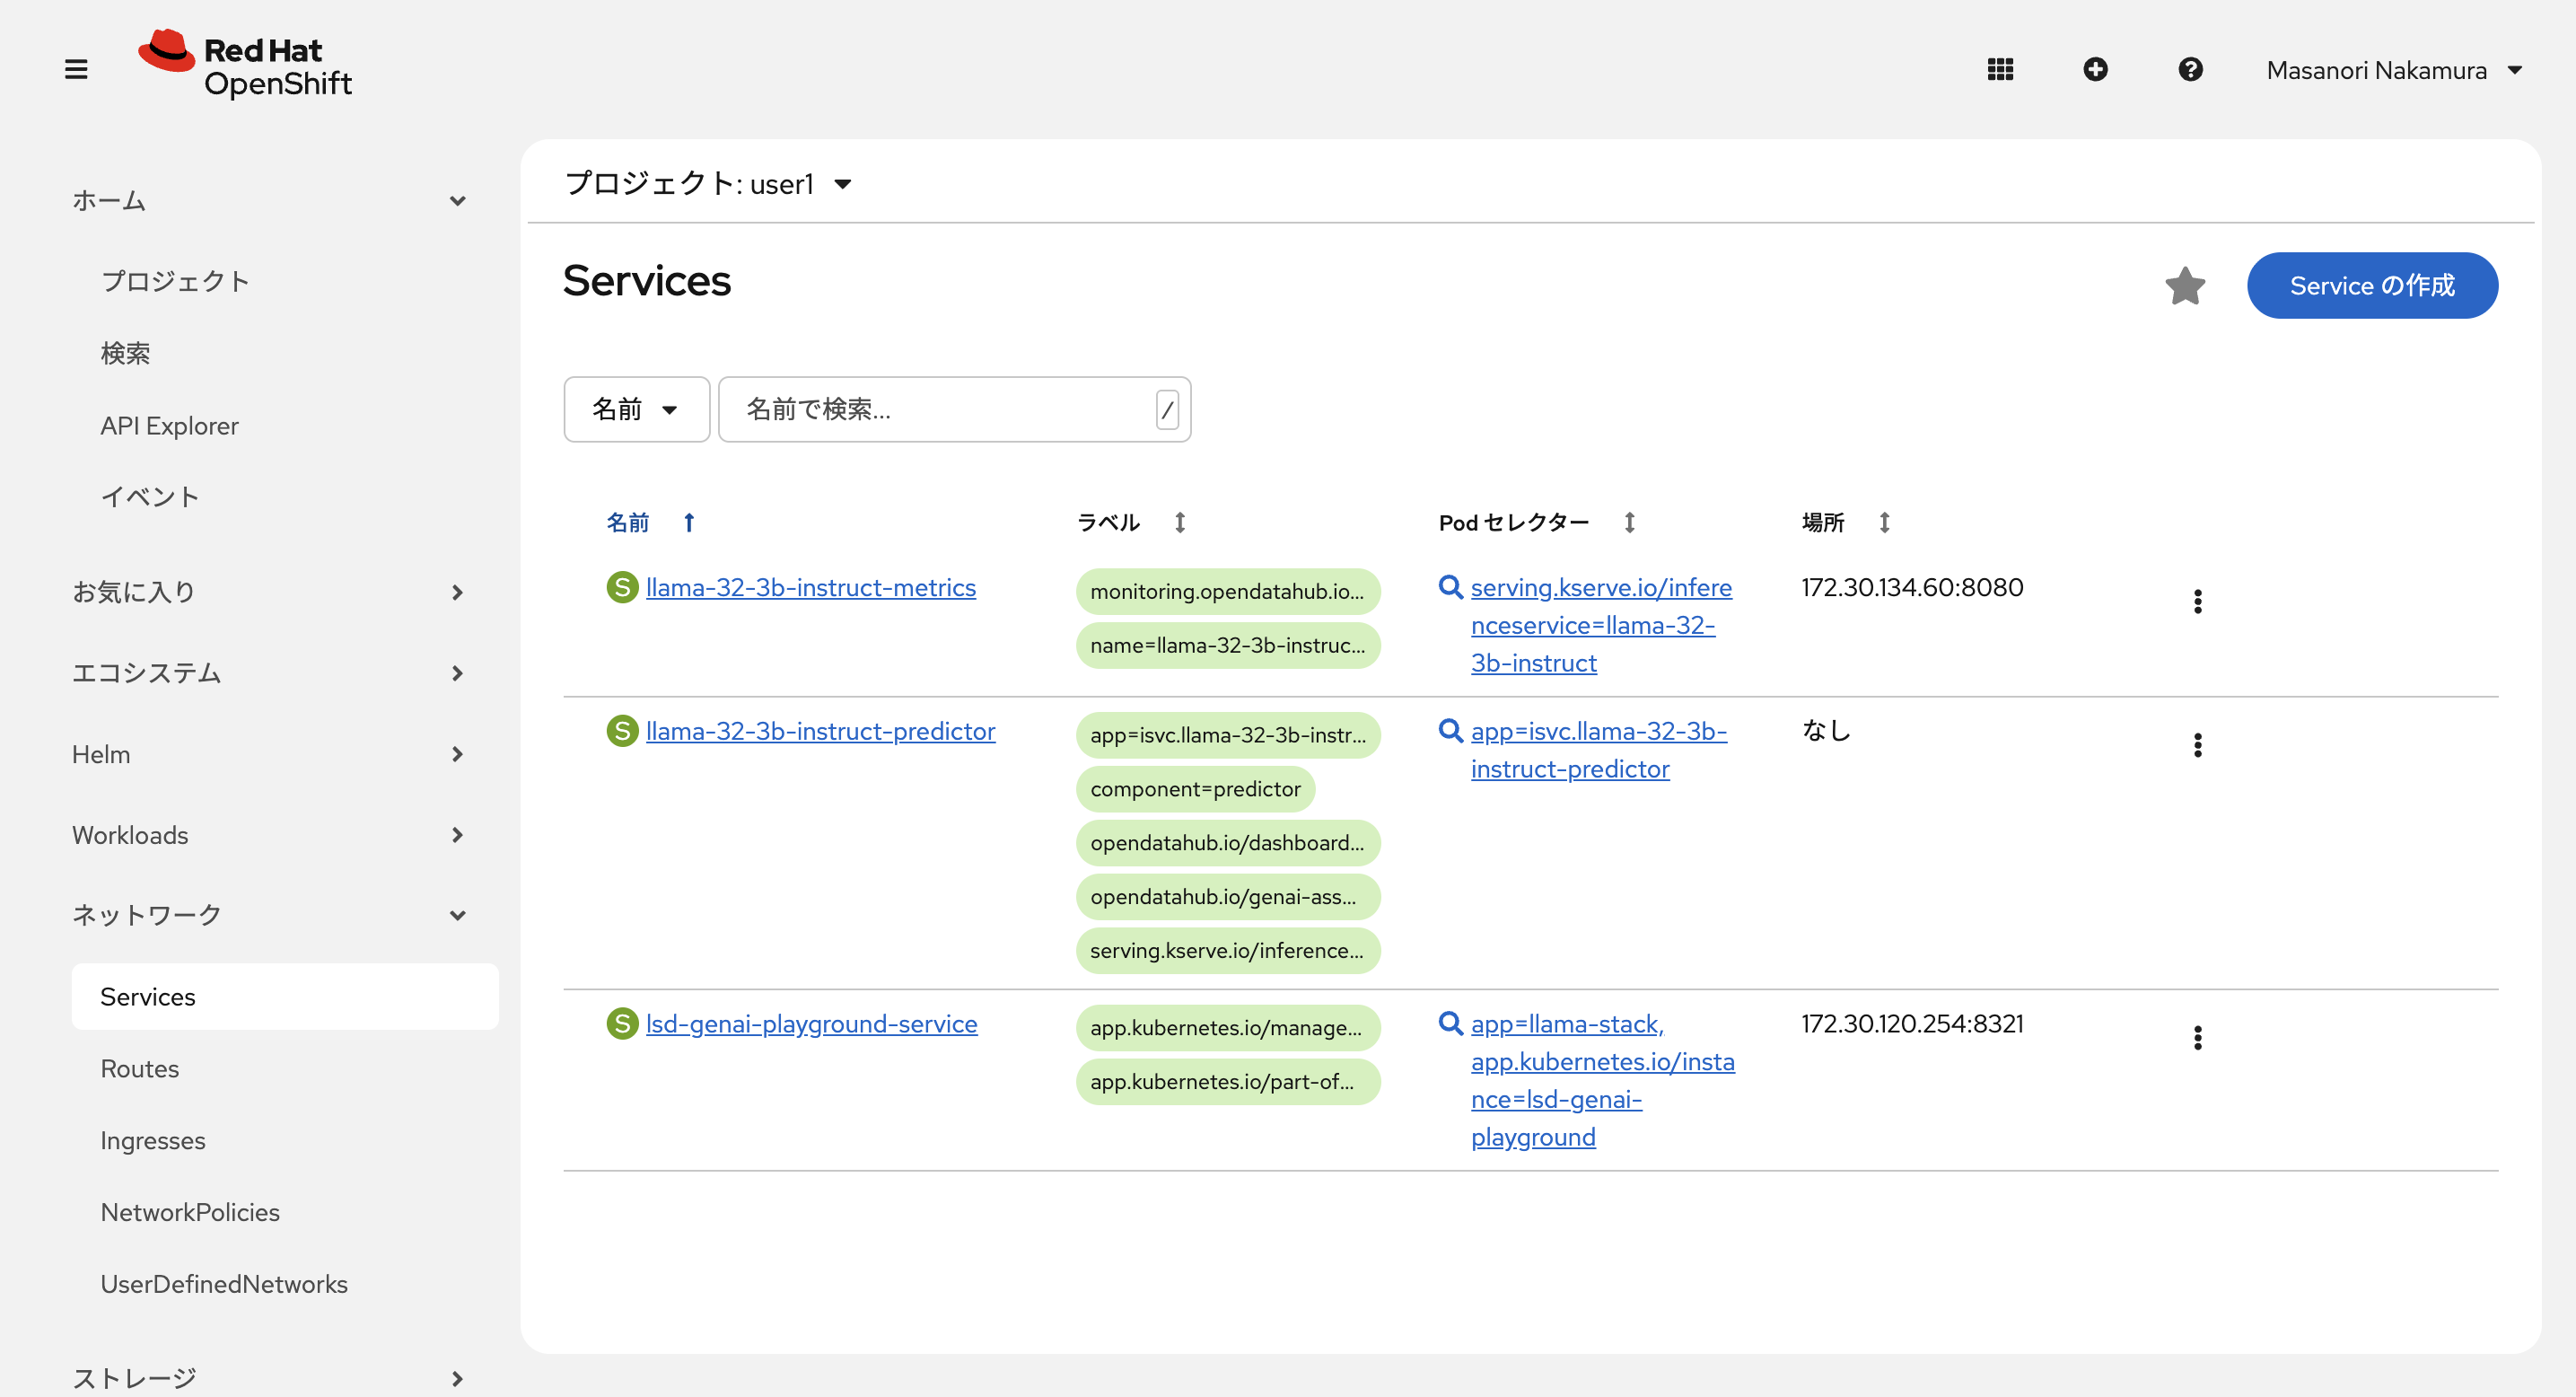
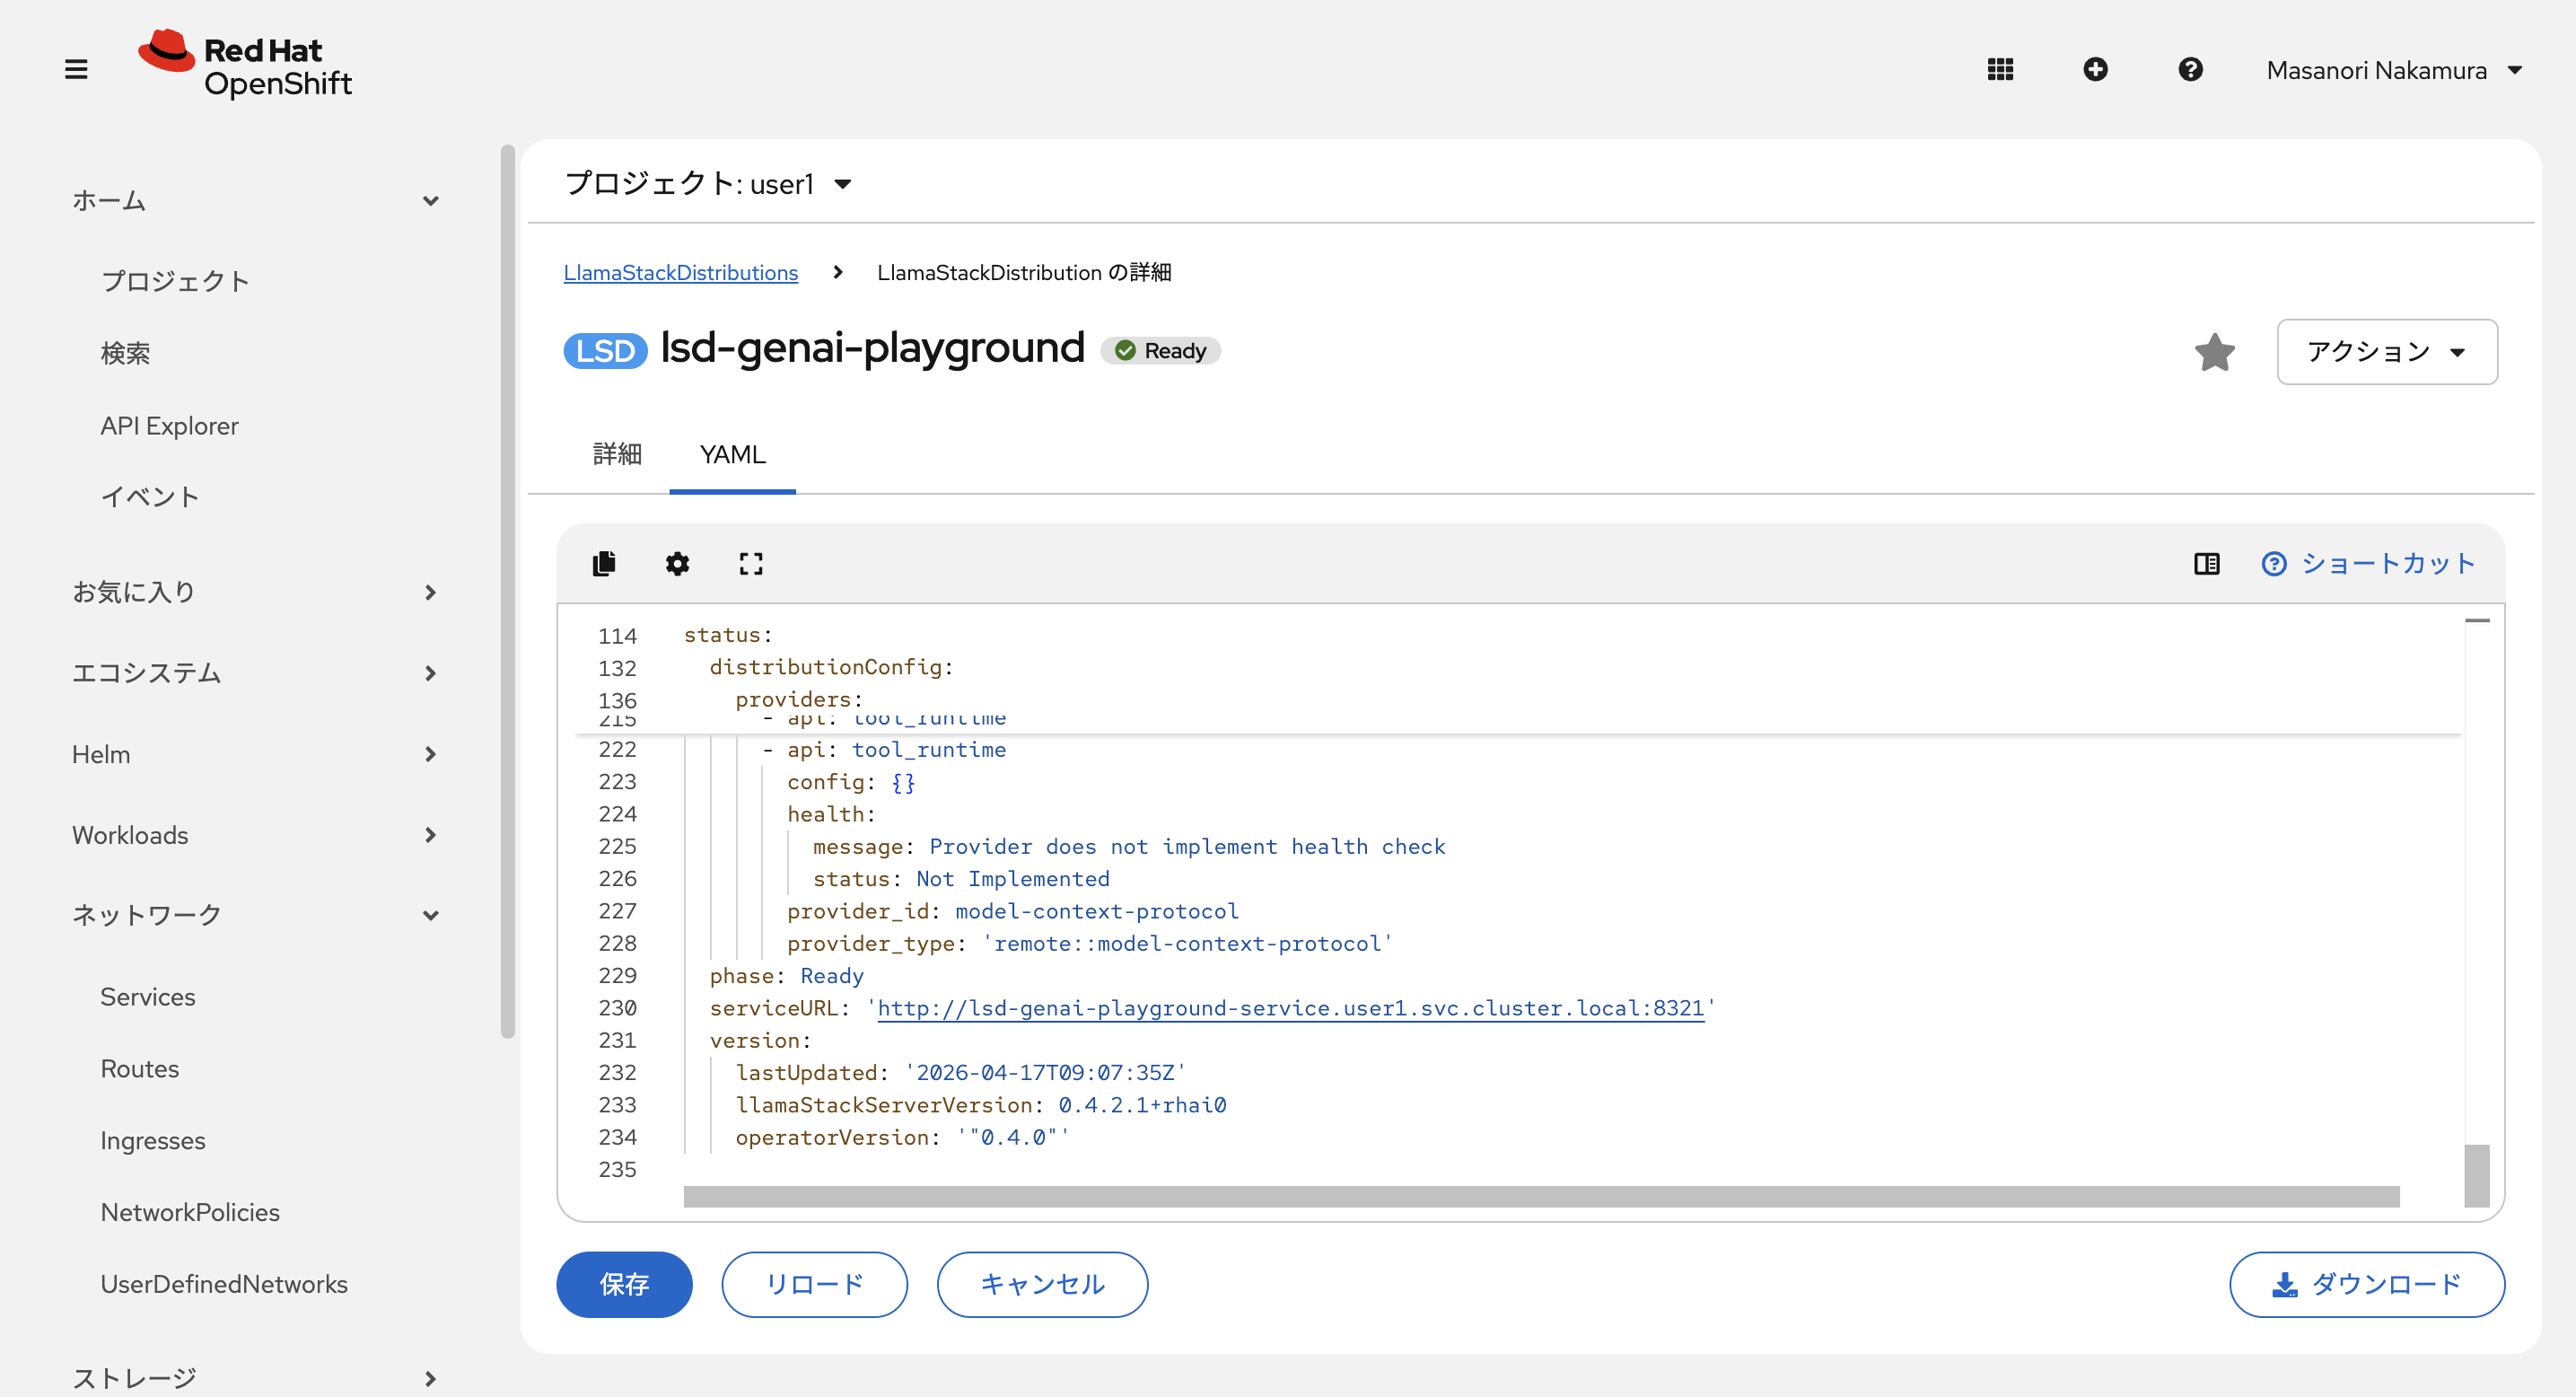
Service: lsd-genai-playground-service が先ほどの Playground で作成した llam stack server です。選択して中を確認してください。次のハンズオンではこのサービス名かホスト名にポート8321でアクセスします。
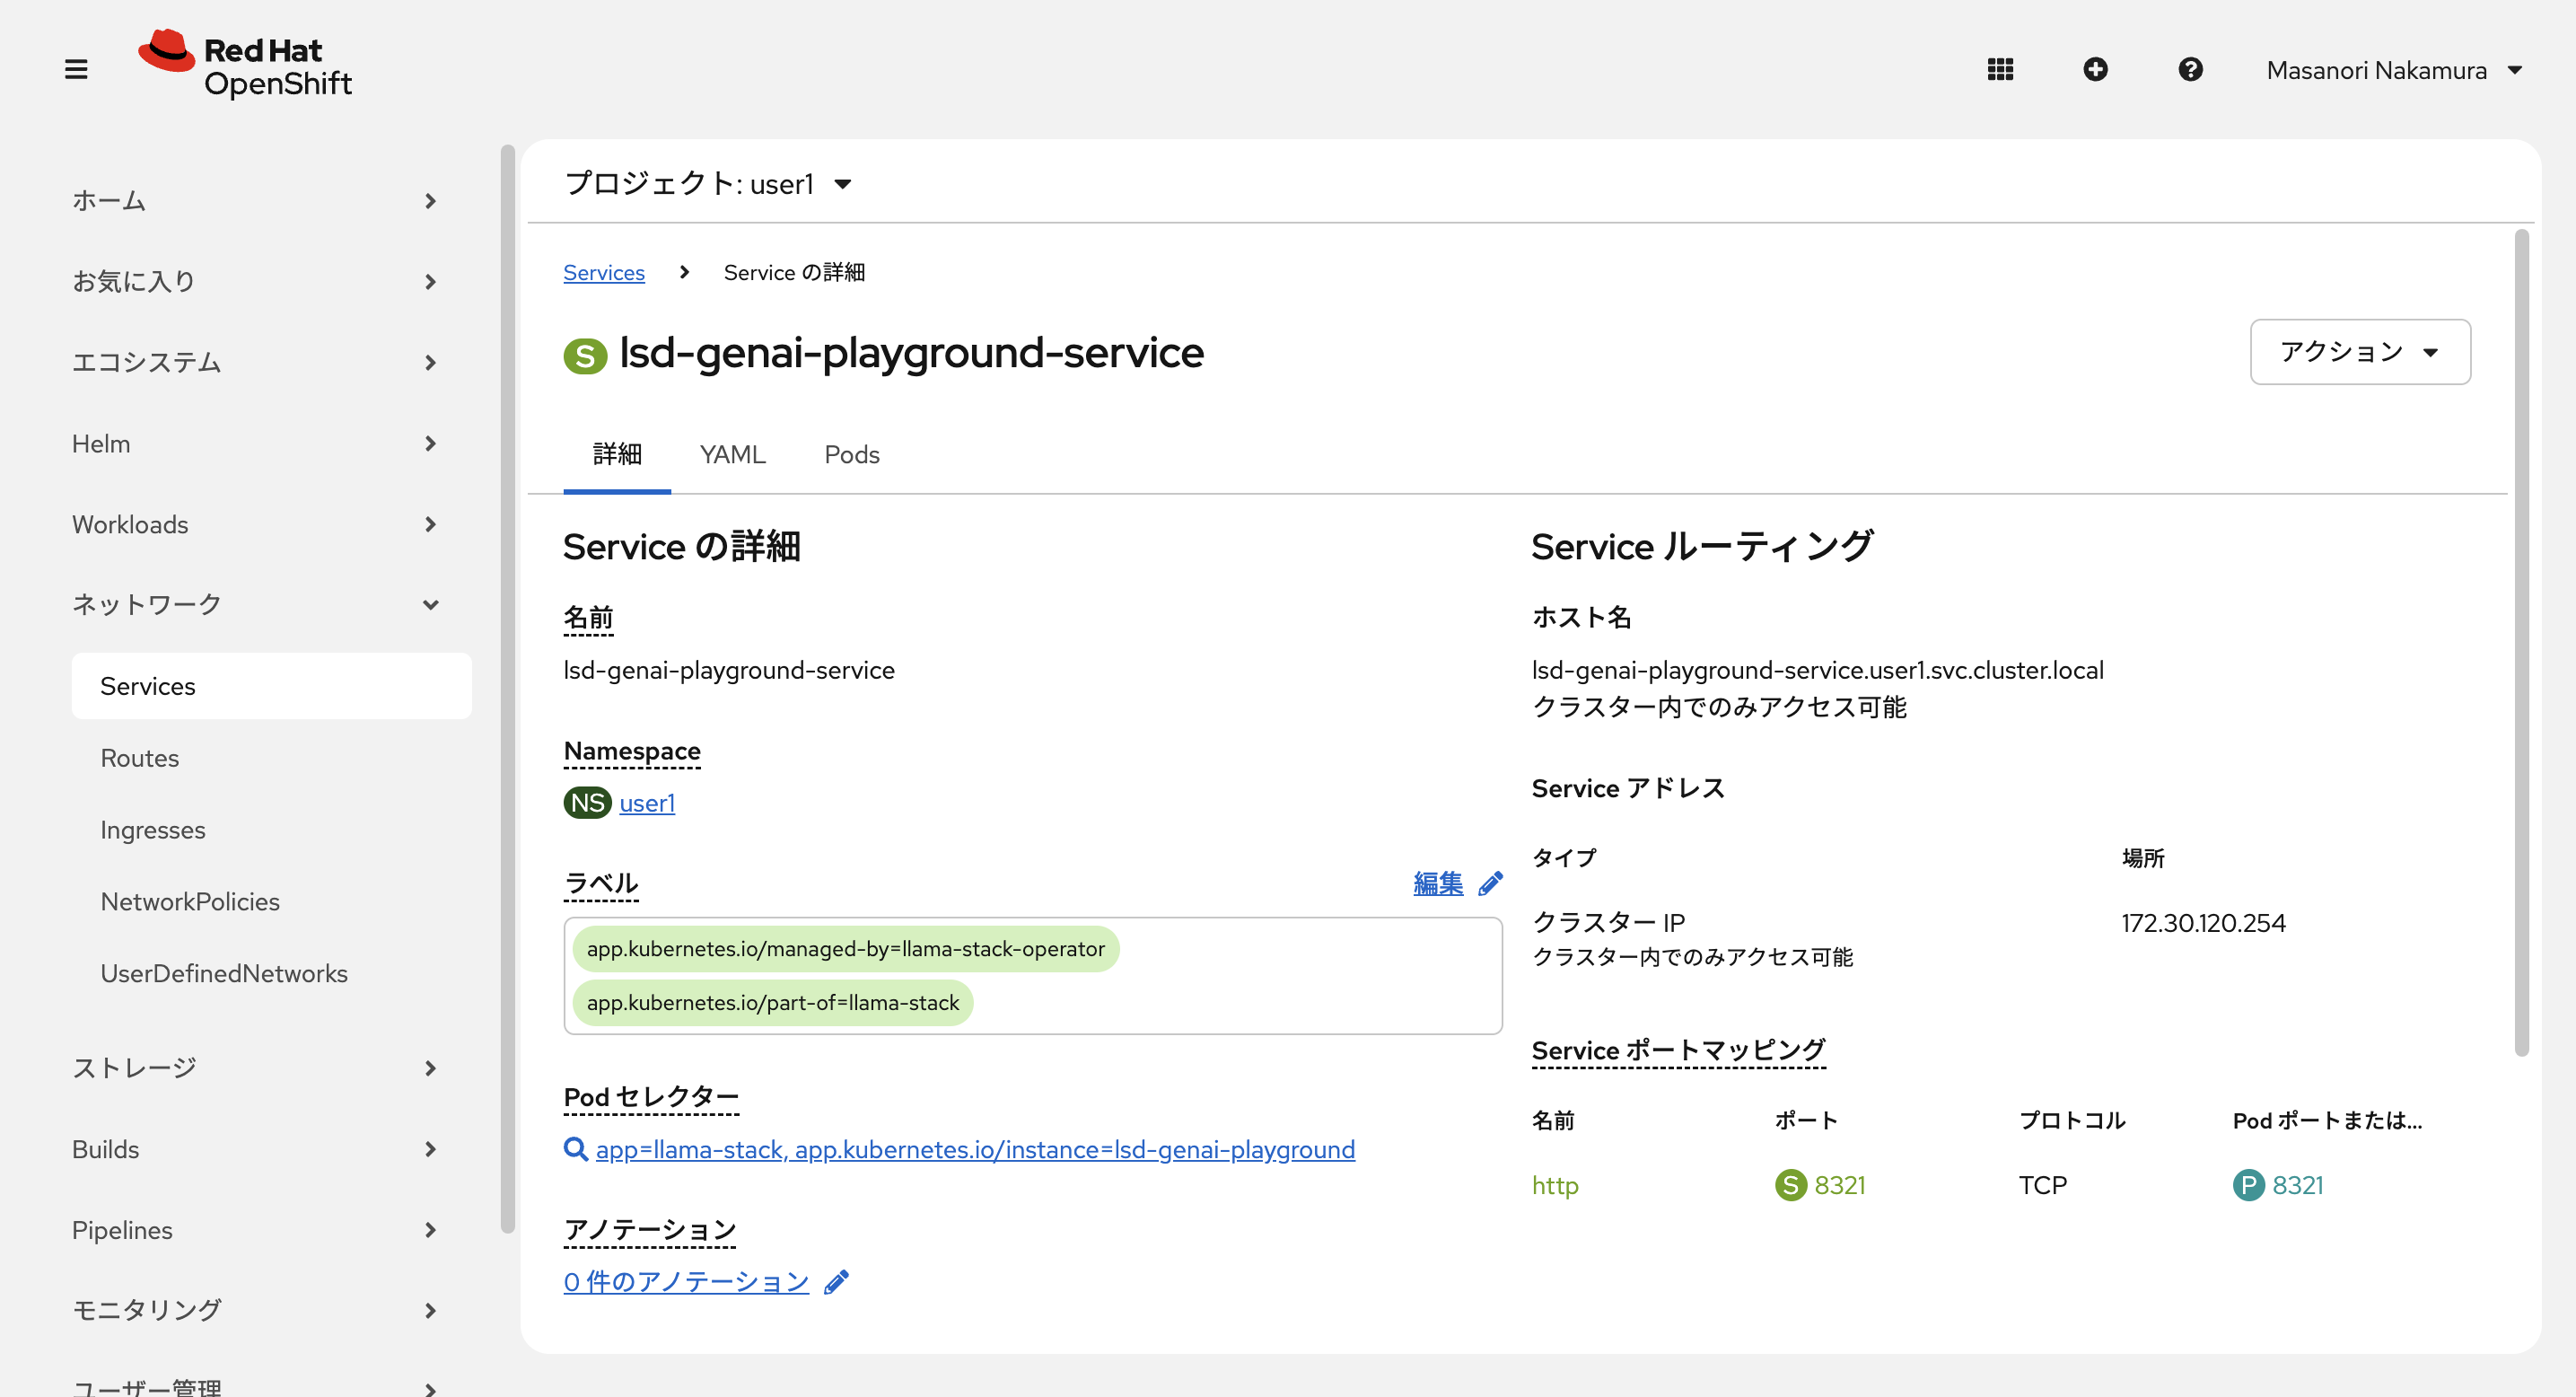
このサービス名もしくはホスト名をどこかに保存しておいてください。
または、lsd-genai-playground という名前の LlamaStackDistribution (LSD) というリソースに設定が保存されているのでそちらから Service URLが確認できます。
左のメニューの ホーム > 検索 で検索できます。
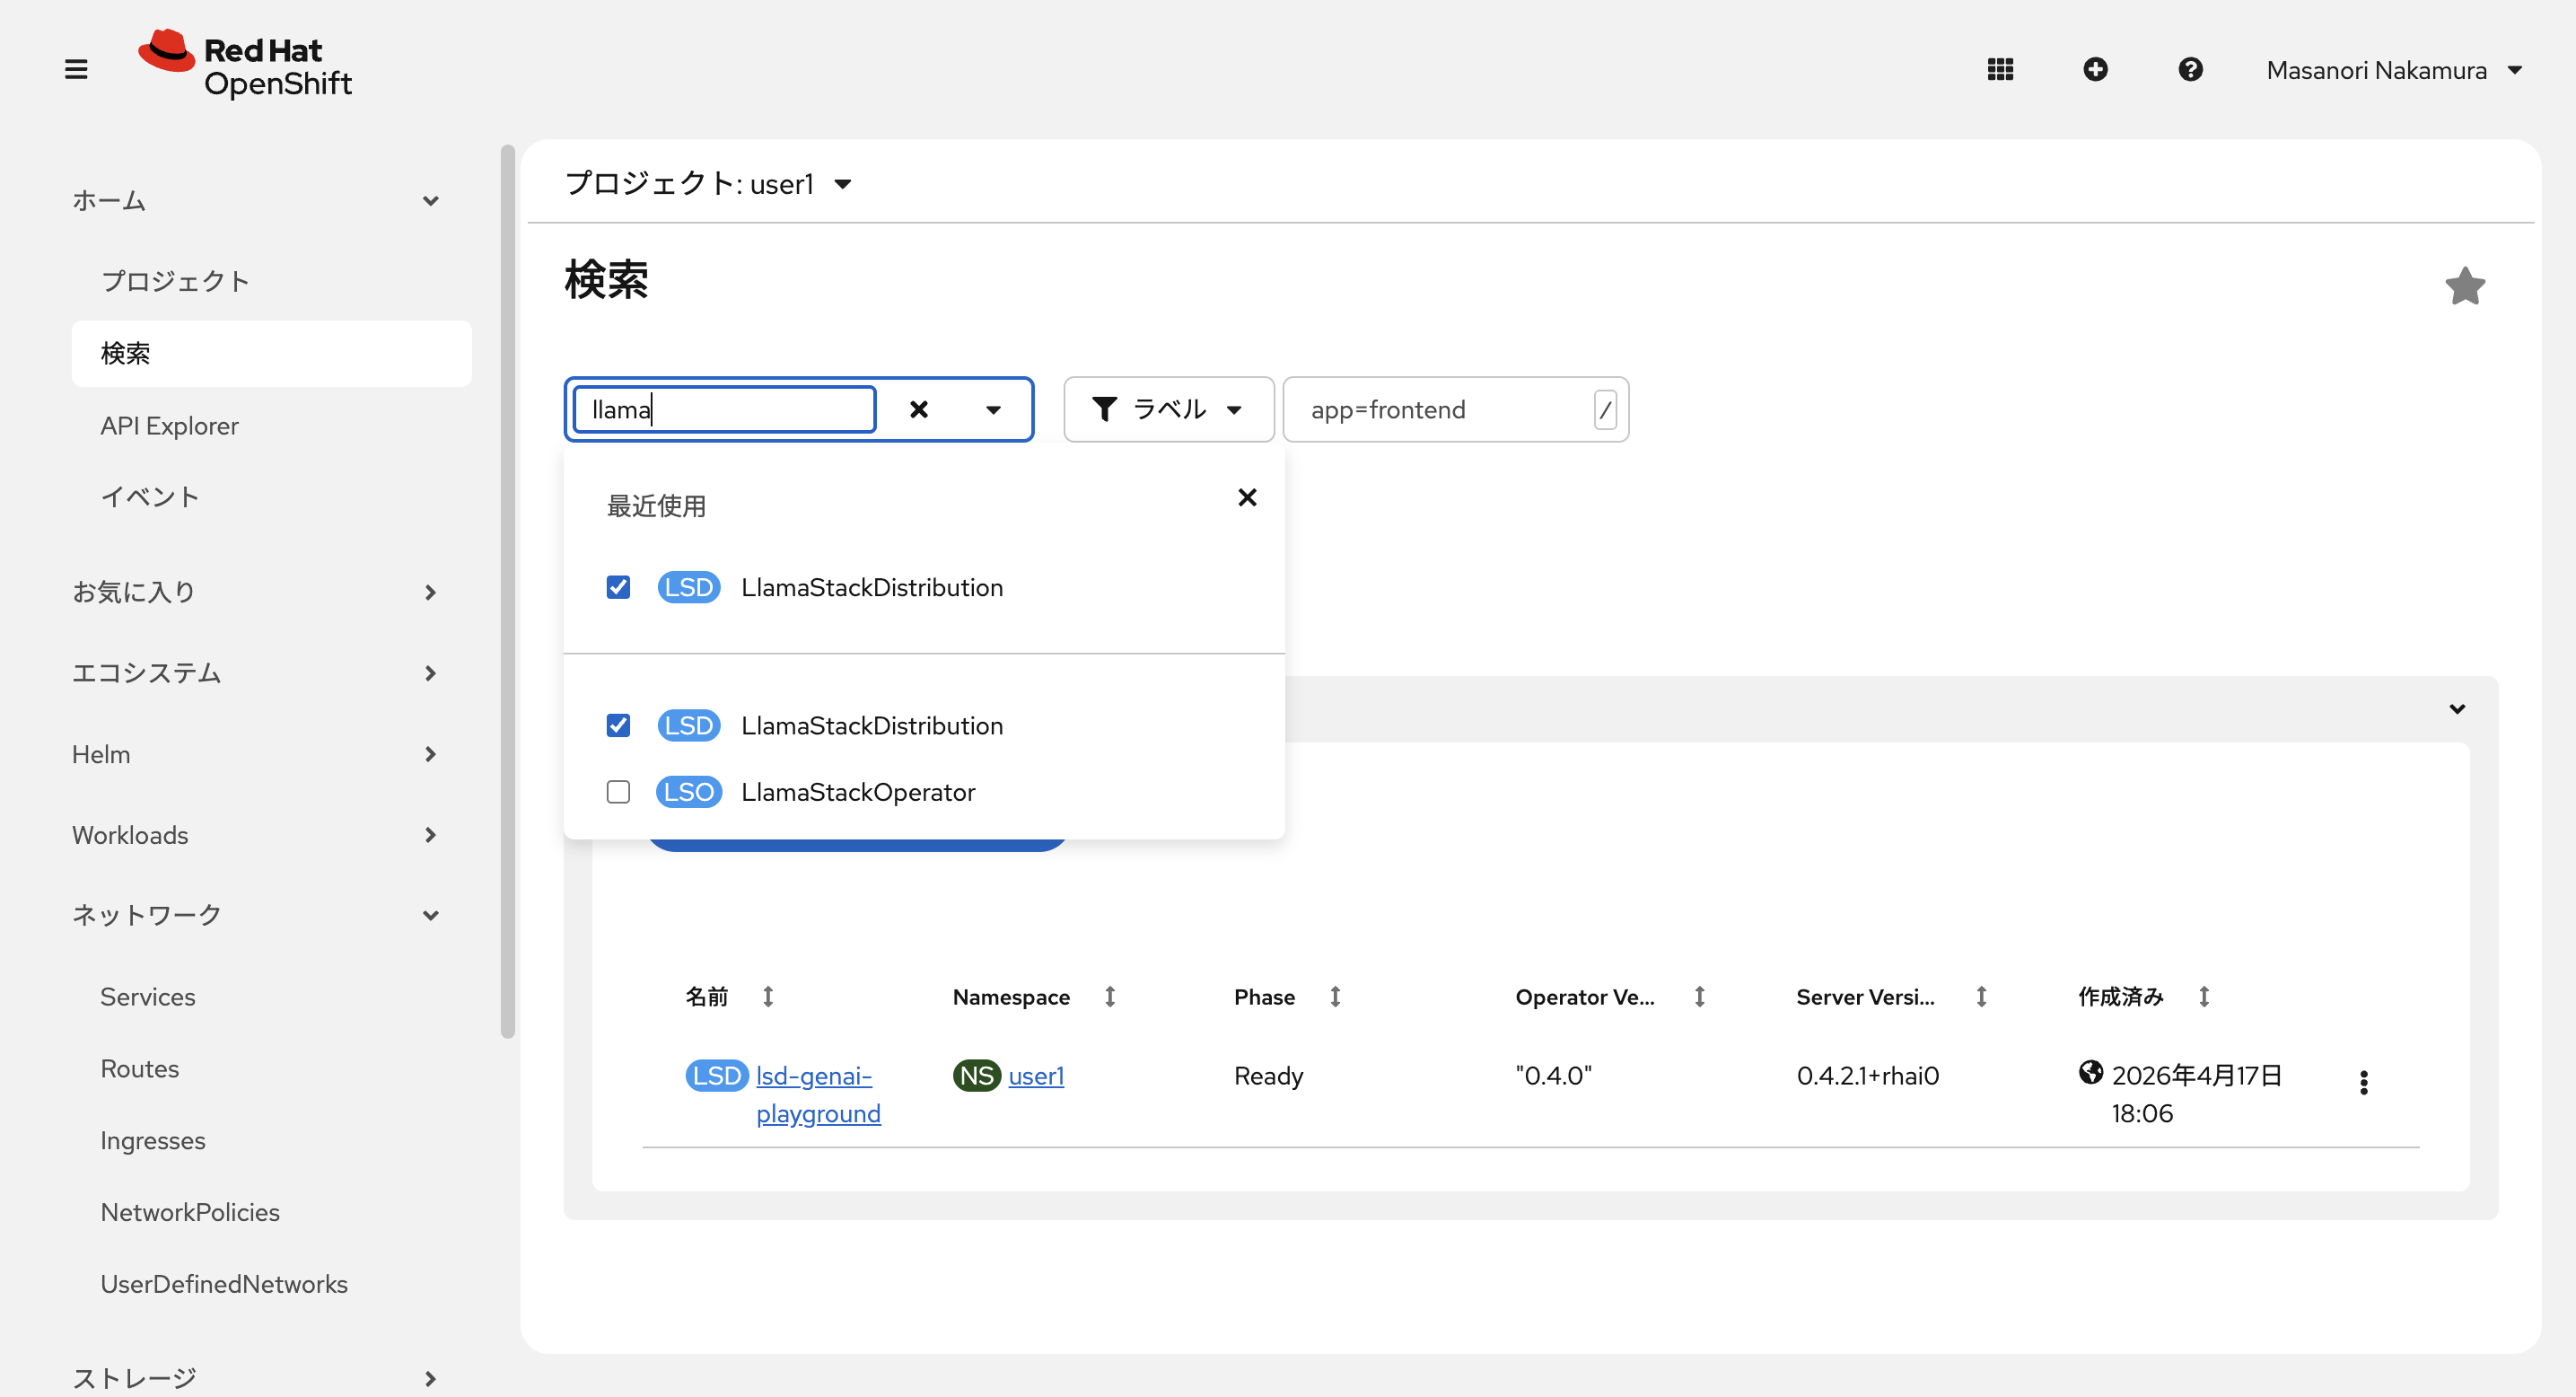
LlamaStackDistribution の詳細:
-
Playground を作成すると、同時に NeworkPolicyが作成され、他のアプリケーションから llama stack server にアクセスできないので、それを上書きする NetworkPolicyを作成します。
左のメニューの ネットワーク > NetworkPolocies からプロジェクトをハンズオンの最初で作成した自分のプロジェクト user<xx> に設定します。
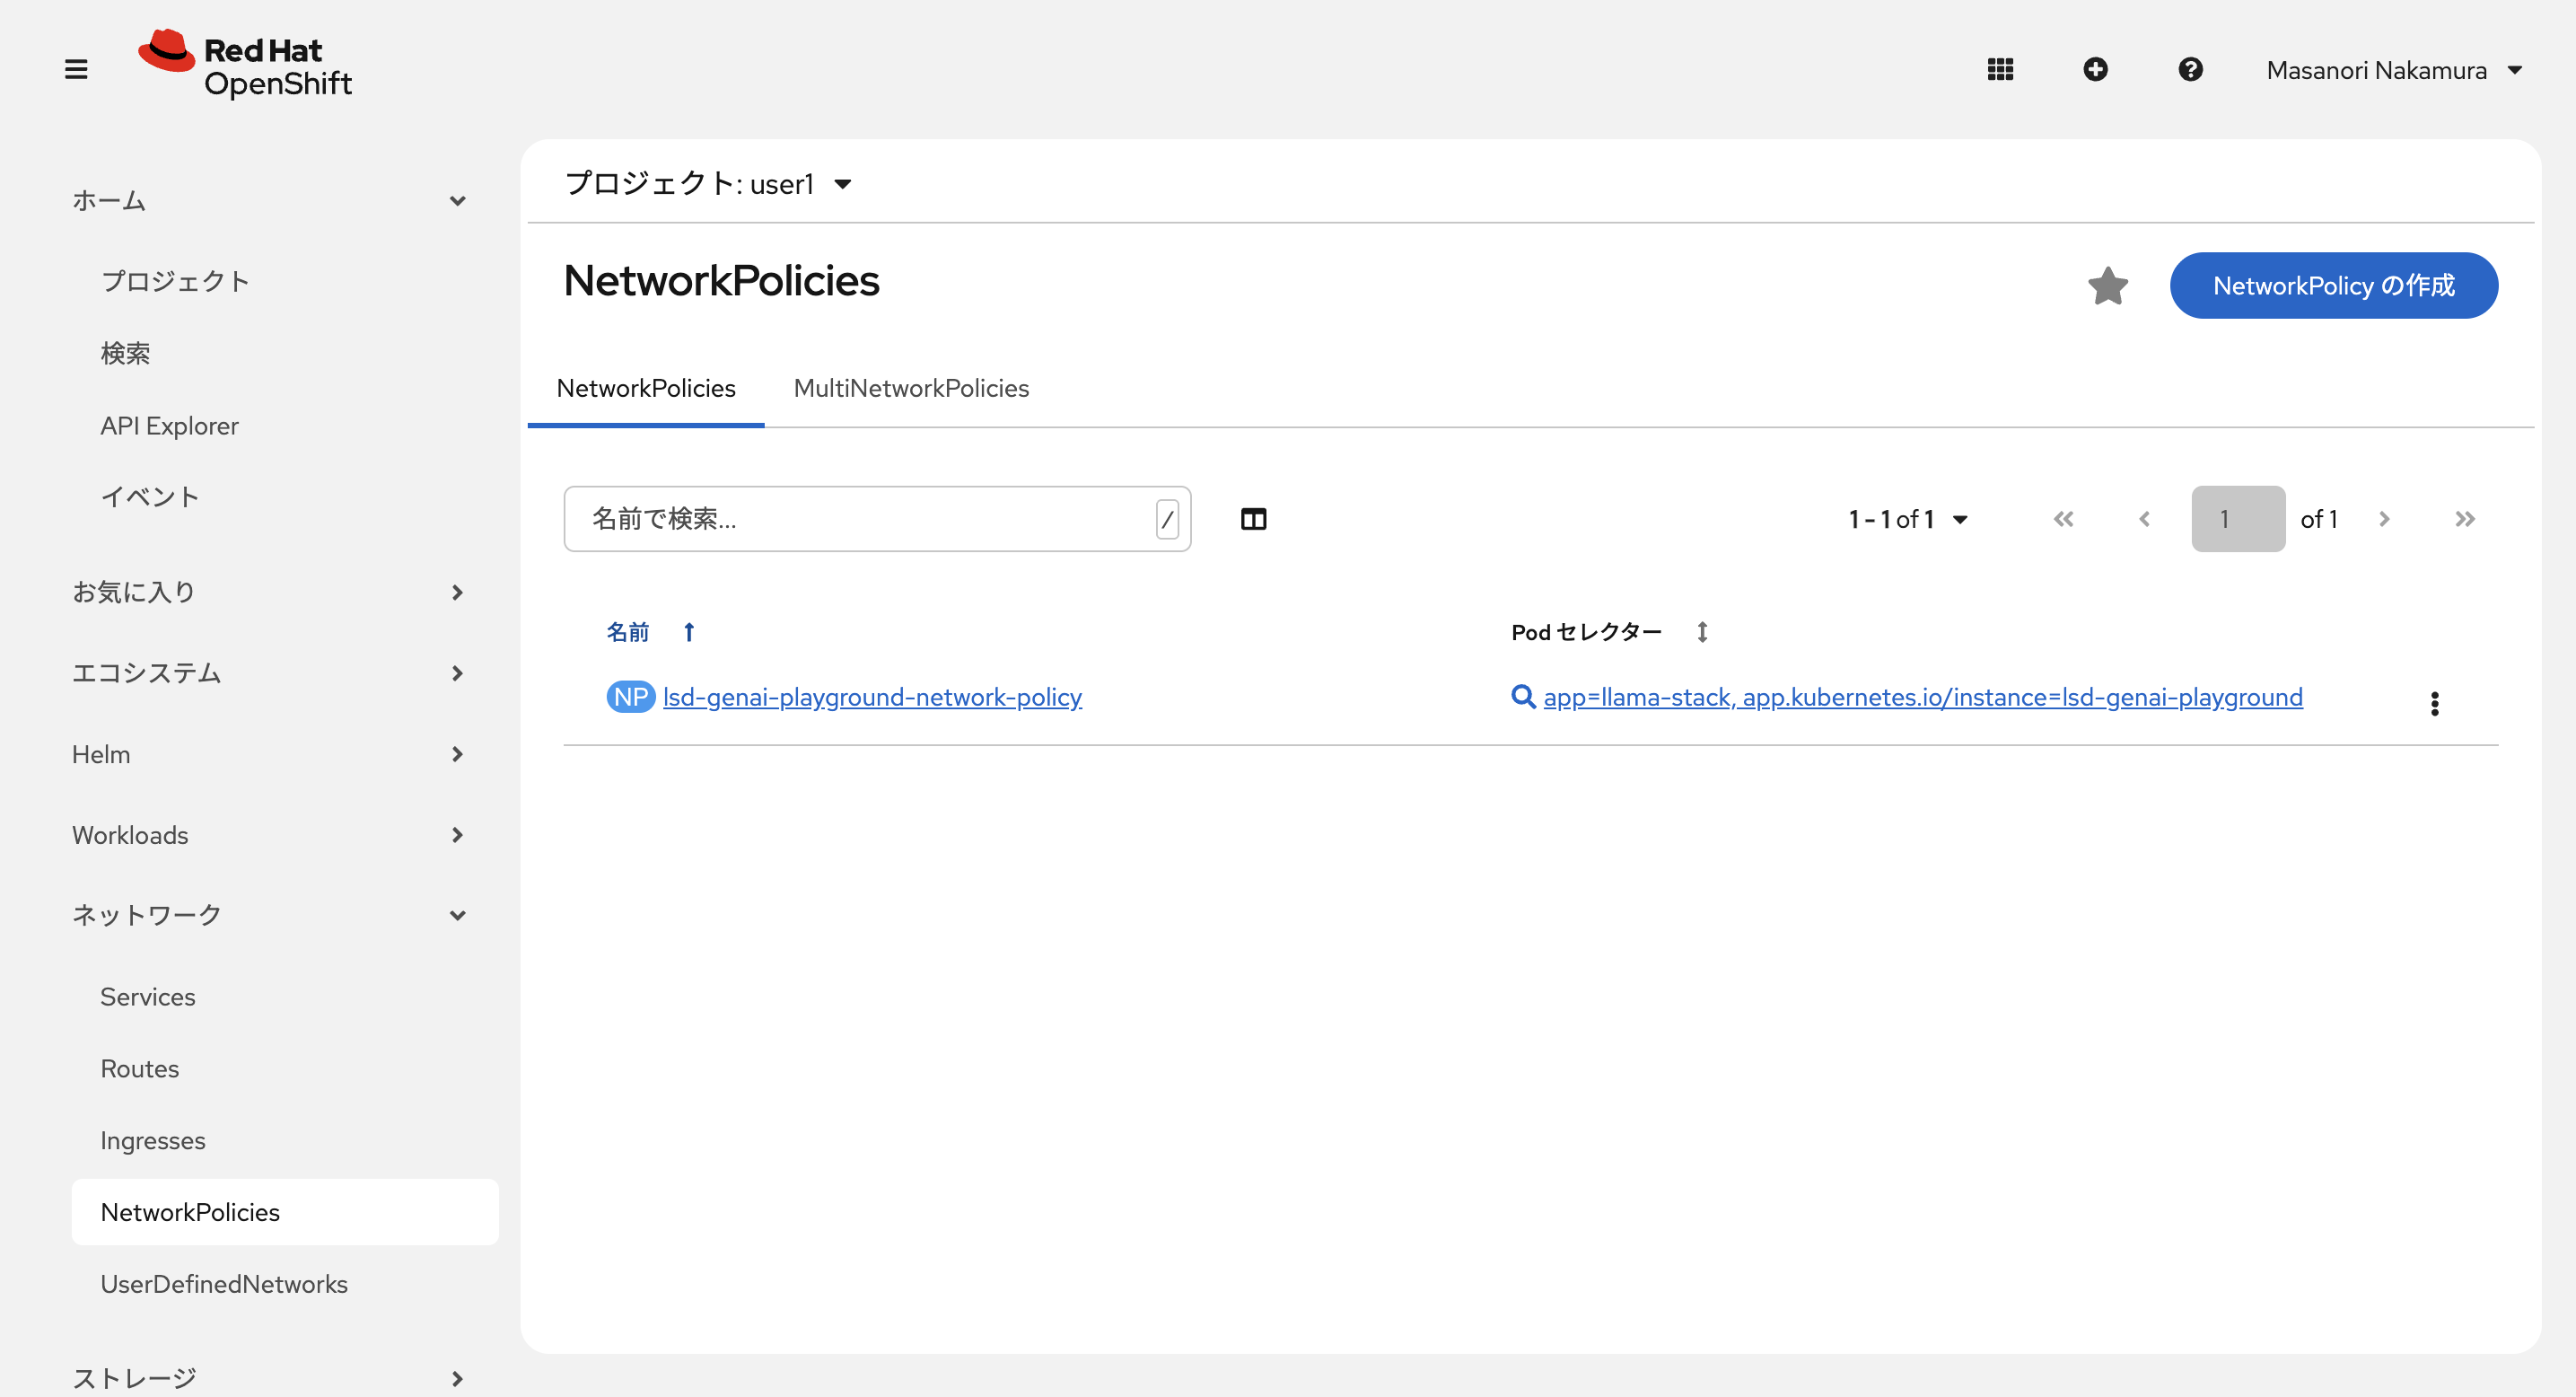
lsd-genai-playground-network-policy というのが Playground 作成時に自動で作られた Network Policy です。redhat-ods-applications という Namespaceからか、同じ Namespaceの llama-stack というアプリケーションからしかアクセスできなくなっています。

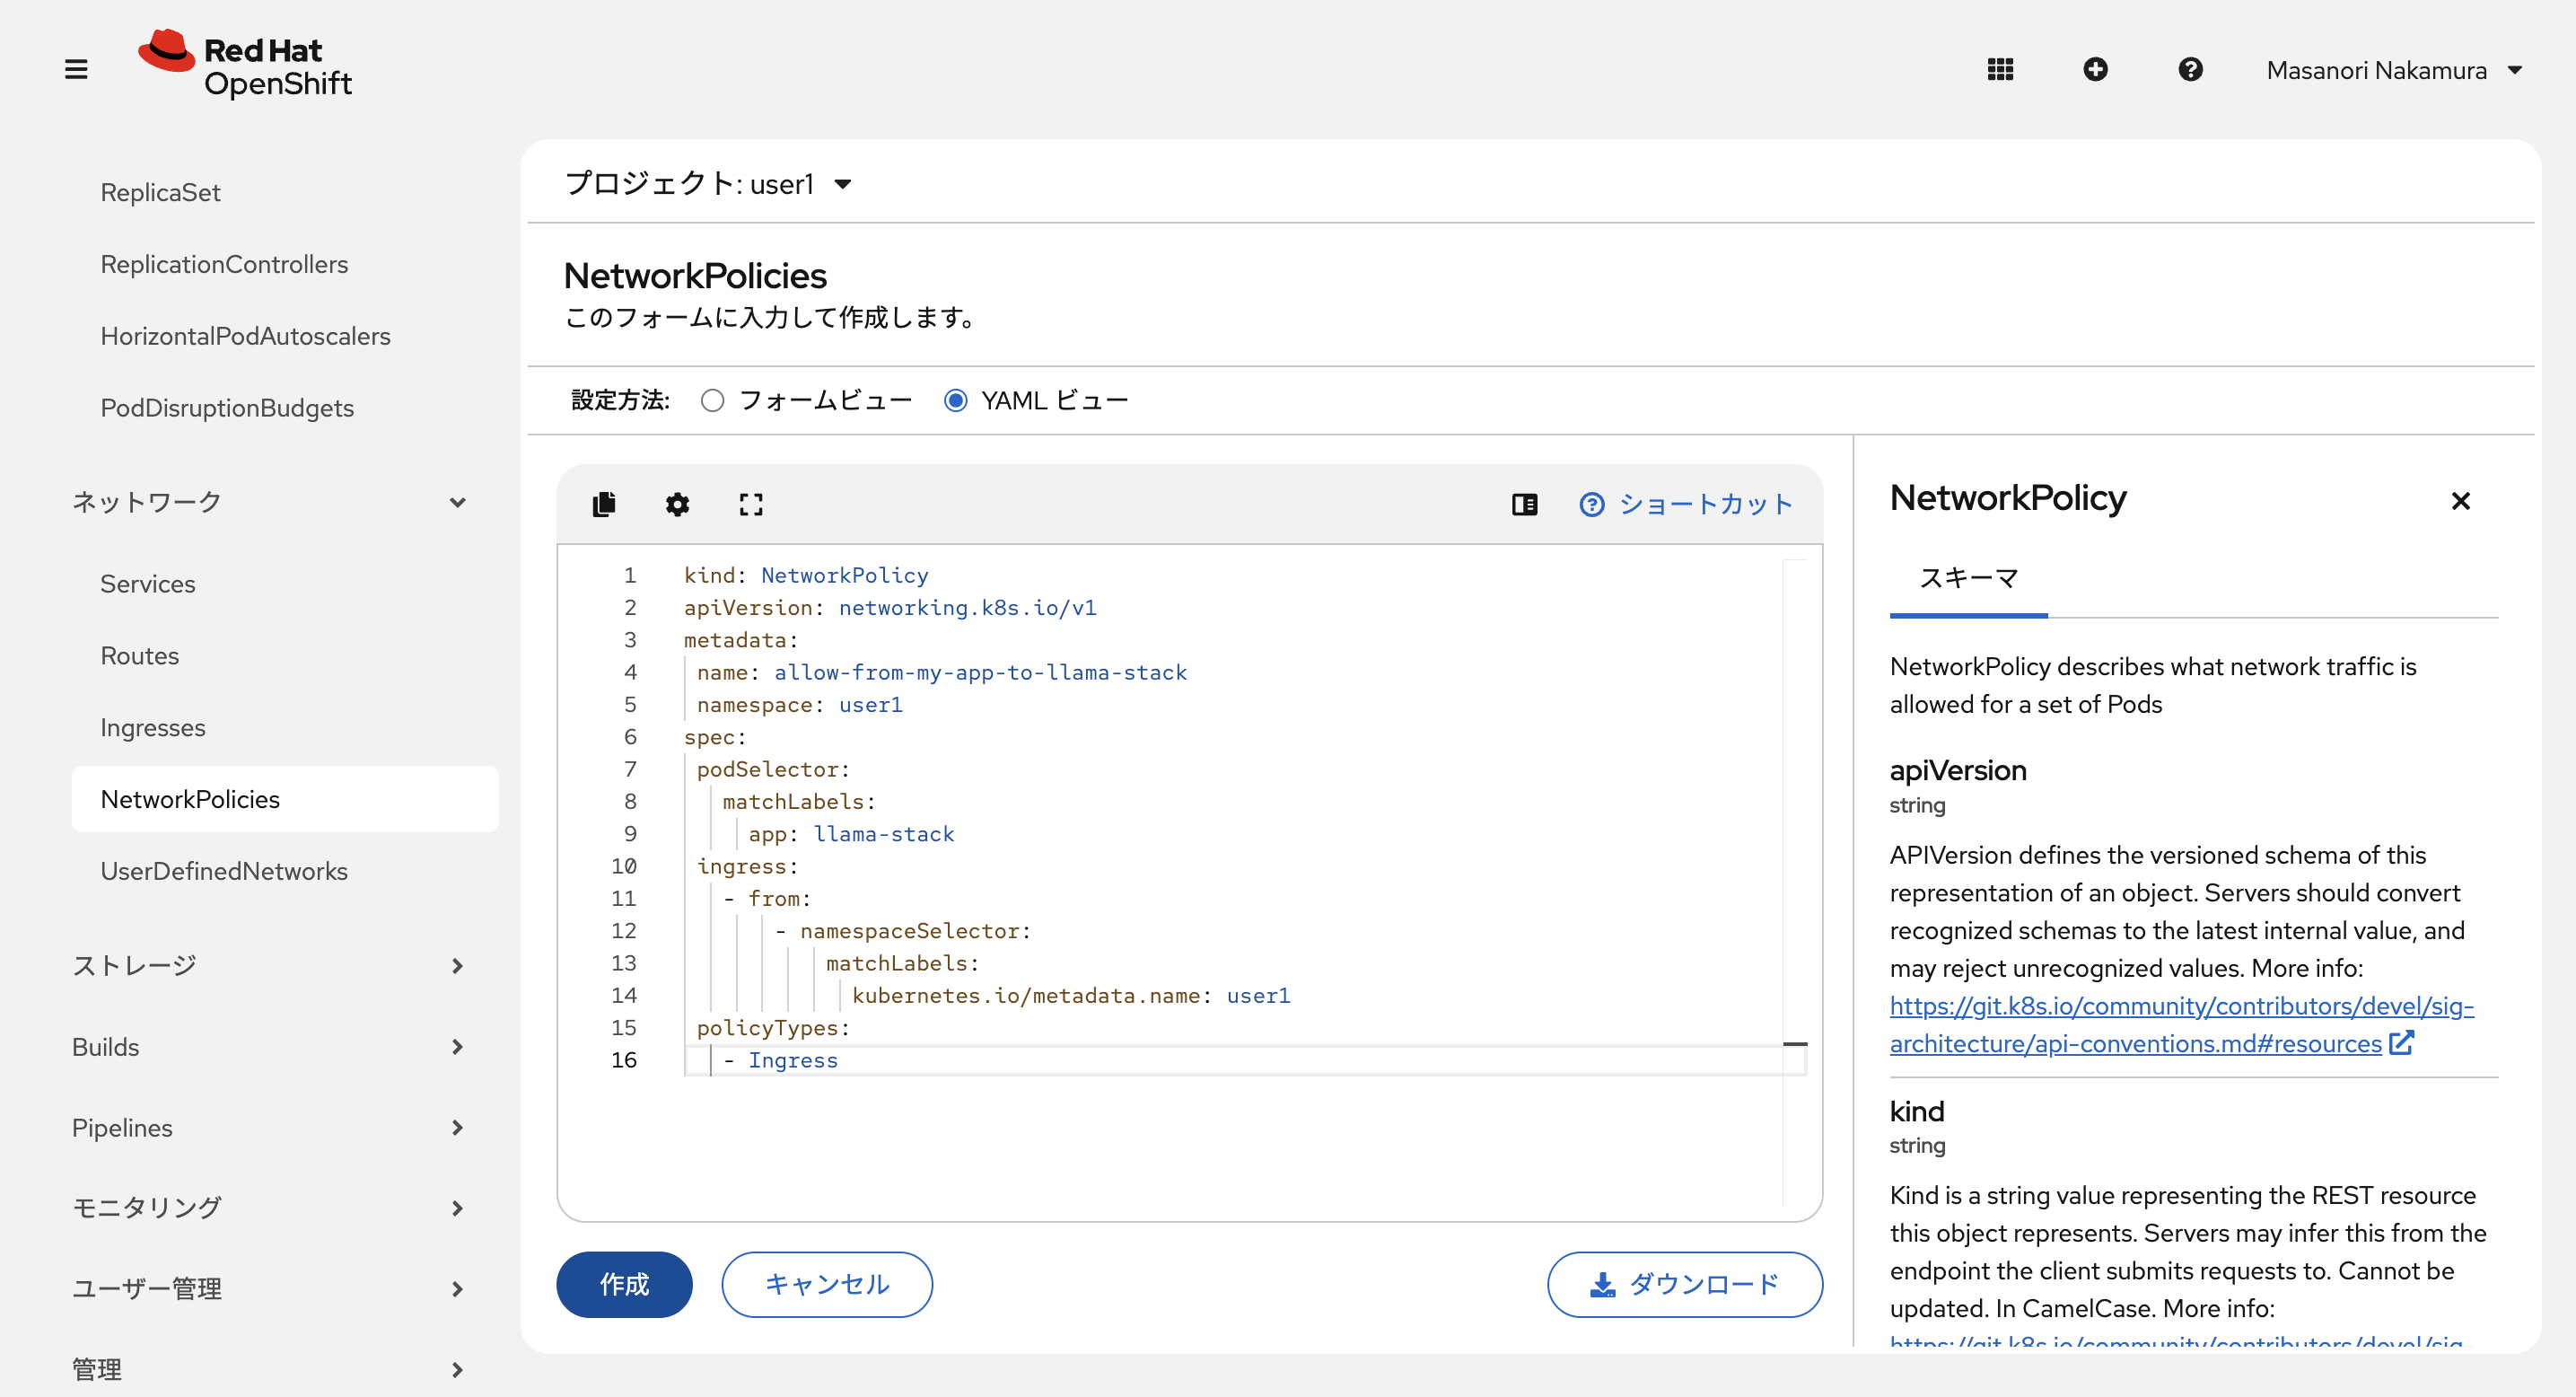
NetworkPoicy の作成 を選択して、YAML ビューに切り替え、以下を入力して、作成 を選択します。
kind: NetworkPolicy
apiVersion: networking.k8s.io/v1
metadata:
 name: allow-from-my-app-to-llama-stack
 namespace: user1
spec:
 podSelector:
   matchLabels:
     app: llama-stack
 ingress:
   - from:
       - namespaceSelector:
           matchLabels:
             kubernetes.io/metadata.name: user1
 policyTypes:
   - Ingress